
Add videos, images, audio and notes to tasks
Attach a video, up to three images, an audio note or written notes to any QuickCoach task. Steps for each medium, plus fixes for videos that won't embed.

A task name on its own rarely tells the whole story. QuickCoach lets you attach four kinds of media to a task: a video, images, an audio note and written notes. You reach all of them through the task's notes window, whether you're building a task in your Task Library or working inside a client's plan.
The four media types behave differently, and the differences matter when you want to reuse work.
| Medium | Saves to your library? | Plan-specific? | Pro-only? |
|---|---|---|---|
| Video | Yes | No | No |
| Images (up to 3) | Yes | No | Yes |
| Audio note | Only if you record it in the Task Library, and it isn't copied into plans | Yes, when you record it on a plan | Yes (older Free accounts keep it) |
| Written notes | Yes | No | No |
Link a video to a task
You can connect a video to any task. Once added, the video embeds and plays directly for your client in their browser, on phone or computer.
Watch the video walkthrough (0:58).
Note: QuickCoach's features and screen layouts may change over time, but the core workflow stays the same.
Step 1: Get your video link
QuickCoach doesn't host videos. Pick any video on the web, or upload your own to YouTube or Vimeo first, then copy its link. The video must be listed as either public or unlisted. Both YouTube and Vimeo have short guides on getting a video link.
Step 2: Open the task's video field
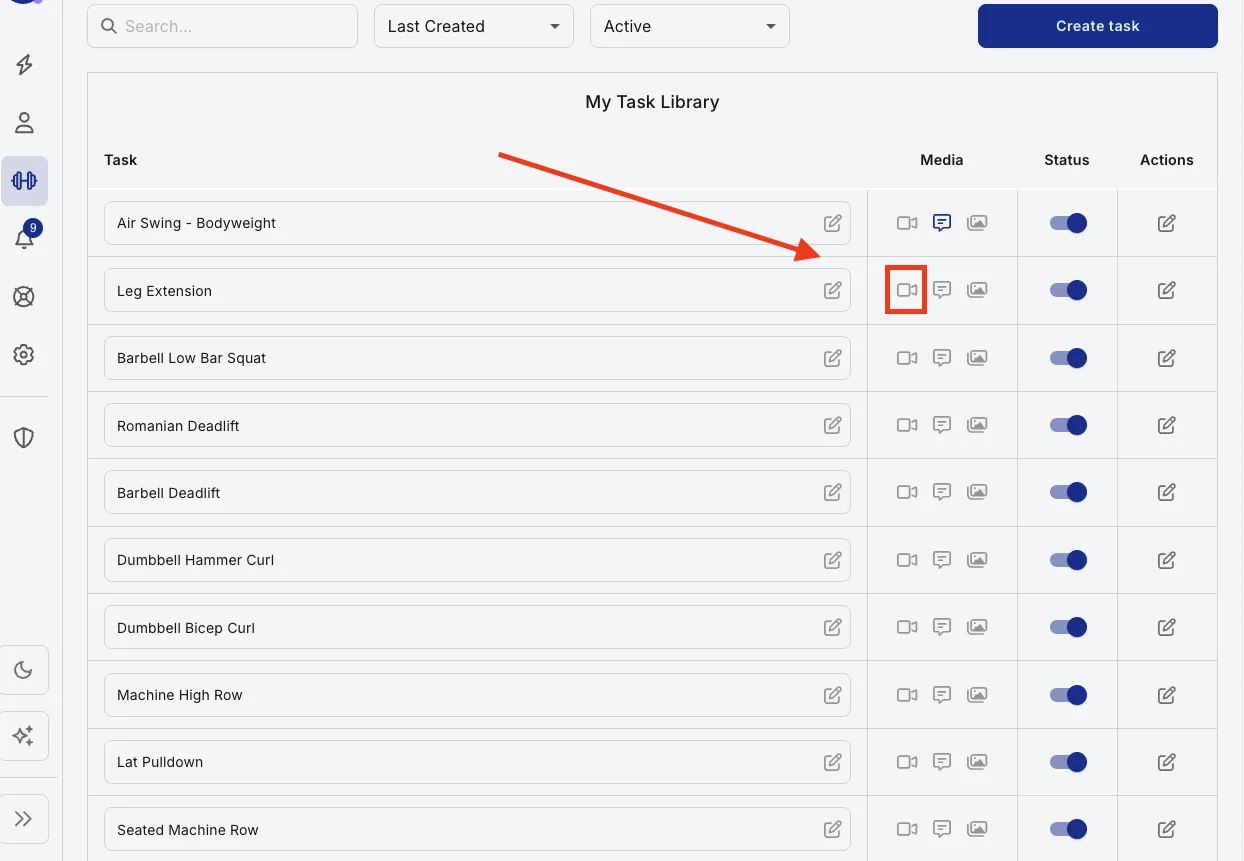
Click the video icon beside the task. The notes window opens.
Step 3: Paste your link and update
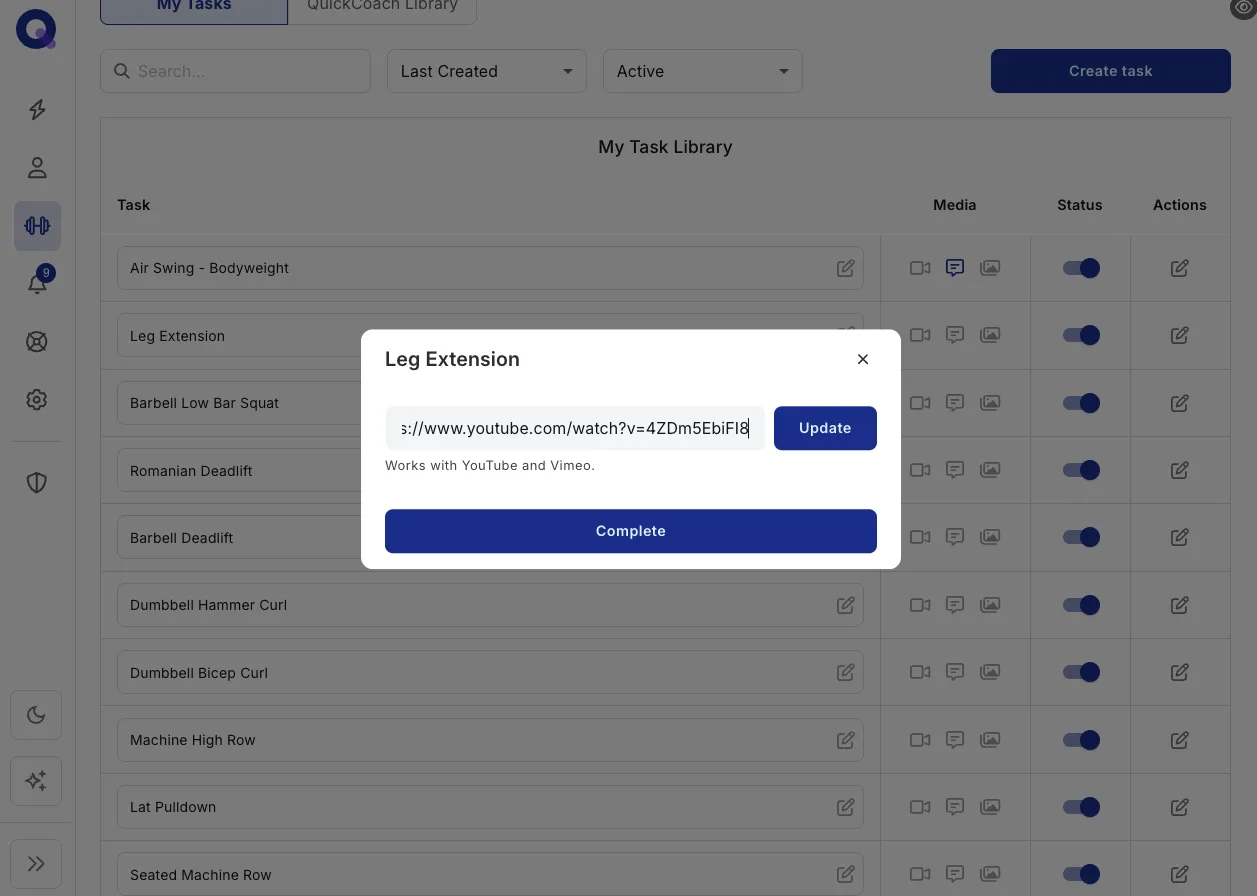
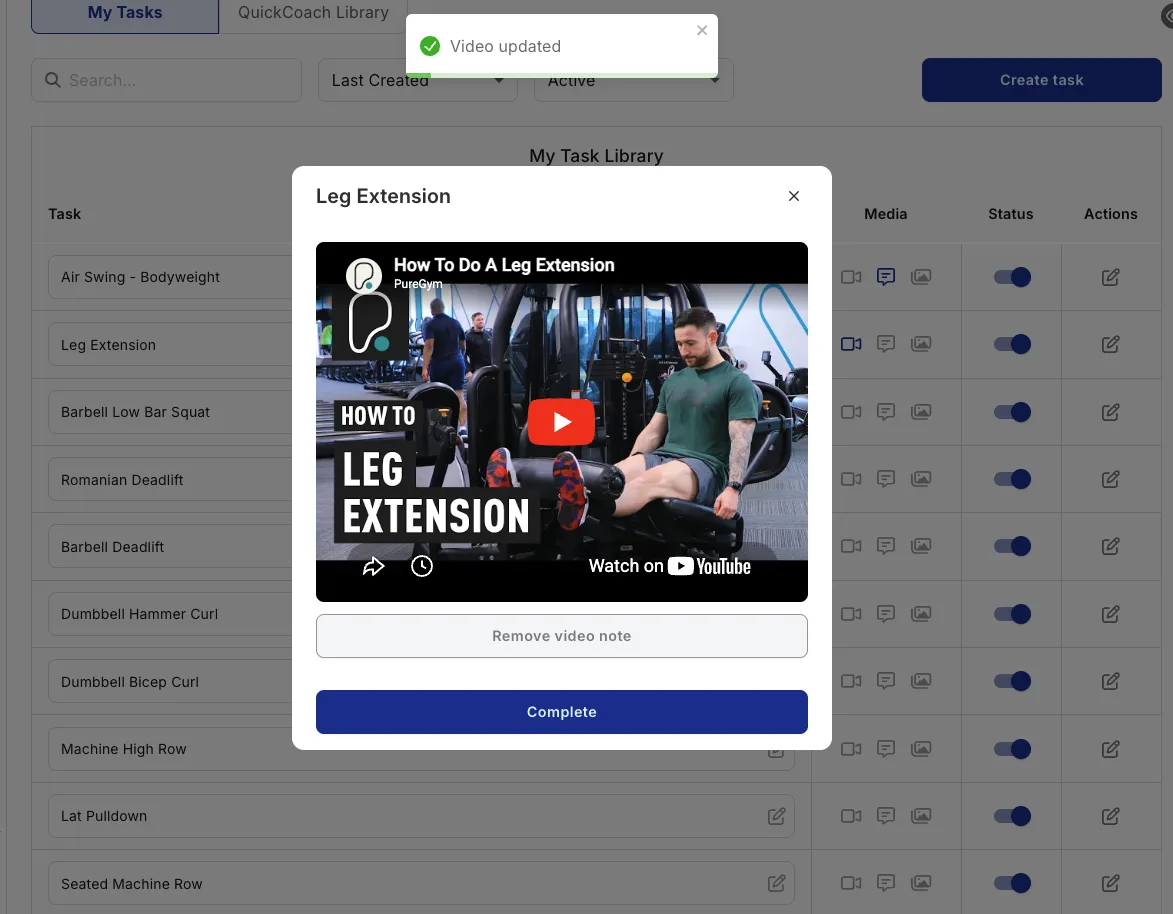
Paste the link into the video field and click Update. If it's formatted correctly, a preview appears. Add a written note (or, on Pro, an audio note) if you like, then click Complete.
A video icon now appears beside the task name. When clients open their plan, they'll see the video is available and it plays right in their browser.
Common YouTube problems
If a video won't embed, it's usually one of three things:
- The video is private. Only public and unlisted videos embed.
- You copied a playlist link. If every video shows as the same one, remove
&list=or&playlist=and everything after it from the URL. - It's a YouTube Short. Shorts don't embed with their usual URL. Replace
shortswithwatchin the link.
Note: you're free to link any public YouTube video to a task, whether it's yours or someone else's. Embedding a public video this way doesn't raise copyright issues.
Add images to a task (Pro)
On the Pro plan you can add up to three images to any task. It's a clean way to demonstrate an exercise, share a recipe, or add a bit of motivation. Images attach to the task in your library, so they travel with it. Not on Pro yet? See what Pro includes.
Watch the video walkthrough (1:09).
You can do this while creating a new task or by editing an existing one. Open the task's notes, then:
- Switch to the Images tab (it carries a Pro badge).
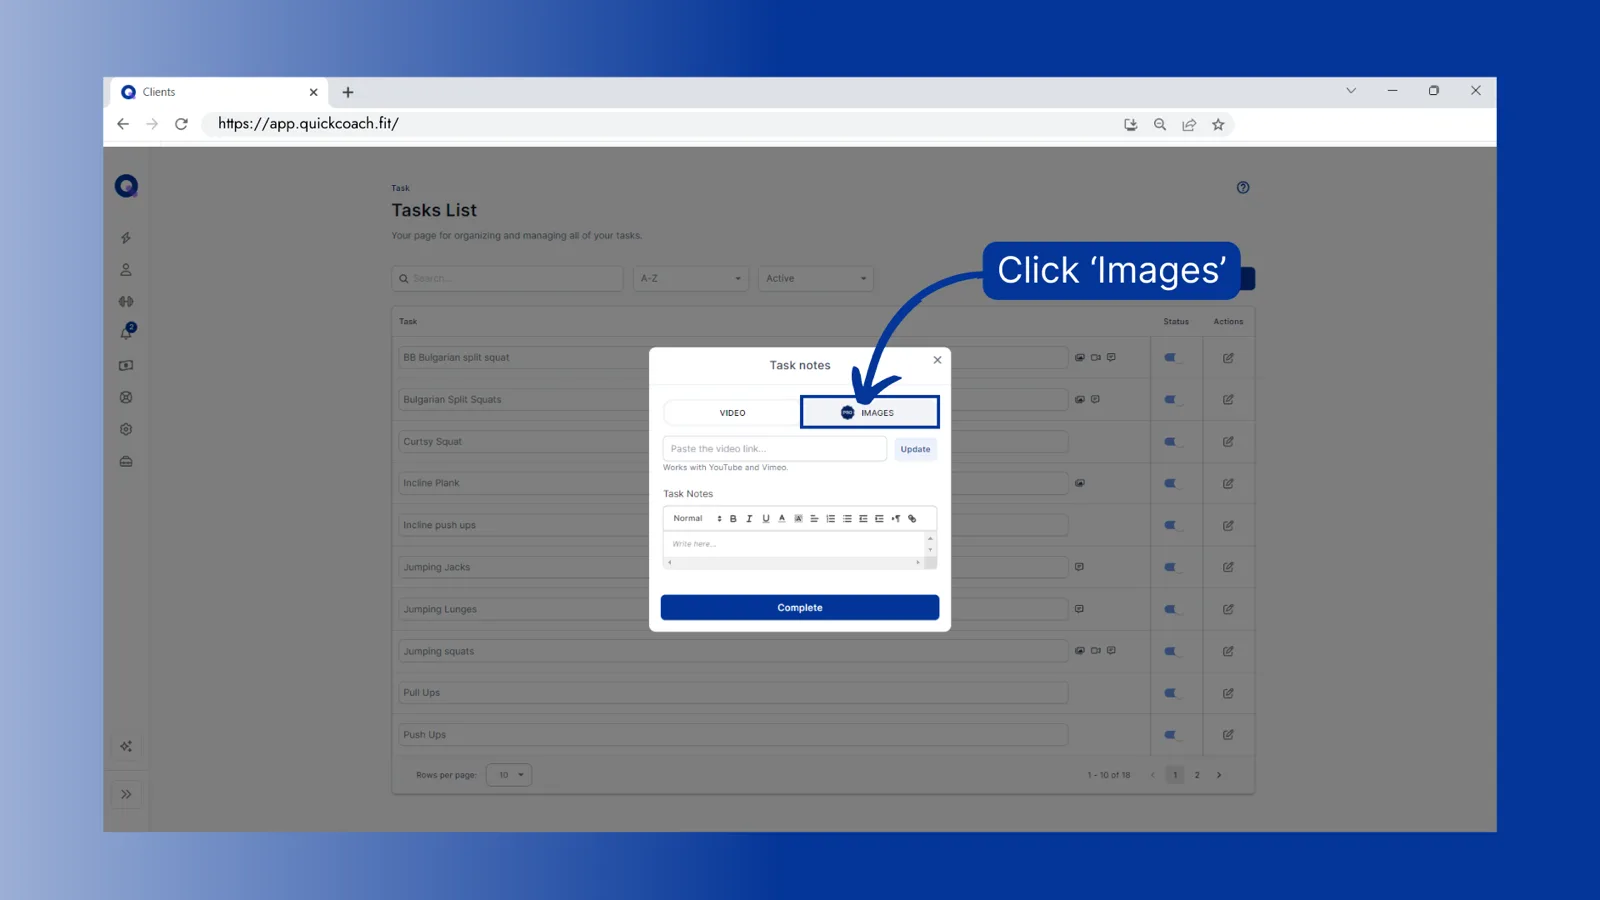
- Click Add Image.
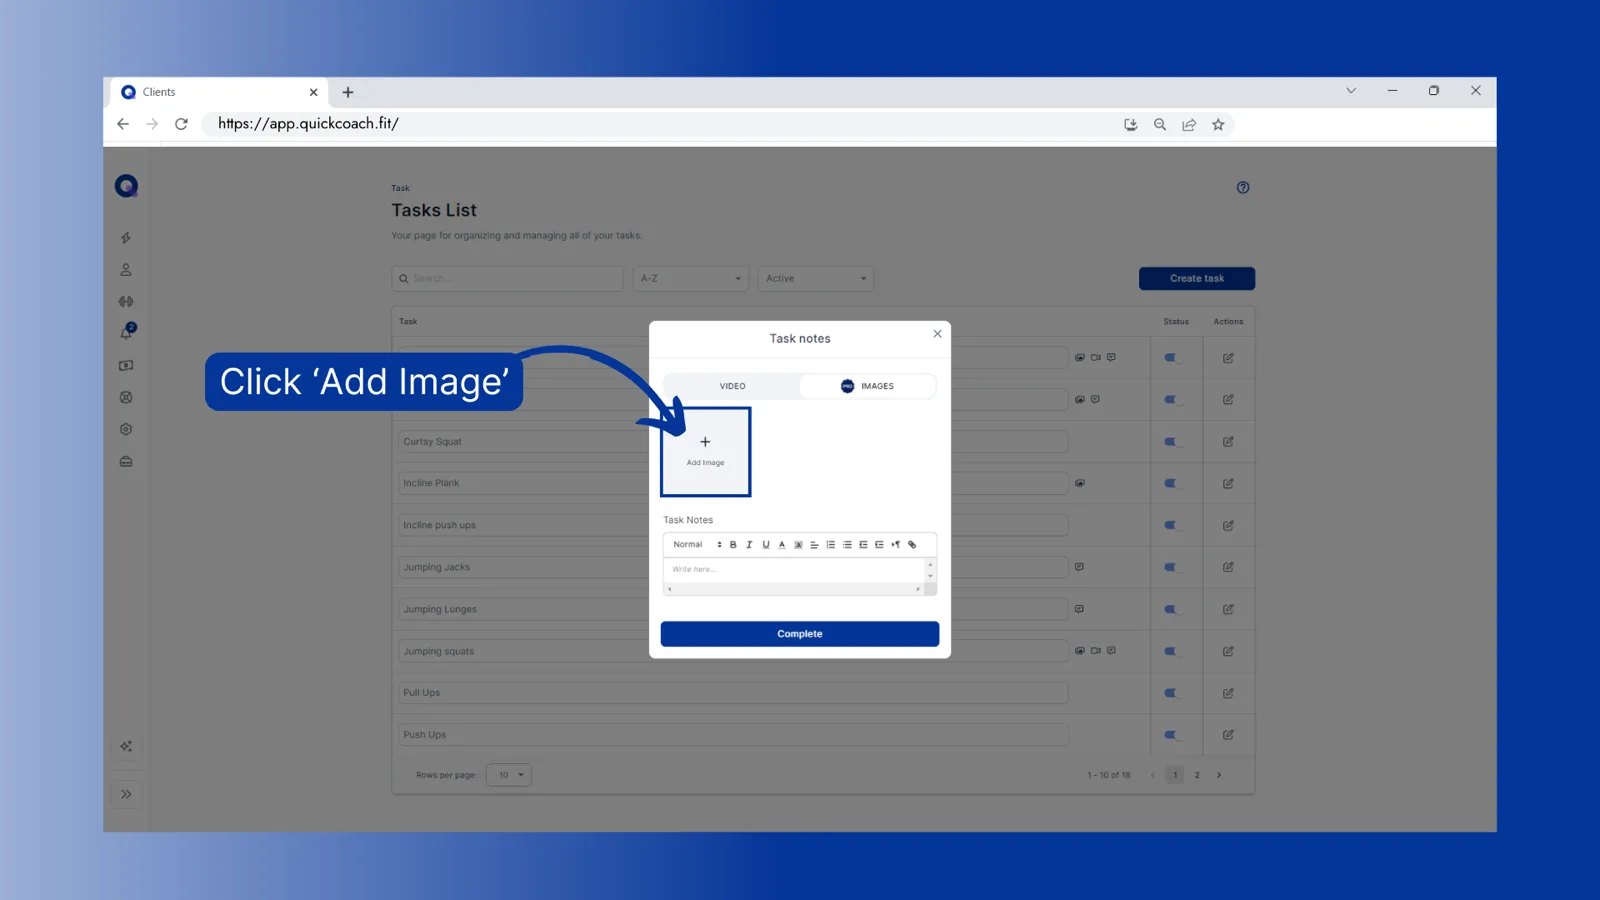
- Browse your device and select up to three images, then open them.
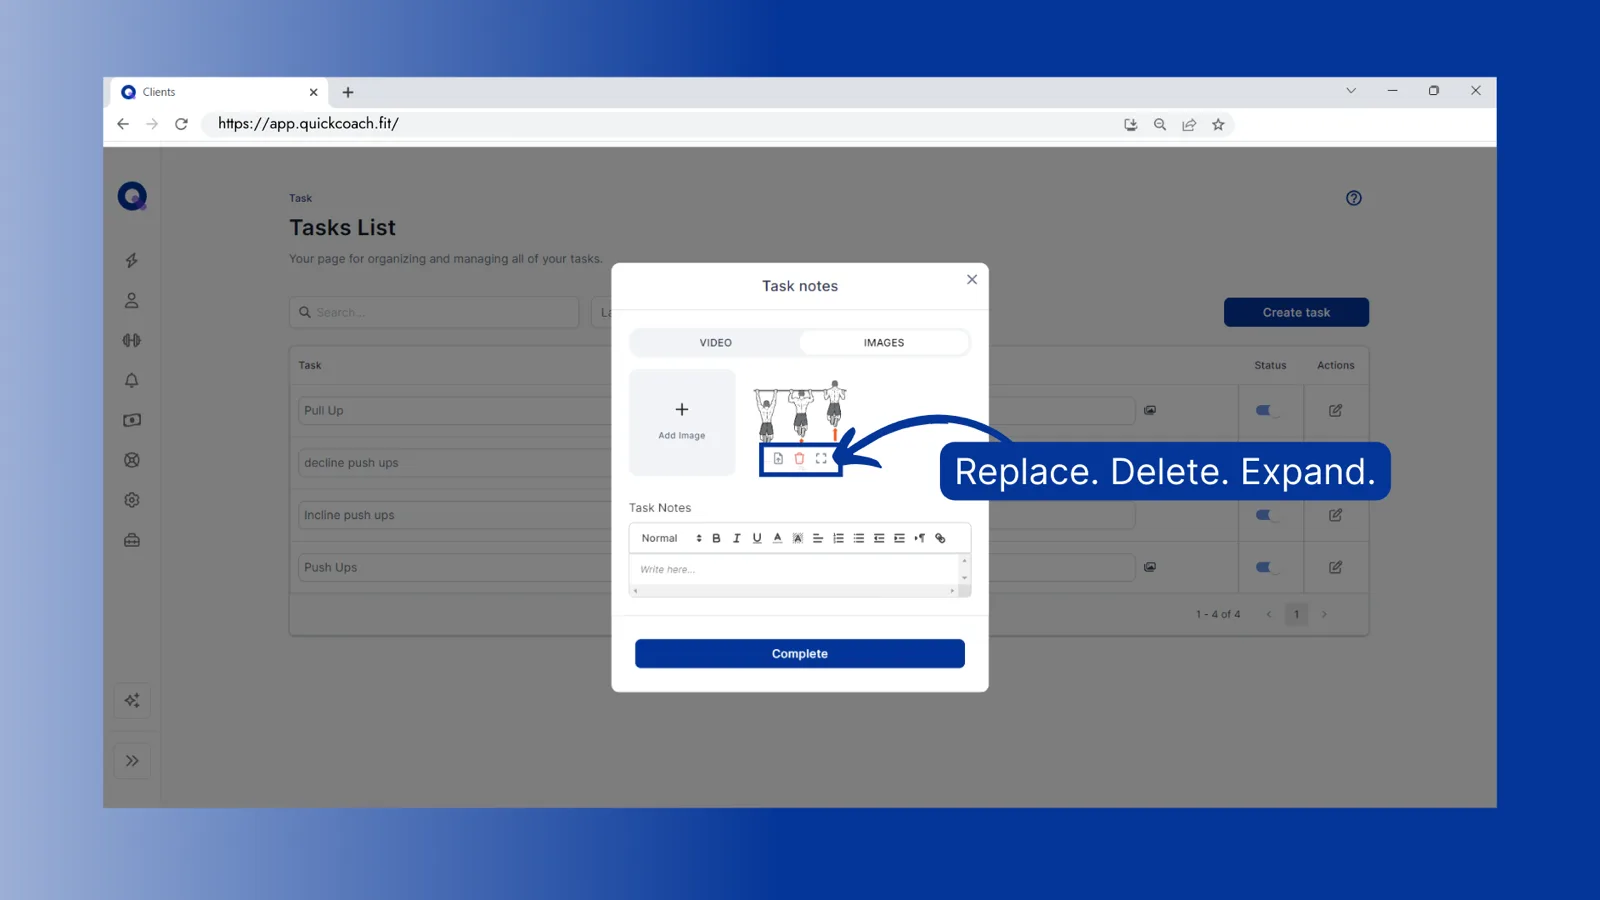
- Each image gets three icons beneath it to replace, delete or expand it. When you're happy, click Complete.
Note: the steps are the same on mobile. Your screen may look a little different, but the tabs and buttons work the same way.
Record an audio note for a client (Pro)
On the Pro plan you can add an audio note to a task, a quick way to leave a personal message for a client, like a coaching cue in your own voice. Audio notes are locked on Free accounts created under the current Free plan rules (older Free accounts keep them); see what Pro includes. Each recording can run for up to 60 seconds.
Watch the video walkthrough (0:33).
There are two places to record one, and they behave differently:
- On a task in a plan. This is the note your client hears. It only exists on the one plan you record it for and never saves back to your Task Library.
- On a task in your Task Library. Open the task with its edit icon and use the 'Audio note' section; the note saves to the library task straight away. It stays with the library task, though. It isn't copied into plans when you add that task to one, so your clients don't hear it.
To send a client a voice note:
- In the plan builder, open the task's notes by clicking the notes icon on the task row.
- Click Record audio note and record your message. Click the button again to stop.
- Click Complete to save it to that plan.
Because a plan audio note lives on a single plan, record a fresh note each time you want to send one. For a note you plan to reuse, you have two options: add a written description instead (see below), or build a plan in your Program Templates with the audio note included and use that plan as a starting template.
Add written notes to a task
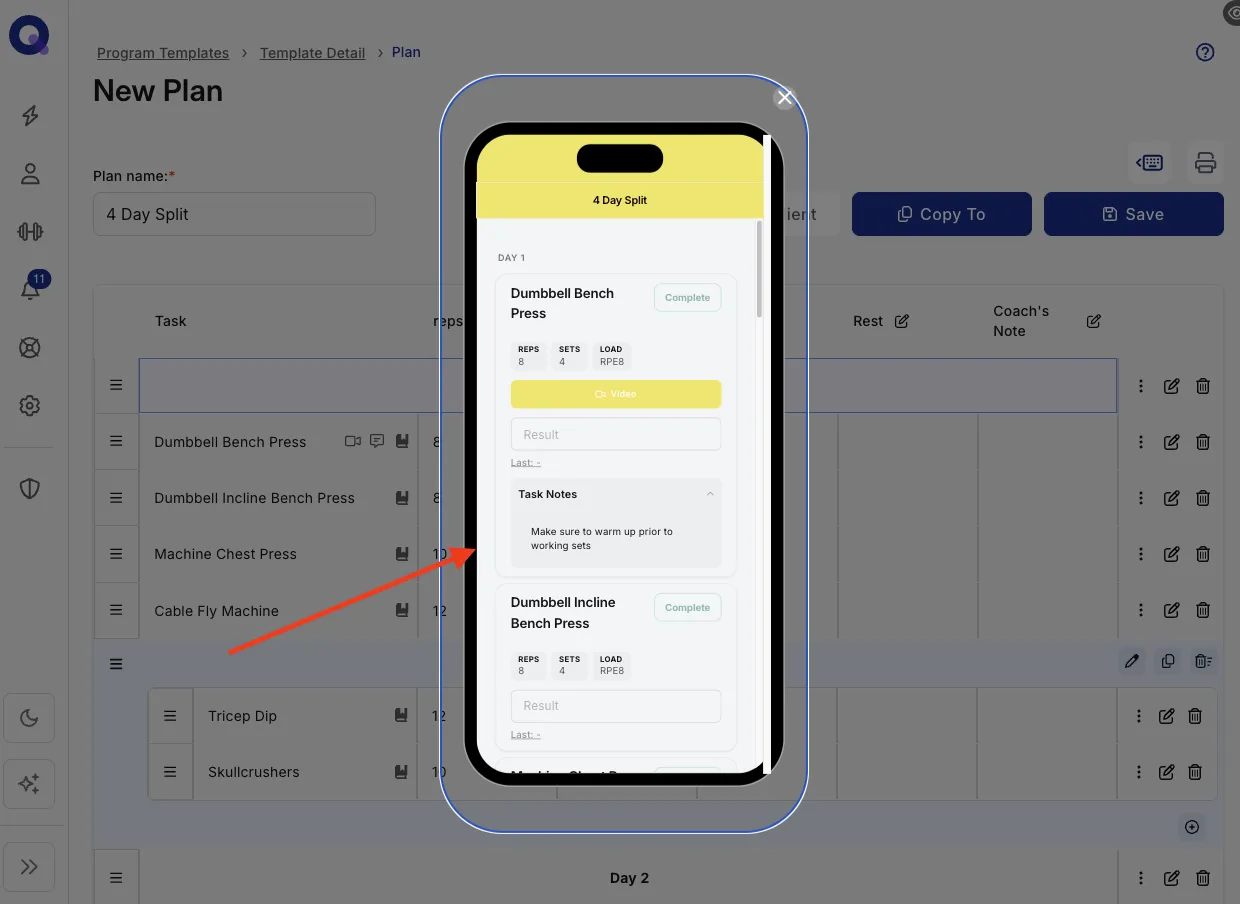
You can add written notes to any task. Use them for form cues, recipe instructions, lesson content, or anything else a client needs to read. Unlike audio, notes save to the task in your library, even when you write them in the plan builder, so you only write them once and they come along every time you use the task.
Watch the video walkthrough (0:40).
- In the plan builder, open the task's notes by clicking the notes icon on the task row.
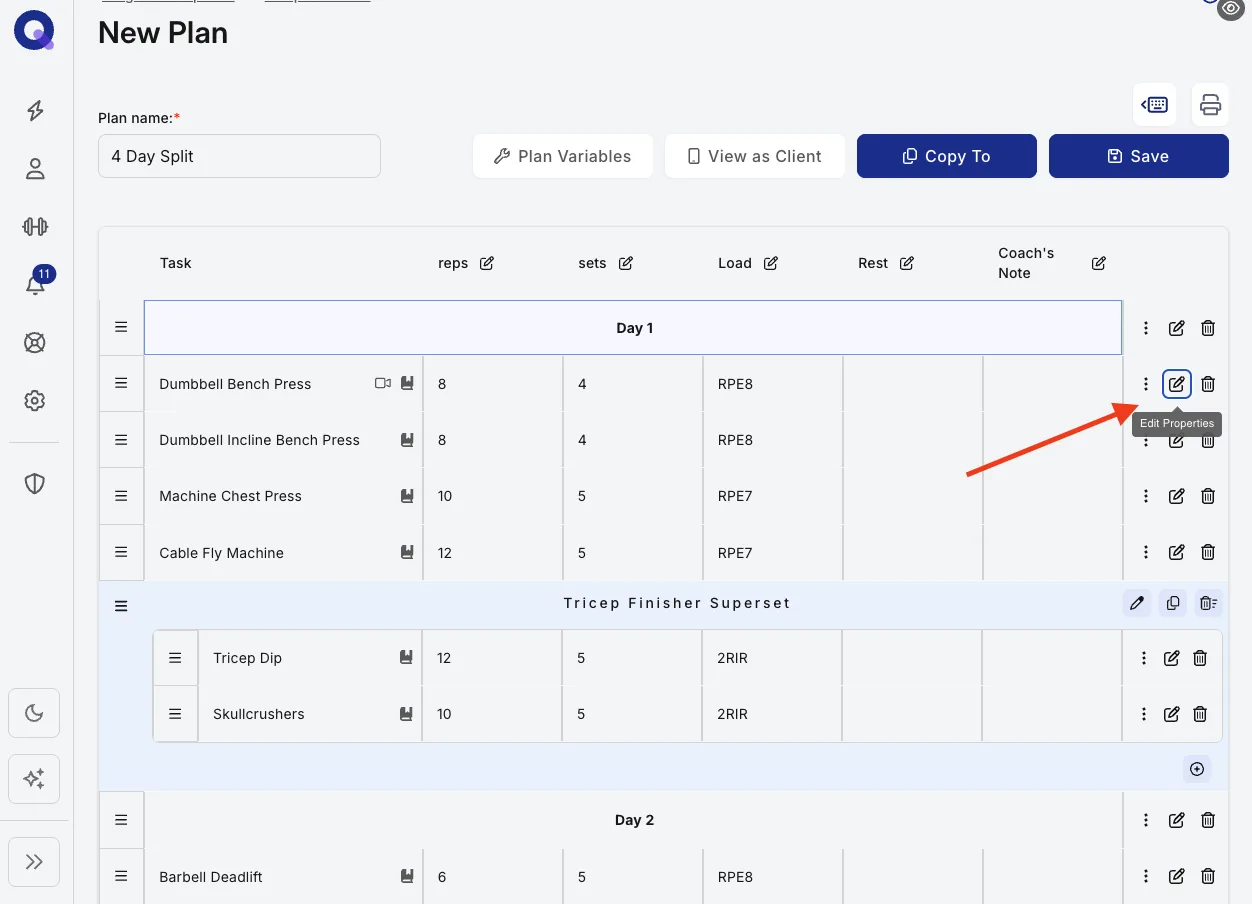
- Type your description in the Task Notes box. You can add a video here too, or an audio note on Pro.
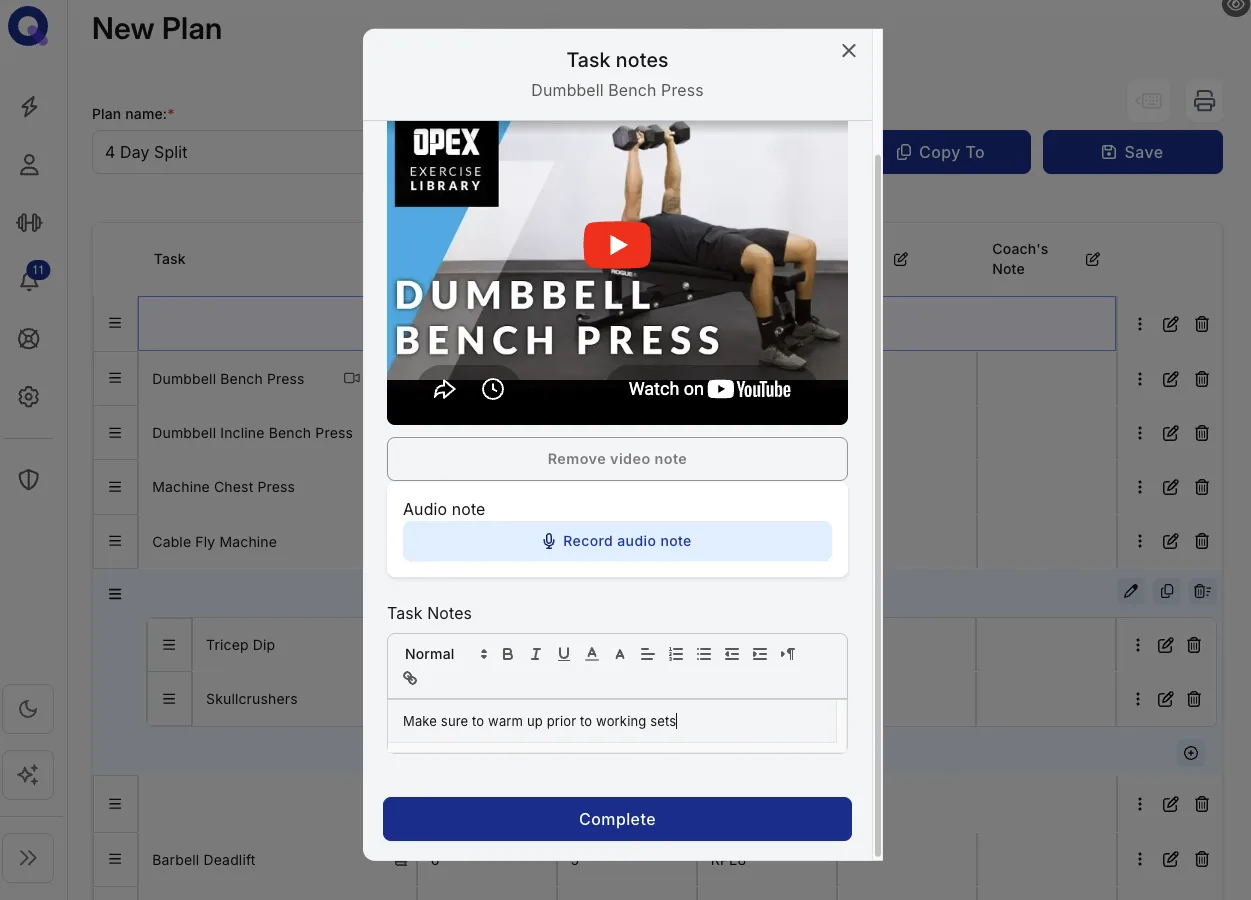
- Click Complete to save. An icon now appears next to the task, and your note shows whenever a client opens the task.
Tip: the notes box is a full text editor, so you can add headings, bullet lists and links. See using the text editor.
Editing media on a task that's already in a client's plan? Check editing a plan first, so you know which changes reach existing plans and which only apply going forward.