
Plan builder shortcuts and settings
Build plans faster: set default columns, rename columns per plan, use the row and superset controls, build with the keyboard and check past results.

Once you've built a few plans, speed comes from three things: defaults that match how you programme, controls you know without looking, and the keyboard. This guide covers all of them. If you're brand new to the plan builder, start with the plan builder tour and come back.
Set your plan builder defaults
Every new plan starts with six columns: Sets, Reps, Rest and three spares. If you always rename a spare to Load or Tempo, set it once and stop doing it plan by plan.
- Open Account & App Set Up in the side menu. The page that opens is called Account Settings. Choose Plan Builder.
- Under Personalize Your Plan Builder, rename Reps, Sets and Rest if you use other words, and fill in Default extra workout variable 1 to 3.
- Set Initial rows to how many empty rows you want a new plan to open with.
There's no Save button. Each field saves when you click out of it.
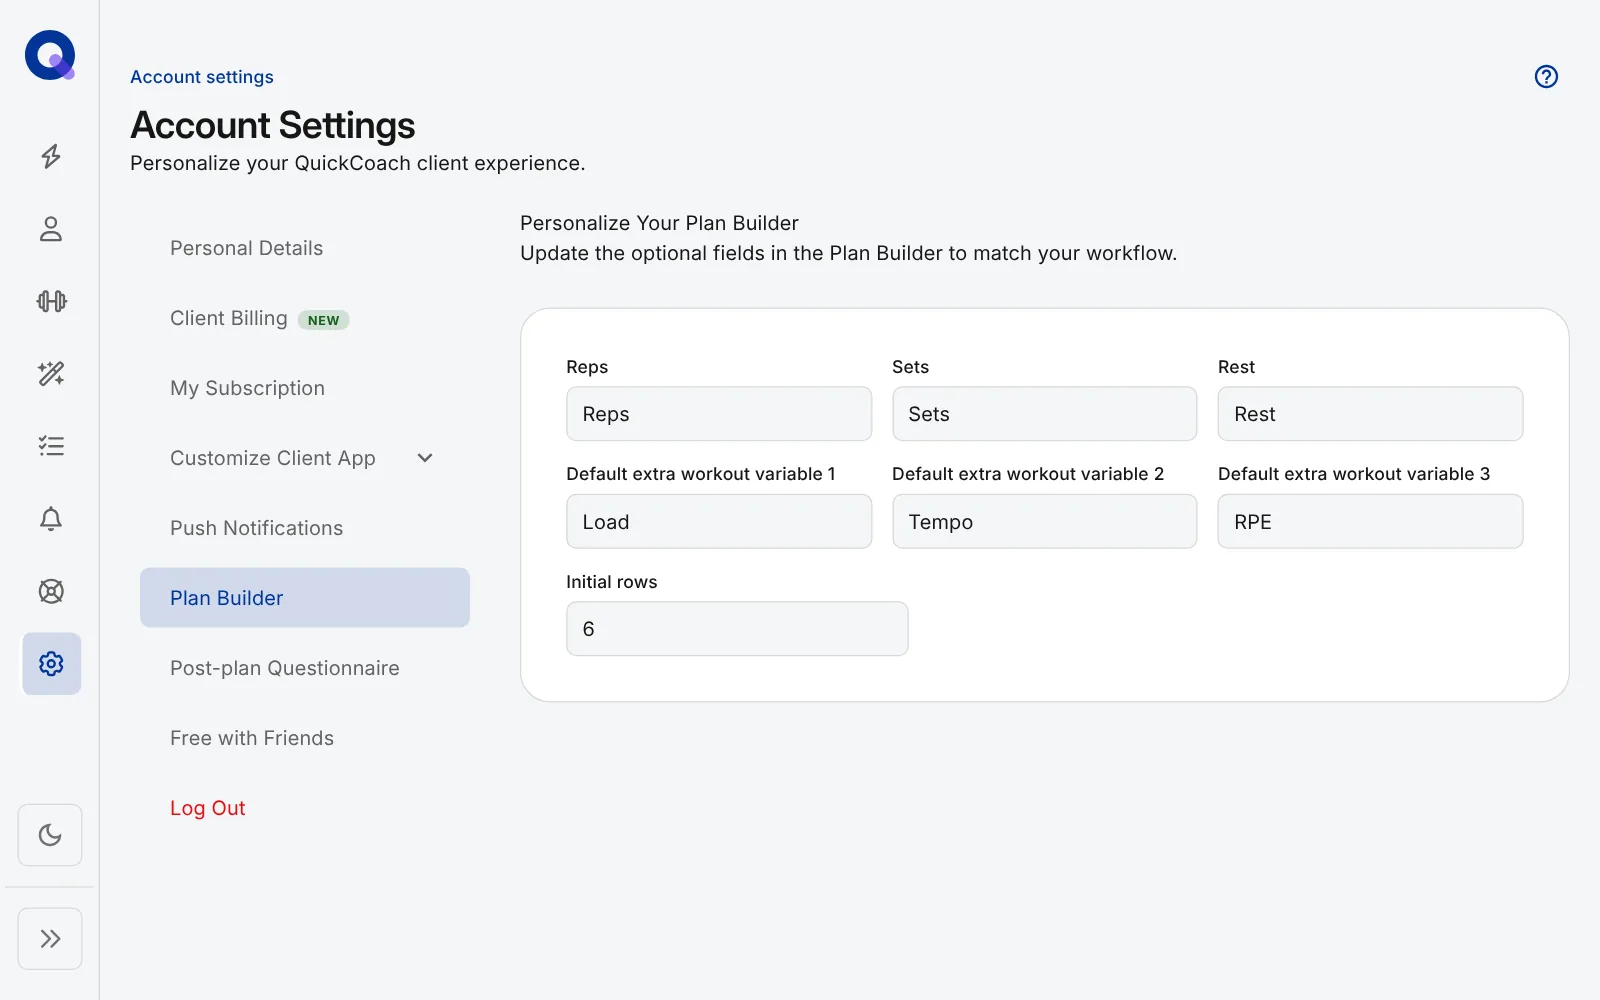
These labels become the starting point in the Create New Plan window. That window is also where you choose which columns a new plan uses: untick any of them under Enabled Fields. You can still change the columns on any single plan later.
Change the columns on one plan
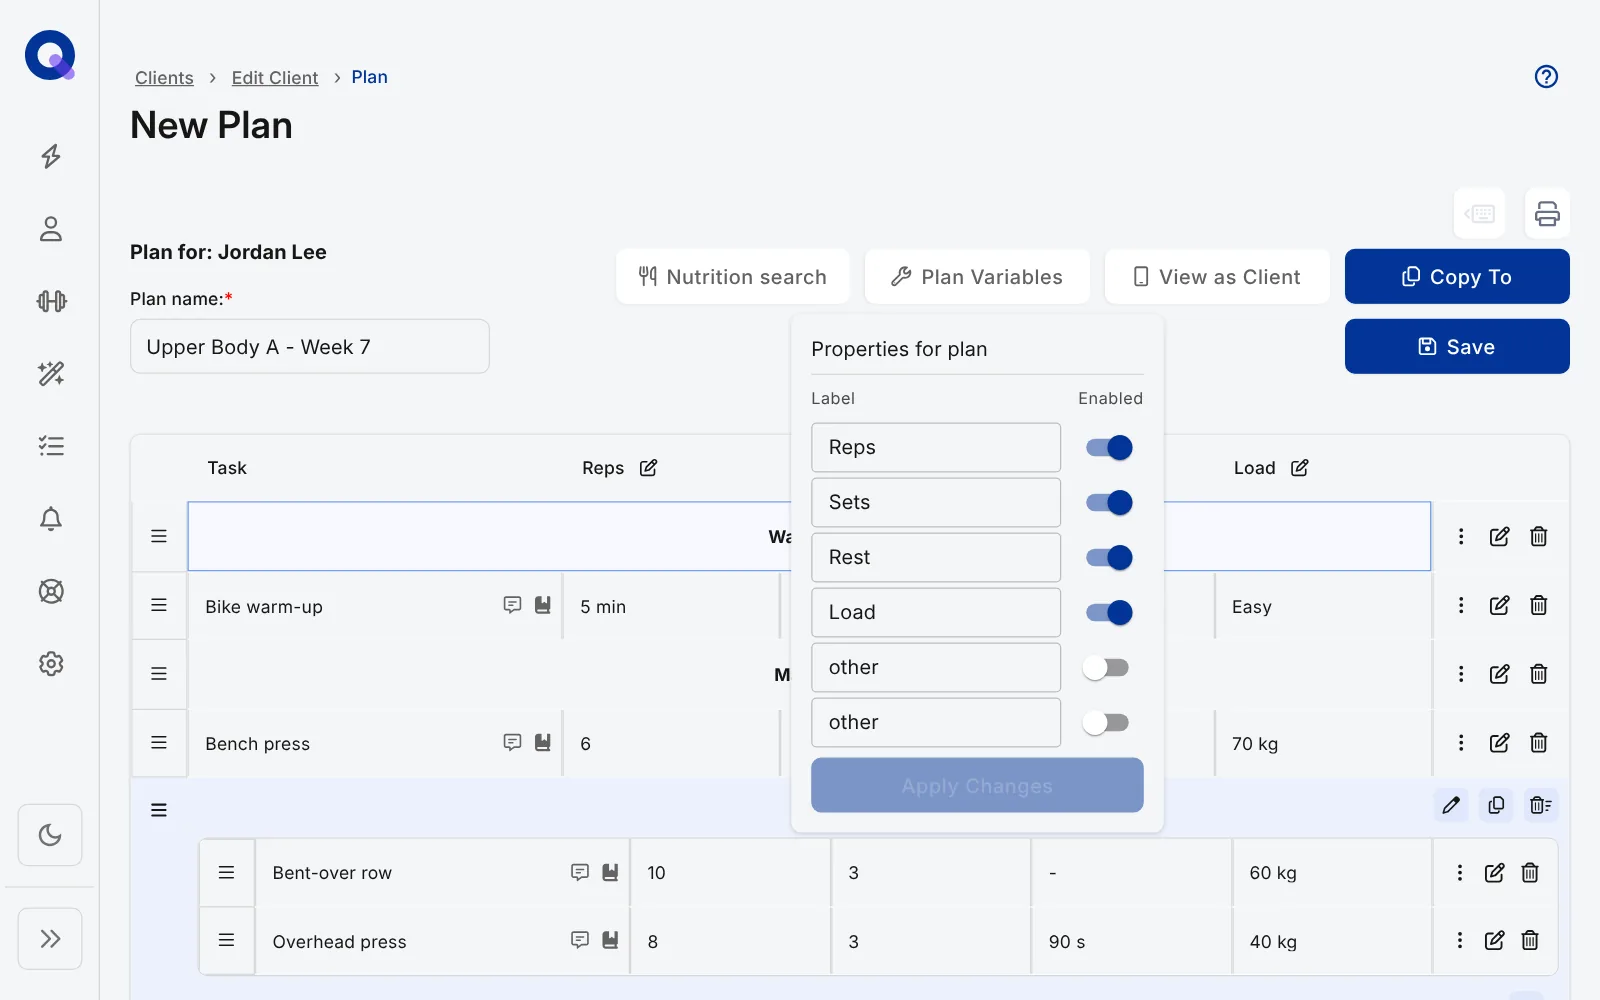
A conditioning day might need Time and Distance where a strength day needs Load and Tempo. In the plan builder, click Plan Variables. A Properties for plan box opens with a Label and an Enabled switch for each column. Rename any column for this plan only, or switch it on or off, then click Apply Changes. Labels run top to bottom in the box and left to right in the plan.
Row and superset controls
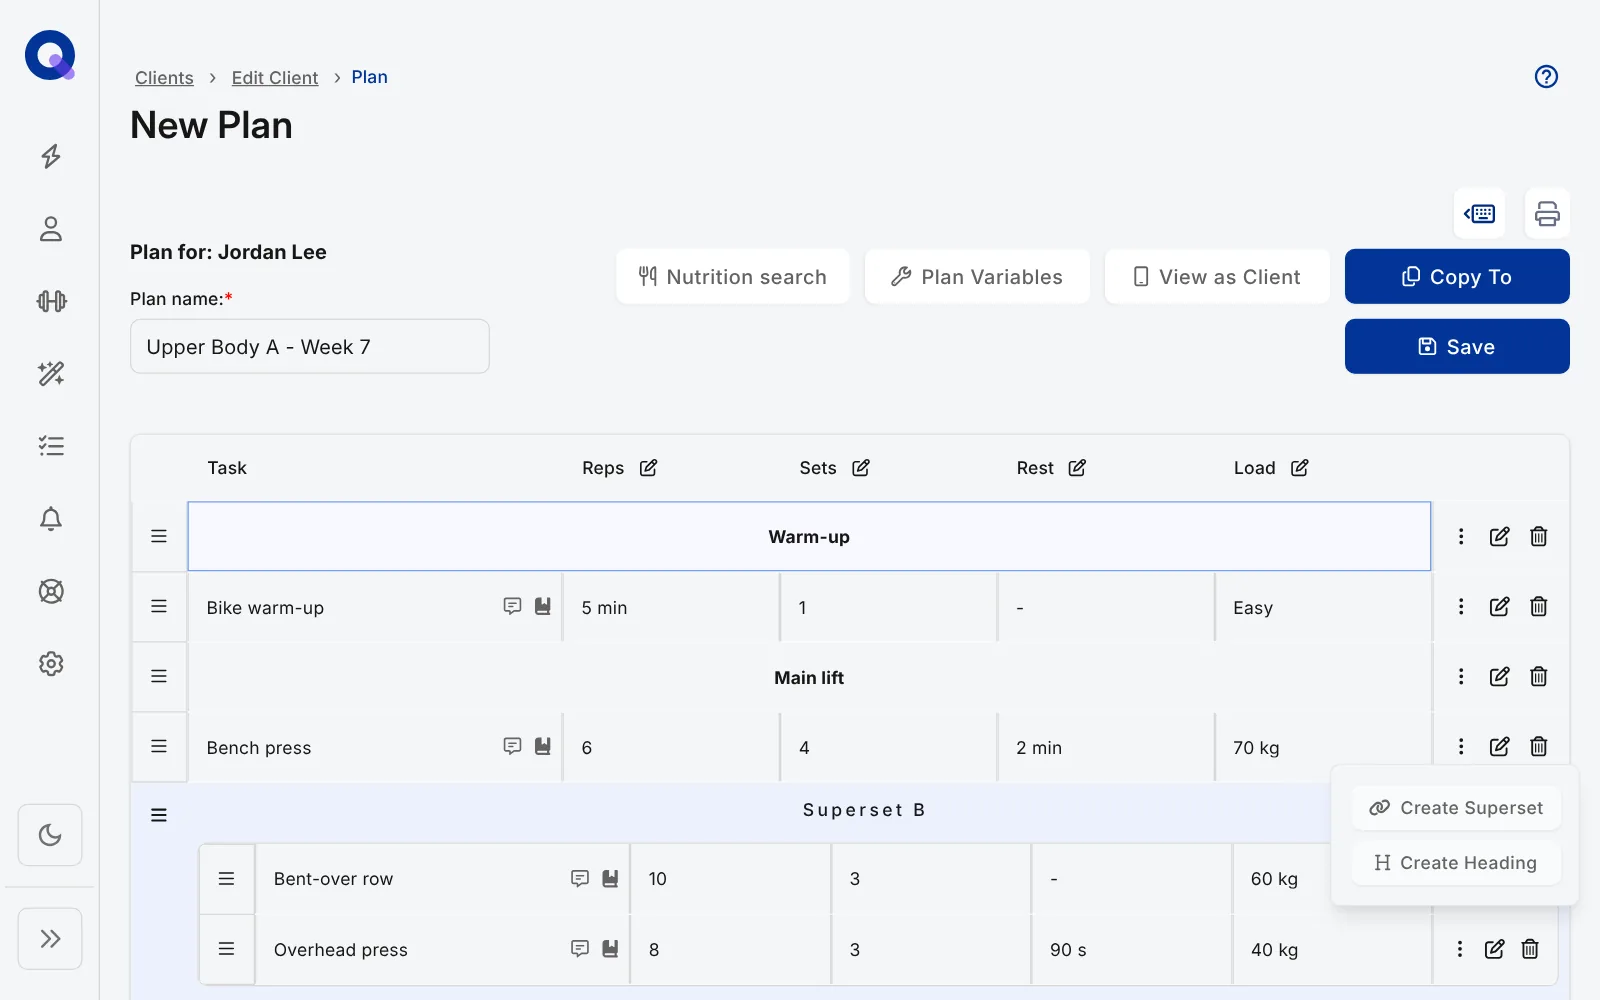
Each row has three icons at its right-hand end:
- Options (the three dots) opens a small menu with Create Superset, which starts a group of exercises done back to back, and Create Heading, which turns the row into a section title such as Warm-up. On a row that's already a heading, the second choice reads Revert to Row.
- Edit Properties (the pencil and square) opens the task's video, images, audio note and notes.
- Remove (the bin) deletes the row.
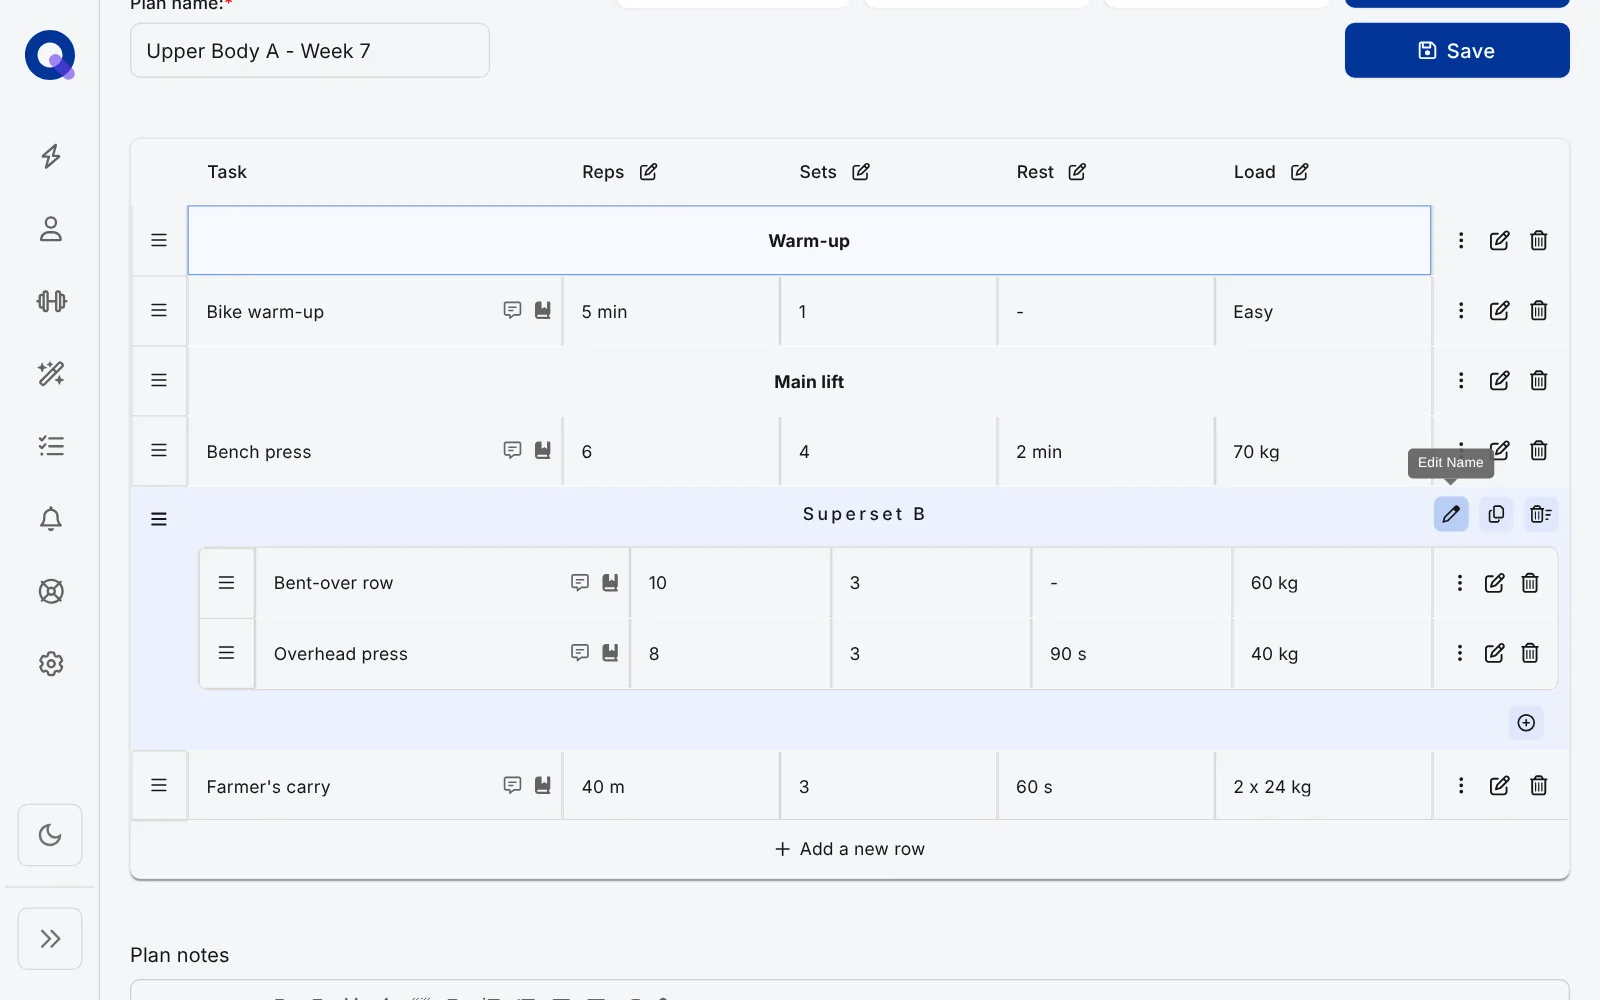
A superset has its own icons on its header row. Hover over each one to see its name. Copy Superset is the time saver: build a circuit once, copy it, and change only what differs. Next to it are Edit Name (the pencil) and Delete Superset. The circled plus under the superset's last row is Add New Row, which adds another exercise to the group. Headings and supersets has more on both, and workout formats shows how to set up AMRAPs, EMOMs and ladders with them.
Build with the keyboard
Keyboard movements are on by default, so you can fill a whole plan without touching the mouse. A blue outline shows which cell you're on. The keyboard icon at the top of the plan builder (tooltip Enable keyboard movements) switches them off and on again, and your choice is remembered on that device.
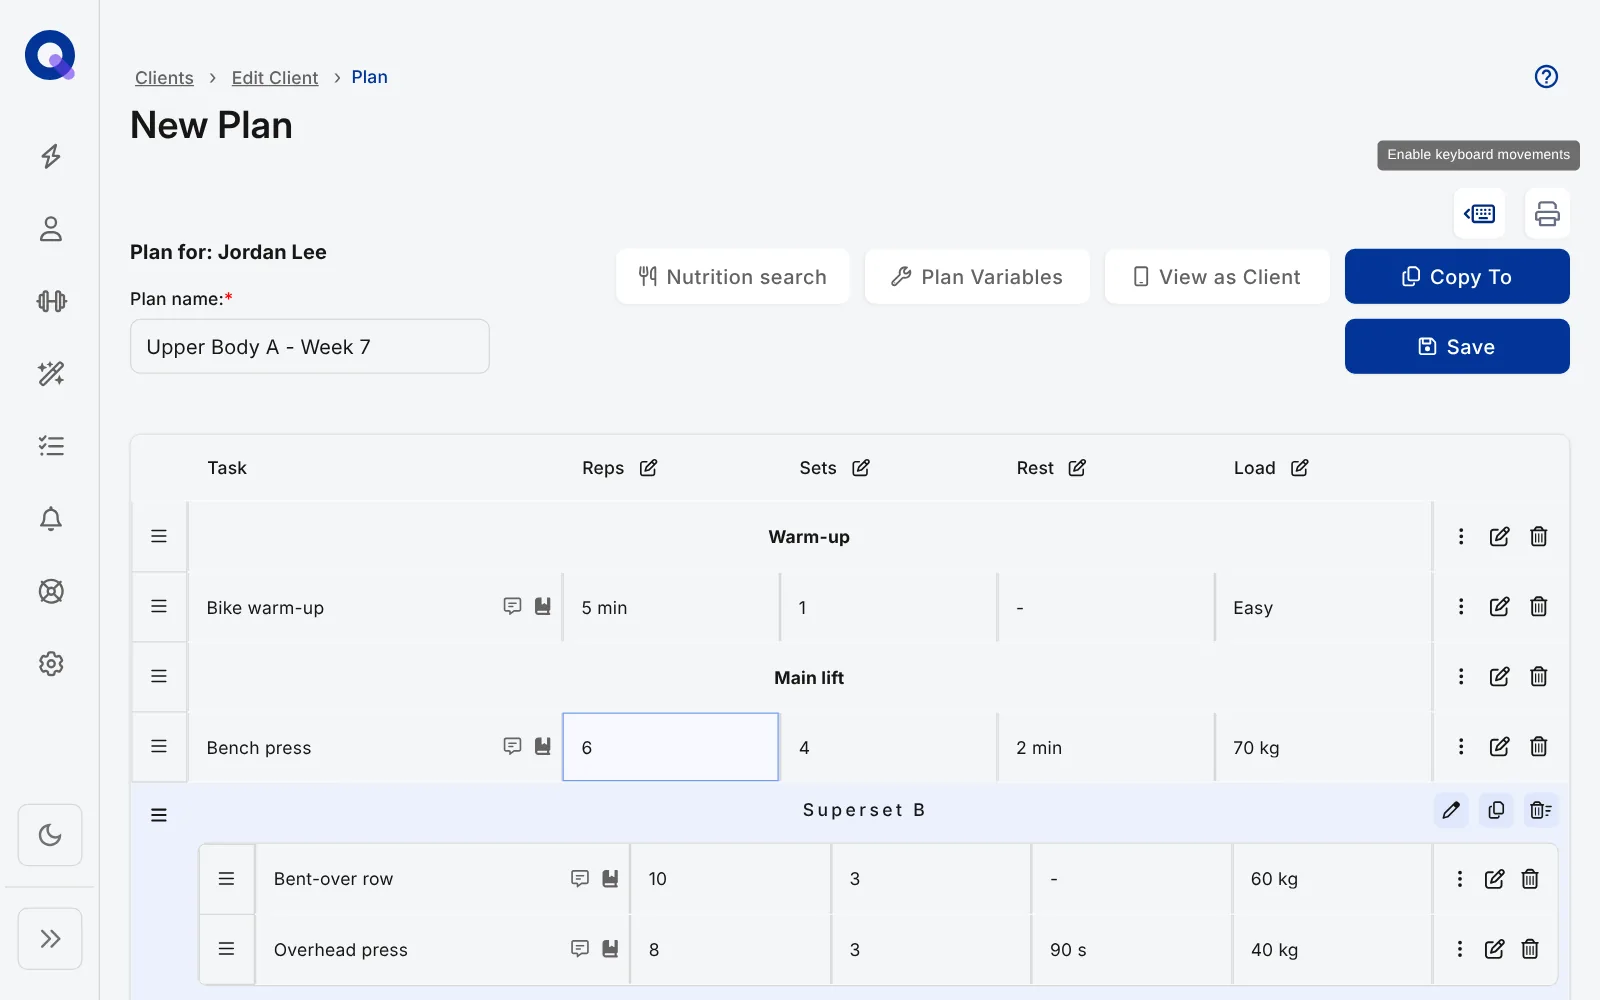
| Key | What it does |
|---|---|
| Arrow keys | Move one cell up, down, left or right |
| Ctrl or Cmd + arrow | Jump to the first or last row, or the start or end of a row |
| Enter | Start typing in the highlighted cell. Press it again to save and move down (Shift + Enter moves up) |
| Tab | Save and move one cell right (Shift + Tab moves left) |
| Escape | Stop typing in the cell |
| Delete or Backspace | Clear the highlighted cell so you can type a new value |
A typical rhythm: type the exercise, press Enter, Tab across the sets and reps, then Enter down to the next row.
Add detail to a task
Click a row's Edit Properties icon. A Task notes window opens with the exercise name under the title. On the Video tab, paste a link and click Update (it works with YouTube and Vimeo). The Images tab and Record audio note are Pro. Write your coaching cues under Task Notes, then click Complete.
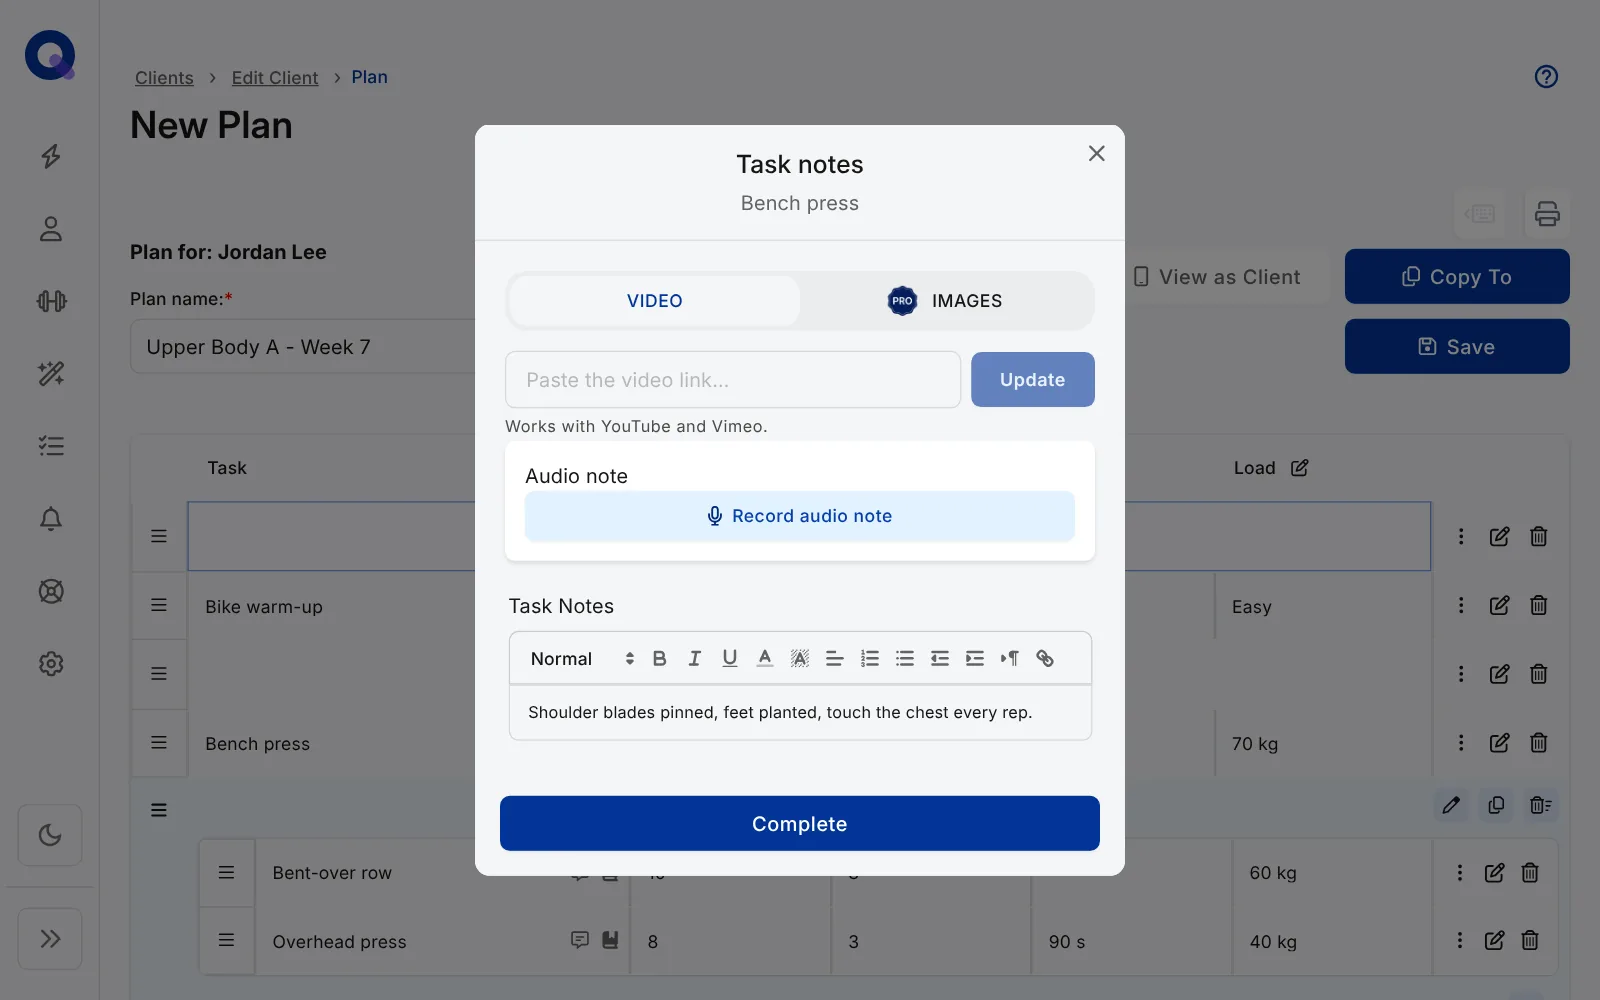
Good to know: notes and video you add here are also saved to the task in your library, so plans you build from then on pick them up. Plans already using it keep the version they were built with.
Check a client's last result while you build
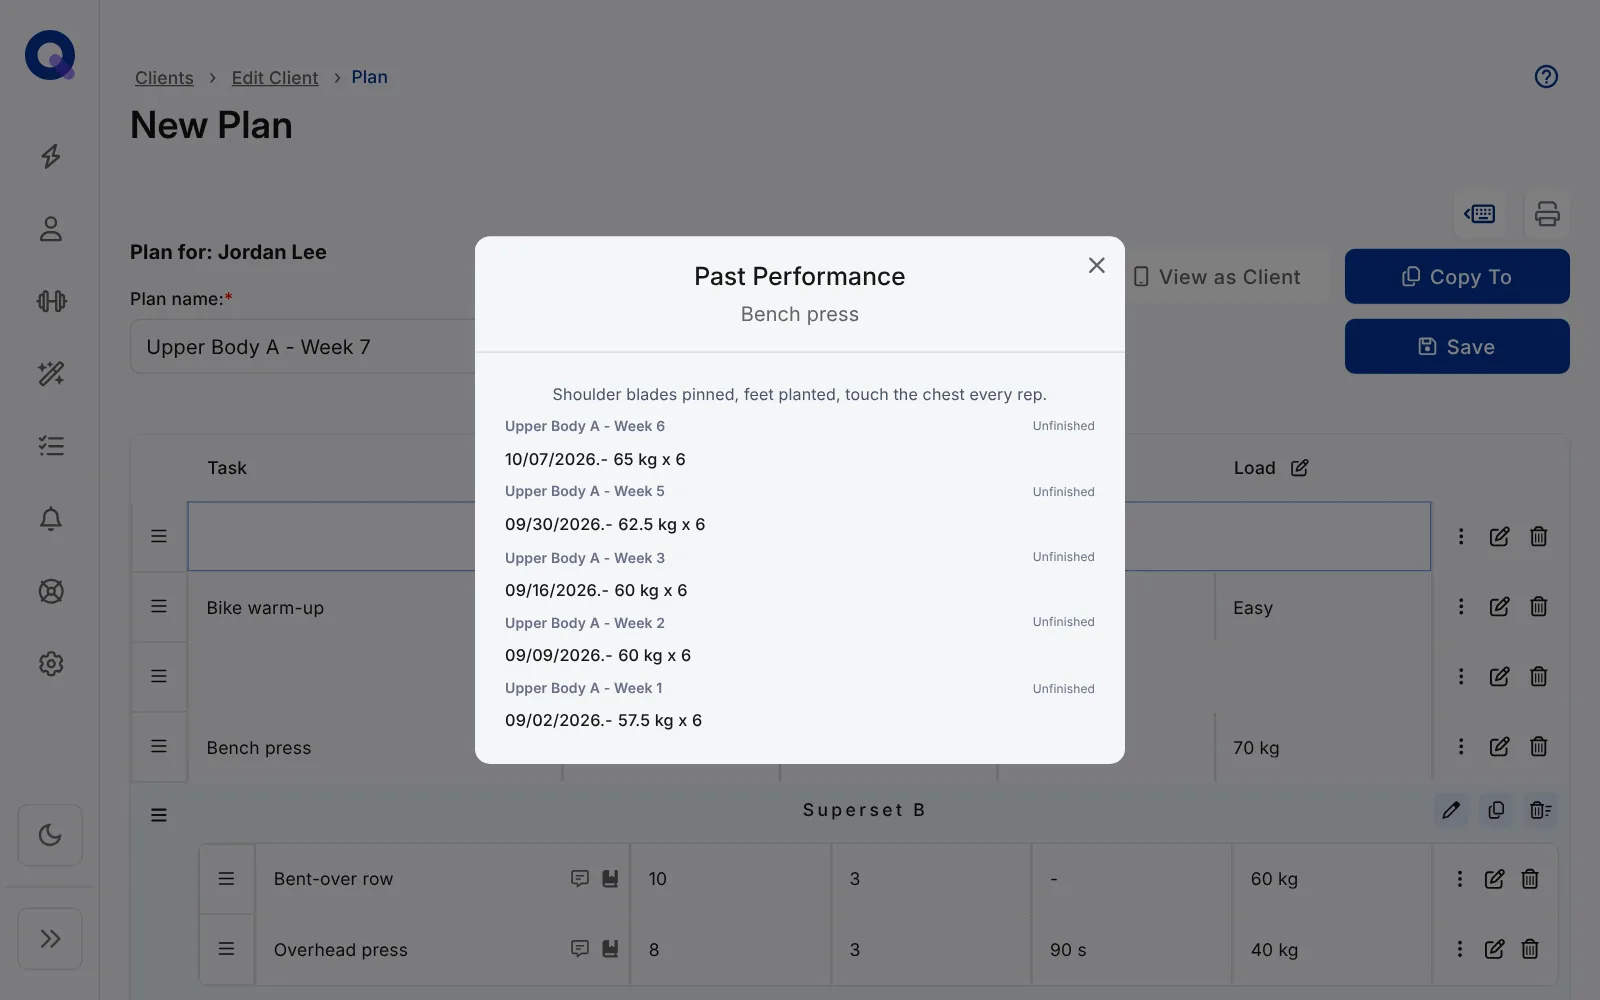
A task that's in your library shows a small book icon. Click it to open Past Performance for that exercise, with this client's results plan by plan, so you can set this week's weight from last week's numbers without leaving the plan.
Preview, copy and print
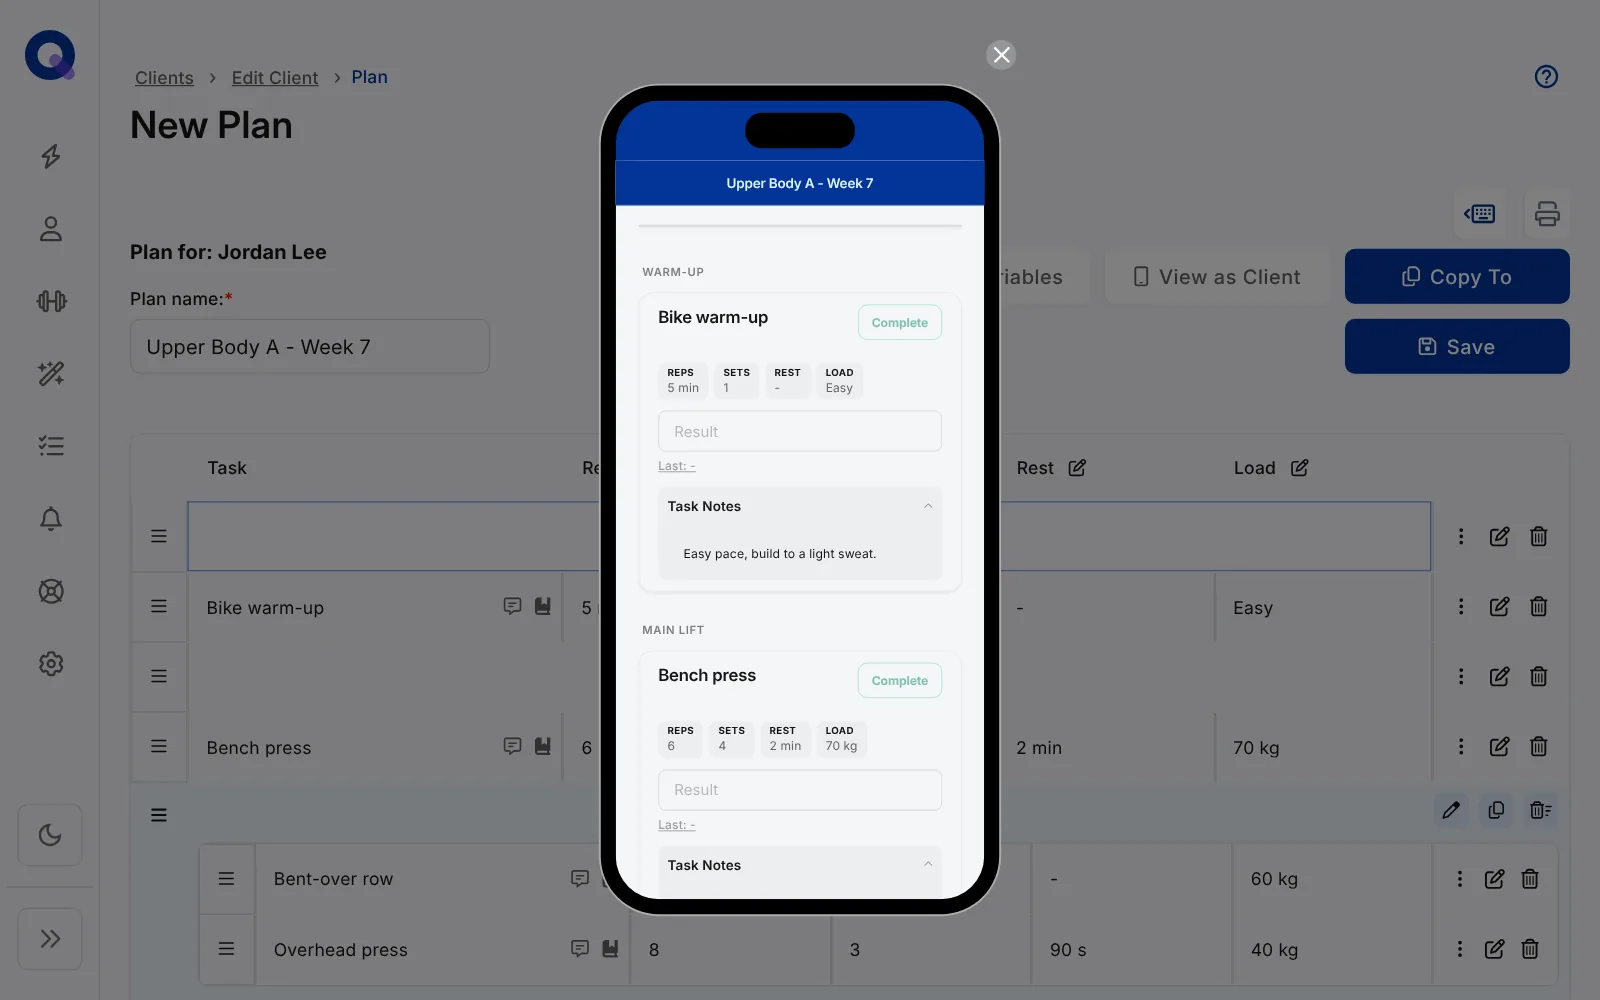
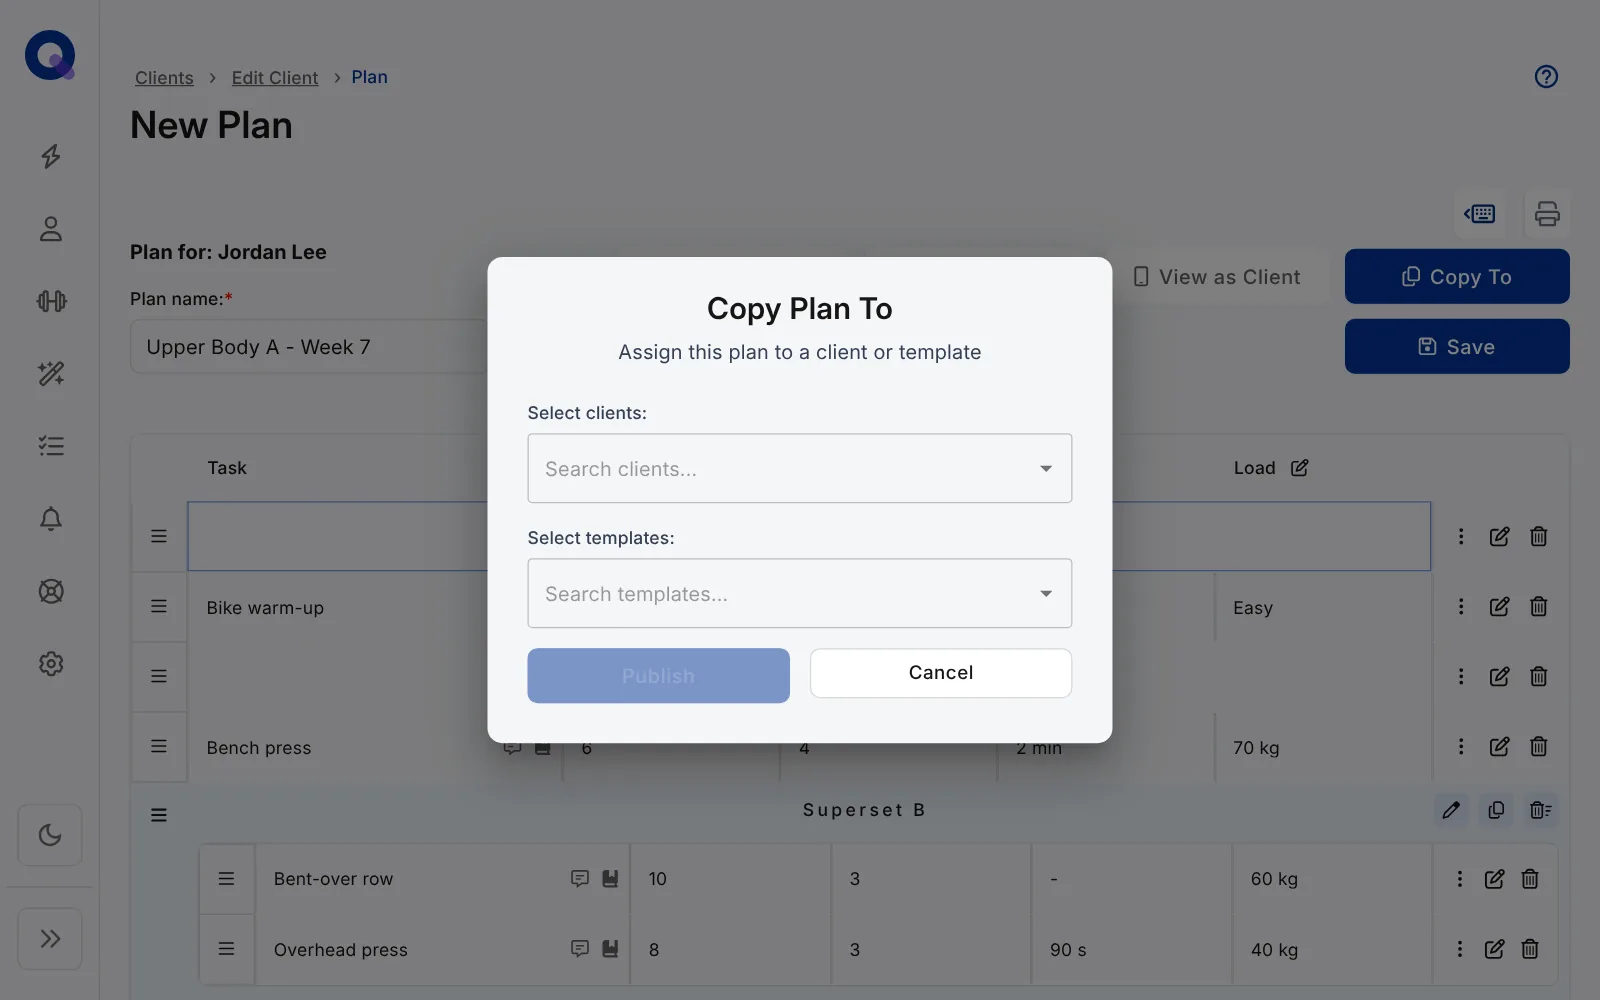
View as Client shows the plan on a phone the way your client will see it. On a published plan, Copy To opens Copy Plan To: pick clients, templates or both, then click Publish to send each of them a published copy. The printer icon (Print plan) gives you a printable version for in-person sessions, branded with your colours on Pro.
More time savers
- Build base templates. Alongside your full programs, keep templates of the warm-ups, cool-downs and plan notes you use every week. Build them well once and copy from them forever.
- Make your own tags with names. There's no tag feature, but names do the job. A client's last name is never shown to them, so it's a handy place for a tag such as "Online | Summer Shred".
- Remember plans are one and done. A completed plan can't be repeated. If a client should do the same workout four times, give them four copies; copying plans shows the quick ways.
For moving many plans at once, see managing a client's plans in bulk.