
QuickCoach in 2 minutes
Watch the whole QuickCoach loop in two minutes, then follow each step: log in with a code, add a client, publish a plan, send their link and see their results.

The video below shows the whole loop in under two minutes: a client invited, a plan built and sent, the client training on their phone, and the result landing back with you. The steps after it walk through each screen so you can follow along in your own account. Nothing here costs anything.
Before you start: have one real client in mind, with their name and email address, and a workout you'd happily give them this week. Building for a real person is faster than building for an imaginary one.
1. Create your account and log in
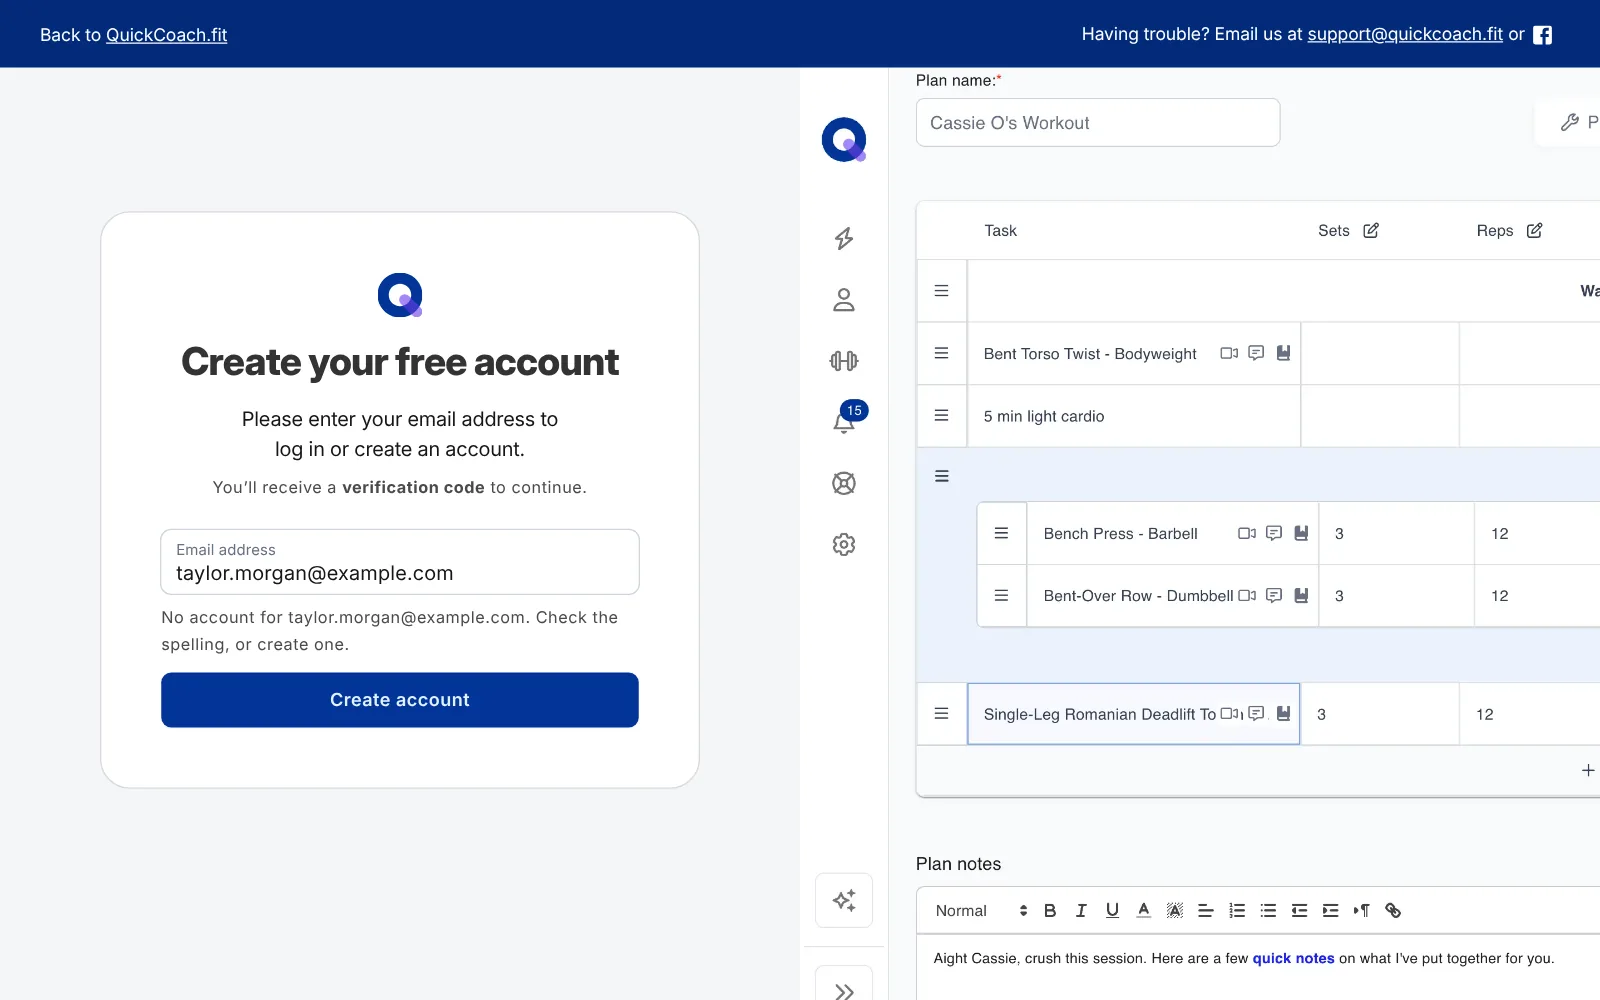
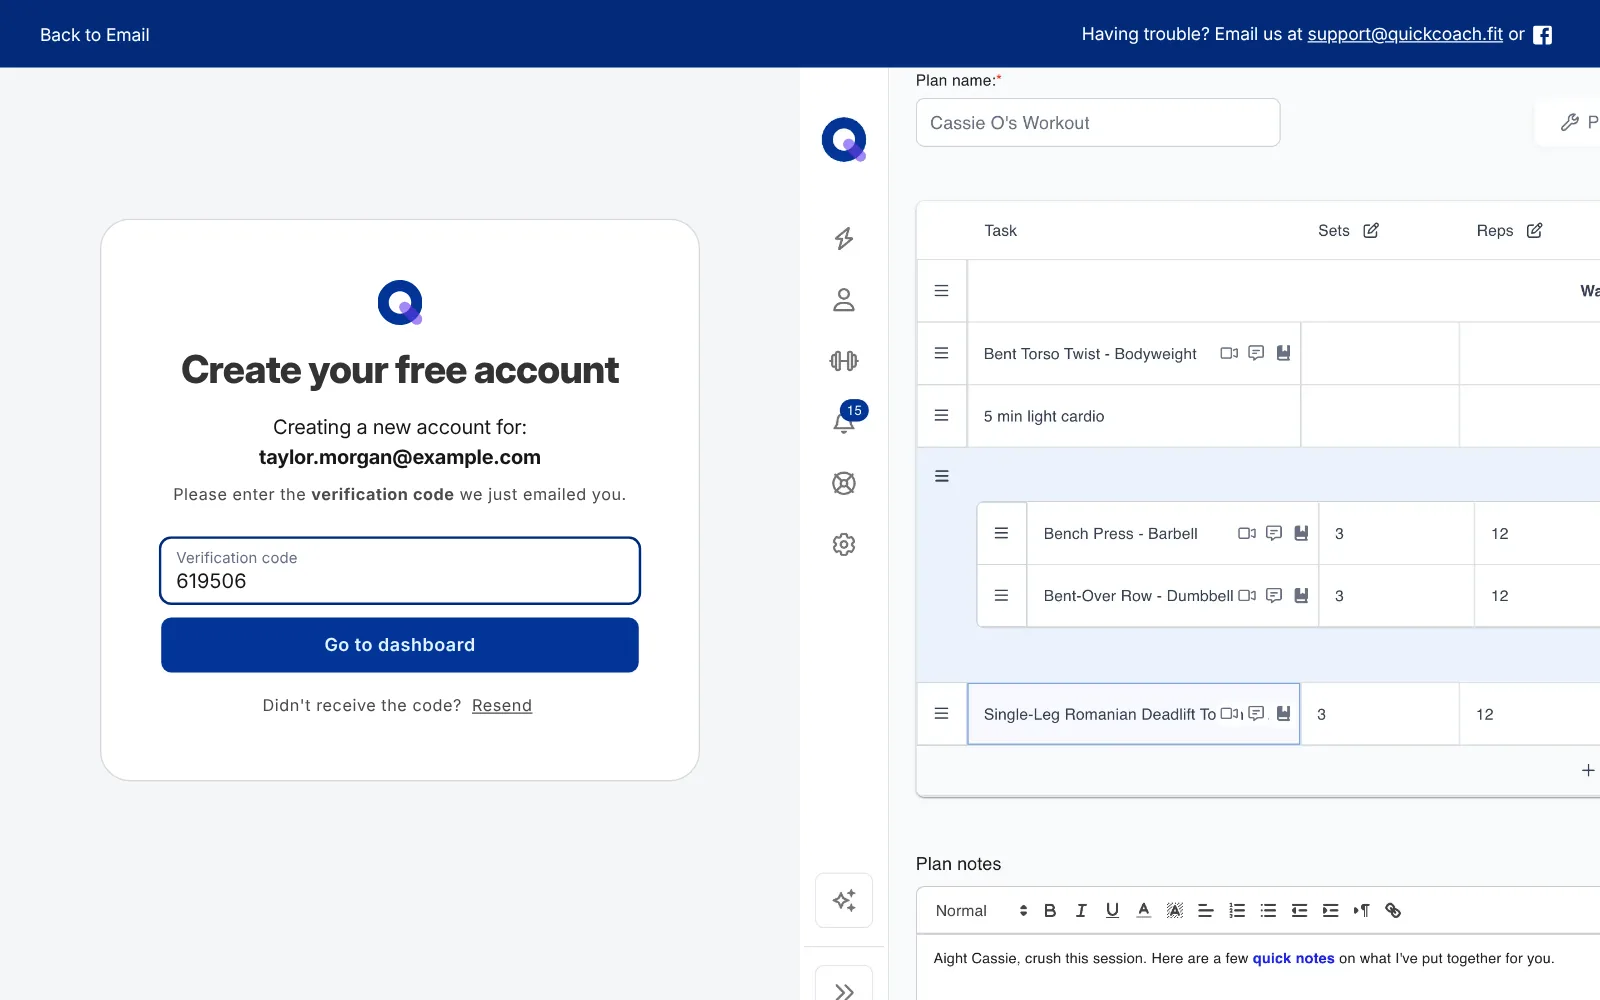
QuickCoach doesn't use passwords. Go to app.quickcoach.fit, enter your email address, and we email you a short verification code. Type the code in and you're through.
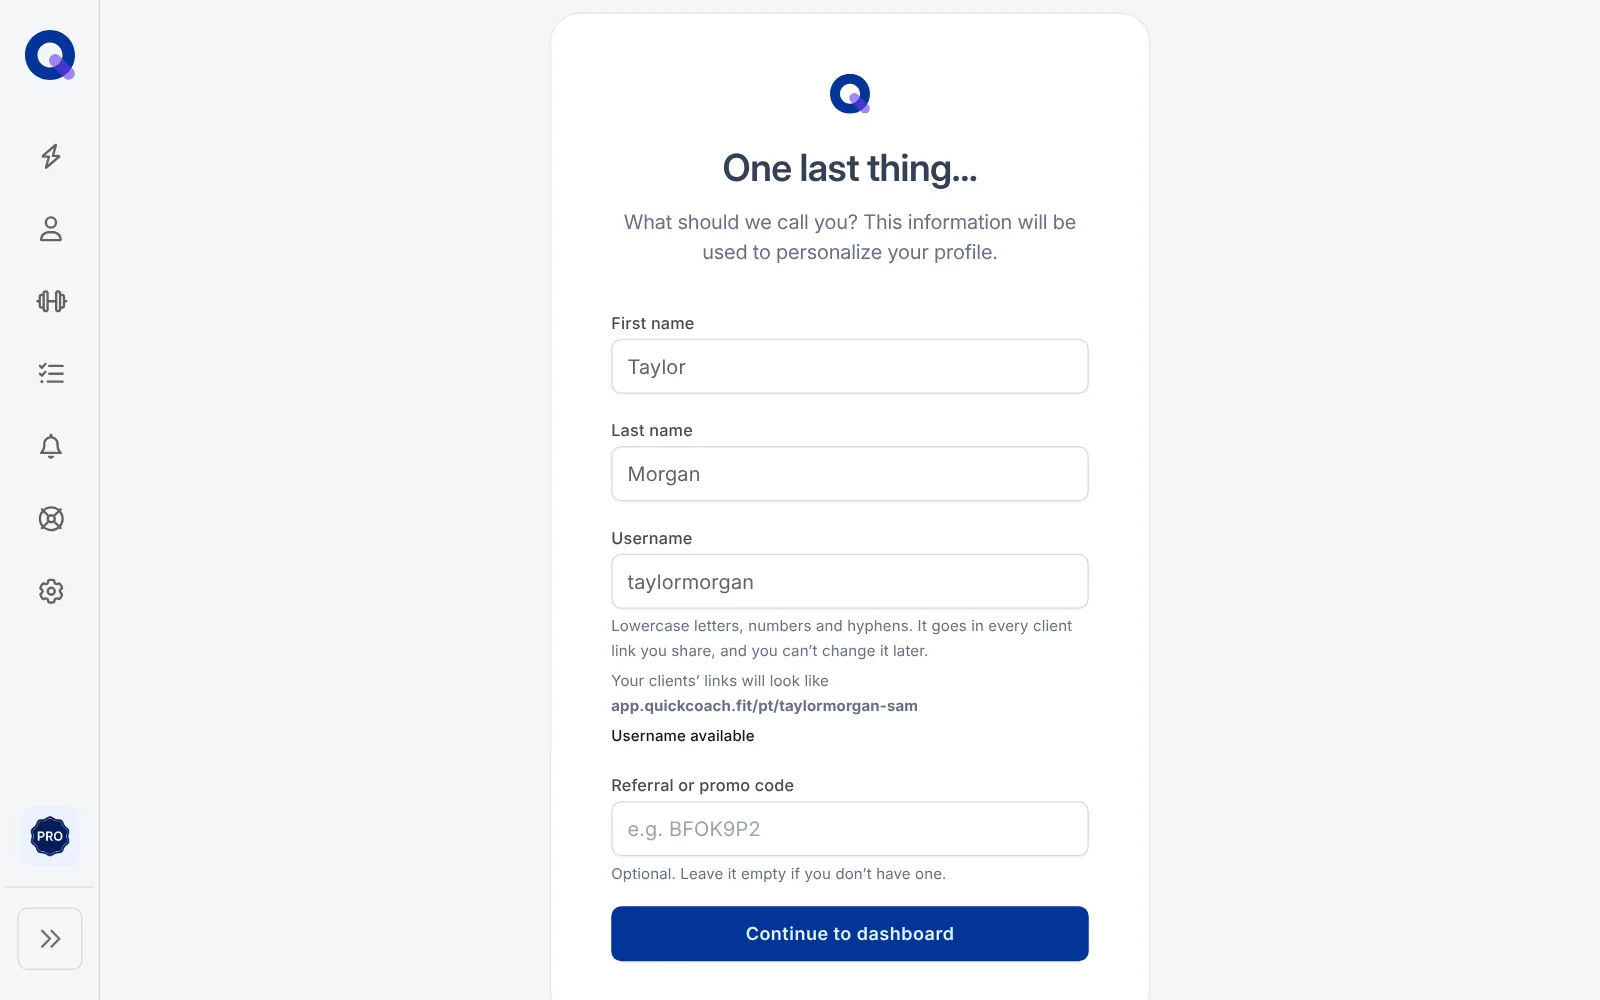
The first time you log in, a screen headed "One last thing..." asks for your first and last name and a username. Your username becomes part of every link your clients open, and you can't change it later, so keep it short and recognisable. If a friend referred you, their Free with Friends code goes in the referral box on the same screen.
Every login works the same way from now on: email, then code. If a code doesn't arrive, check your spam folder first. The troubleshooting guide covers the rest.
2. Tell us how you coach
Next comes one question: "What kind of coaching do you do?" Pick the closest of 1-on-1 coaching (in person), group or team coaching, online or remote coaching, or a mix. It takes ten seconds and helps us understand how coaches use QuickCoach.
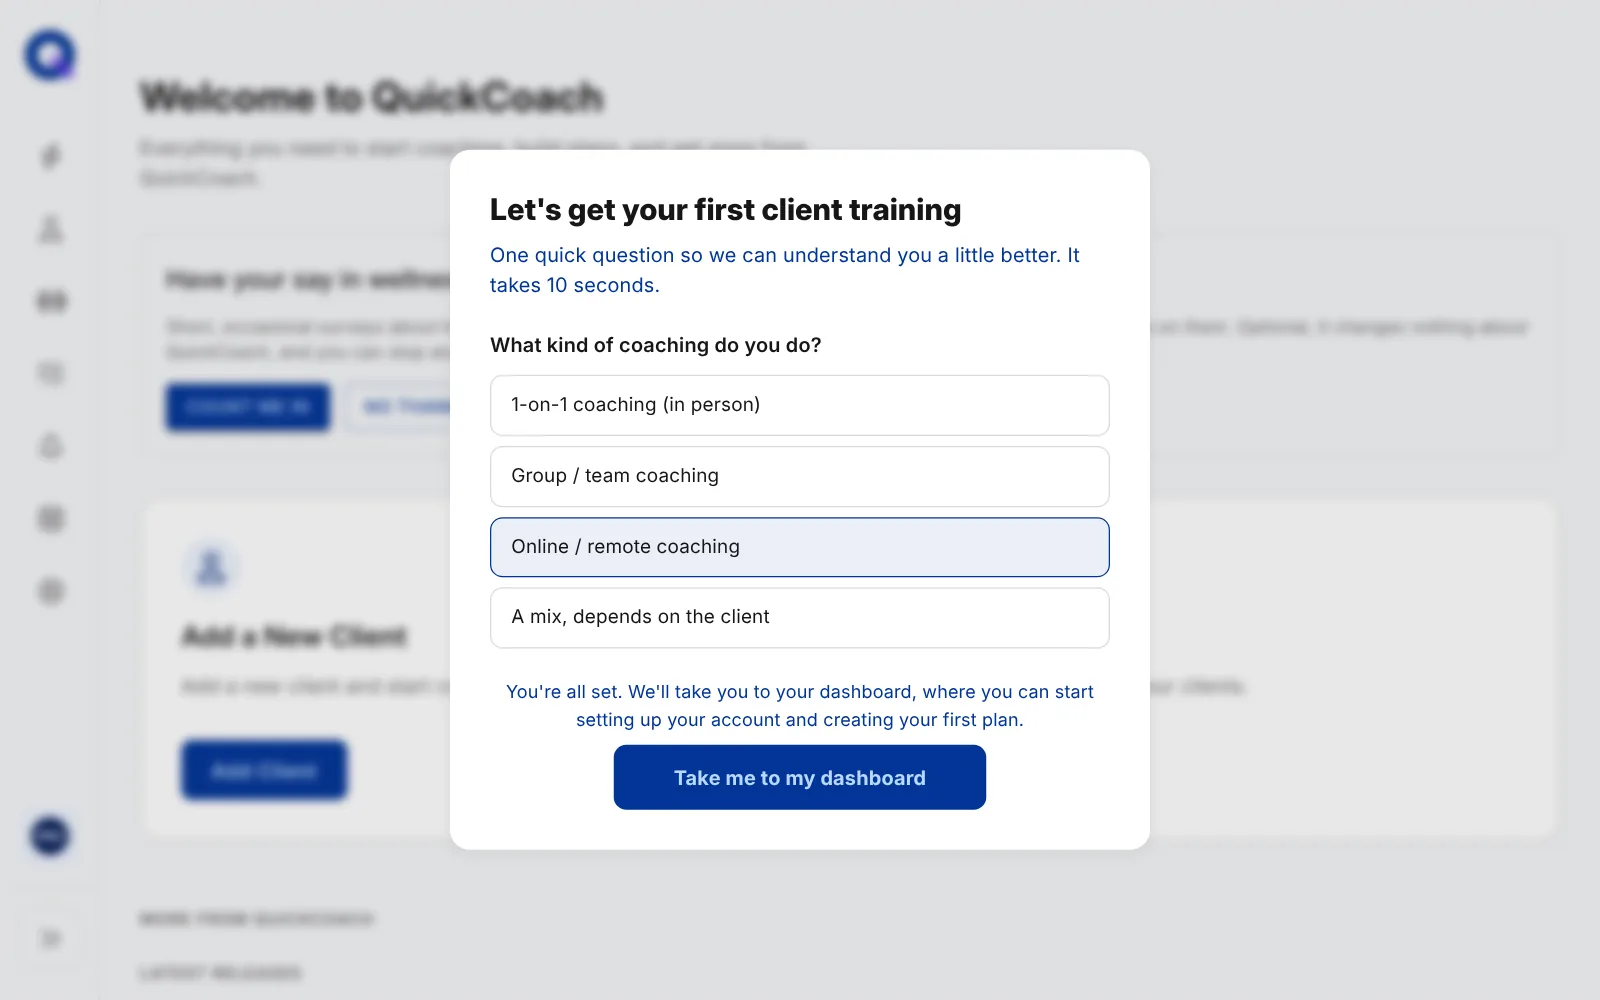
Click Take me to my dashboard and you'll land on your dashboard.
3. Start from your dashboard
Your dashboard opens with "Welcome to QuickCoach" and two cards: Add a New Client and Create a Plan. Those are the next two steps, so you can start from either card or from the navigation on the left.
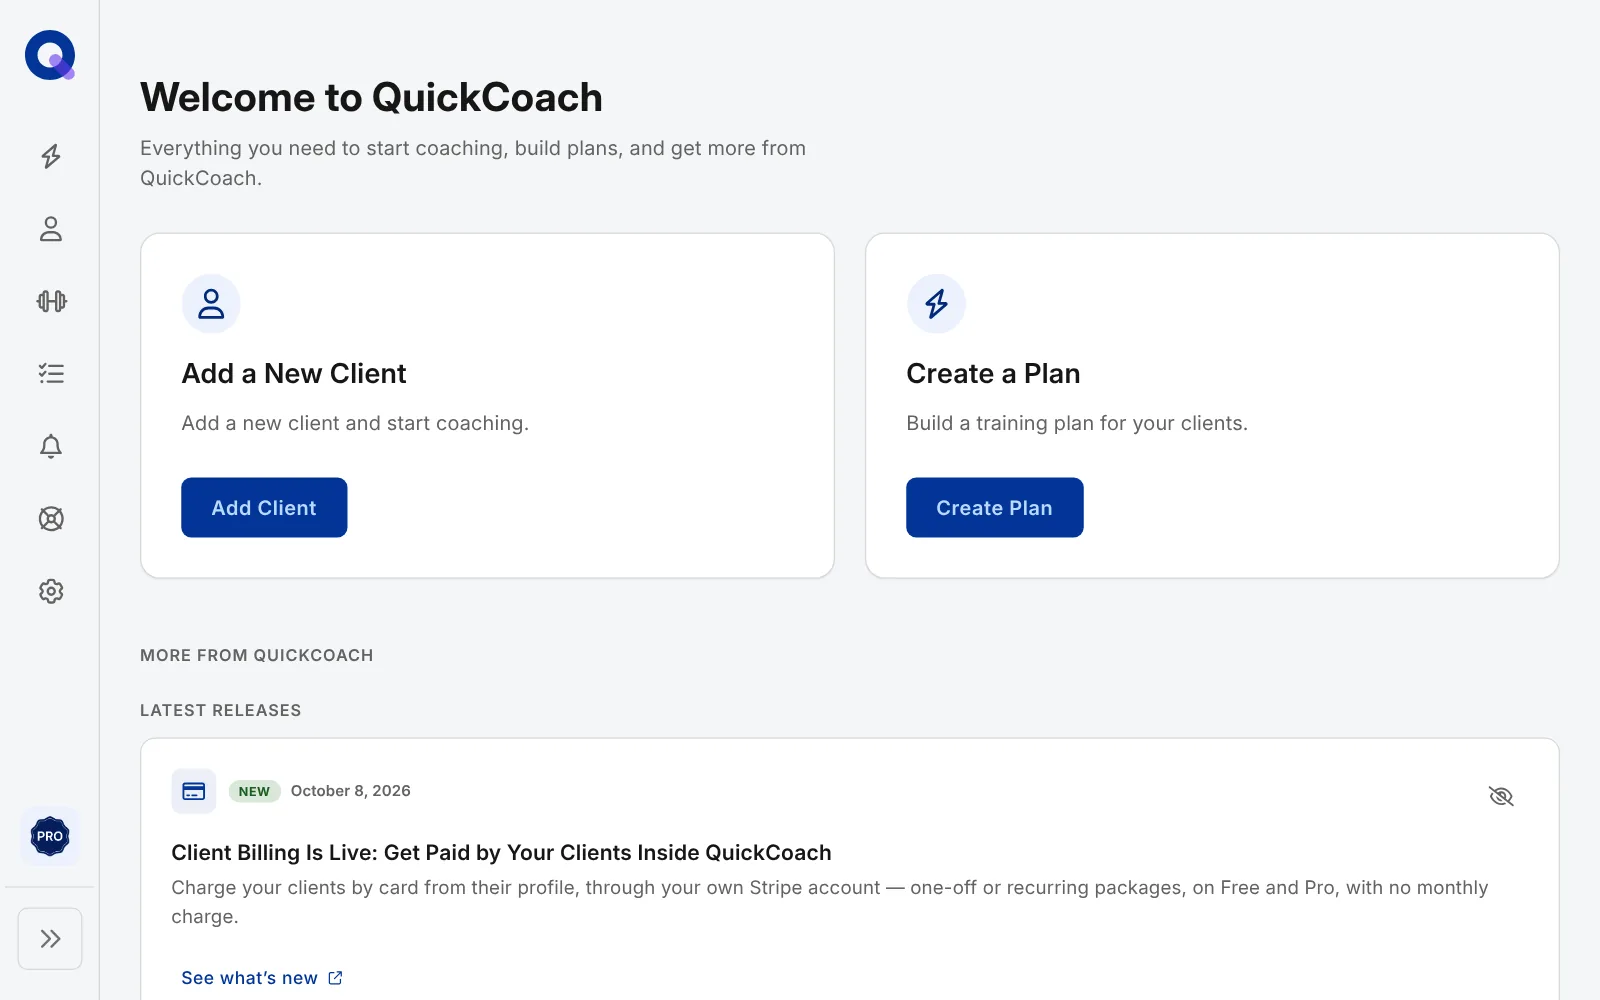
Everything in this guide works on the free plan, which keeps up to 20 active clients with no time limit. If you want to try the Pro features too, there's a 14-day free trial; QuickCoach Free and Pro, explained sets out what Pro adds.
4. Add your first client
Click Add Client on your dashboard, or Add a Client on the Clients page. Only the first name is required. Add their email address too if you want QuickCoach to send them their link, then click Create client. You'll go straight to their page.
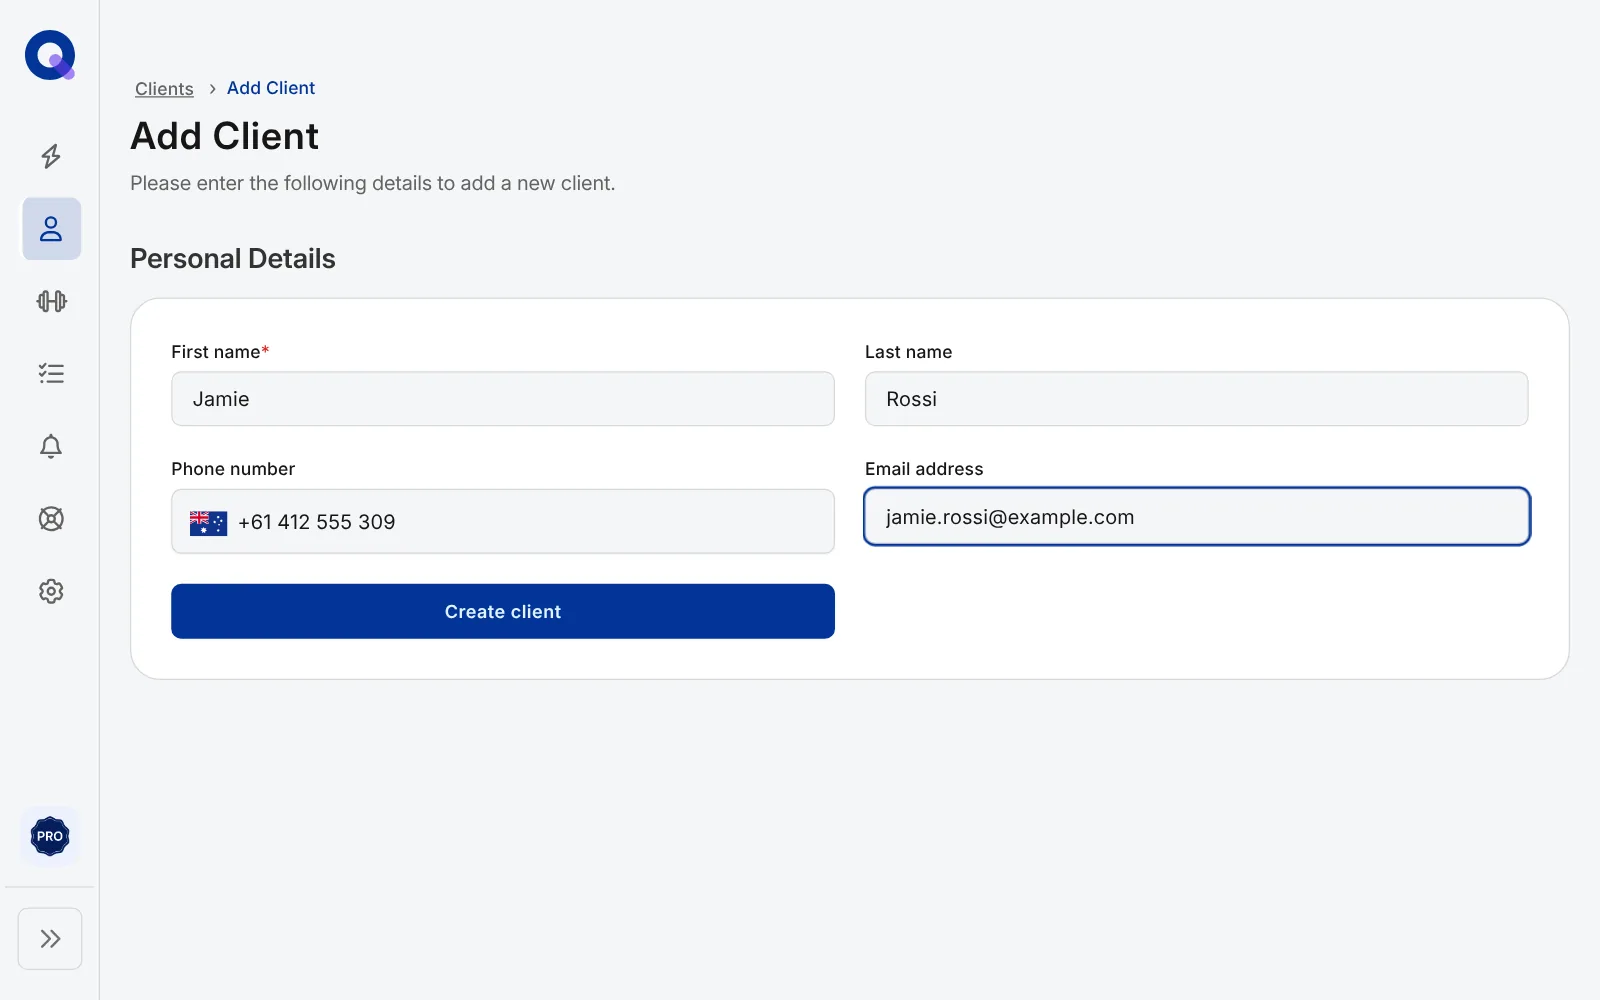
Adding a client creates their profile and nothing else. They don't hear from QuickCoach yet, so there's no rush to have everything perfect before you send anything. You can see them on your Clients page straight away.
5. Build their first plan and publish it
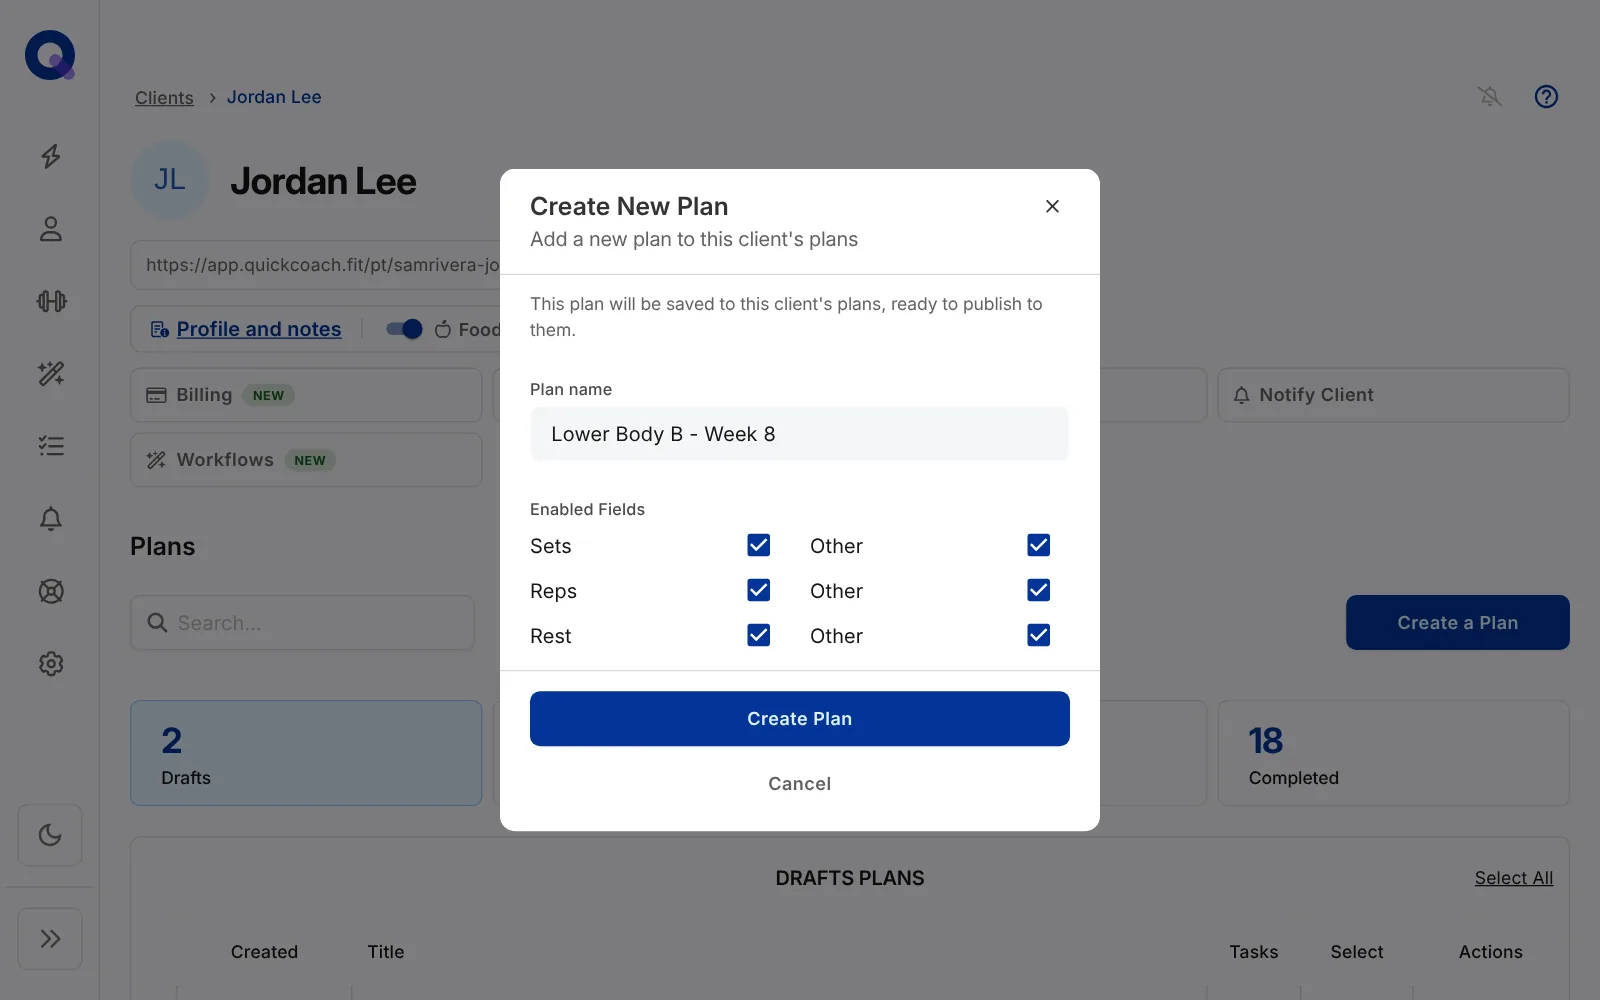
A plan is one session's worth of tasks: a workout, a check-in, a nutrition day. Open your client's page and click Create a Plan. Give it a name, such as "Week 1, Day 1", and choose which columns the plan needs. All six start switched on: Sets, Reps, Rest and three spare fields called Other 1 to 3. Rename the spares to whatever you track, such as Weight or Tempo, and switch off any you won't use.
You'll land in the plan builder. Type an exercise name into the first row. If it's new, choose Add "Goblet squat" to your library (with your exercise's name) so you can reuse it and track your client's results on it later. Fill in the sets and reps, then keep adding rows.
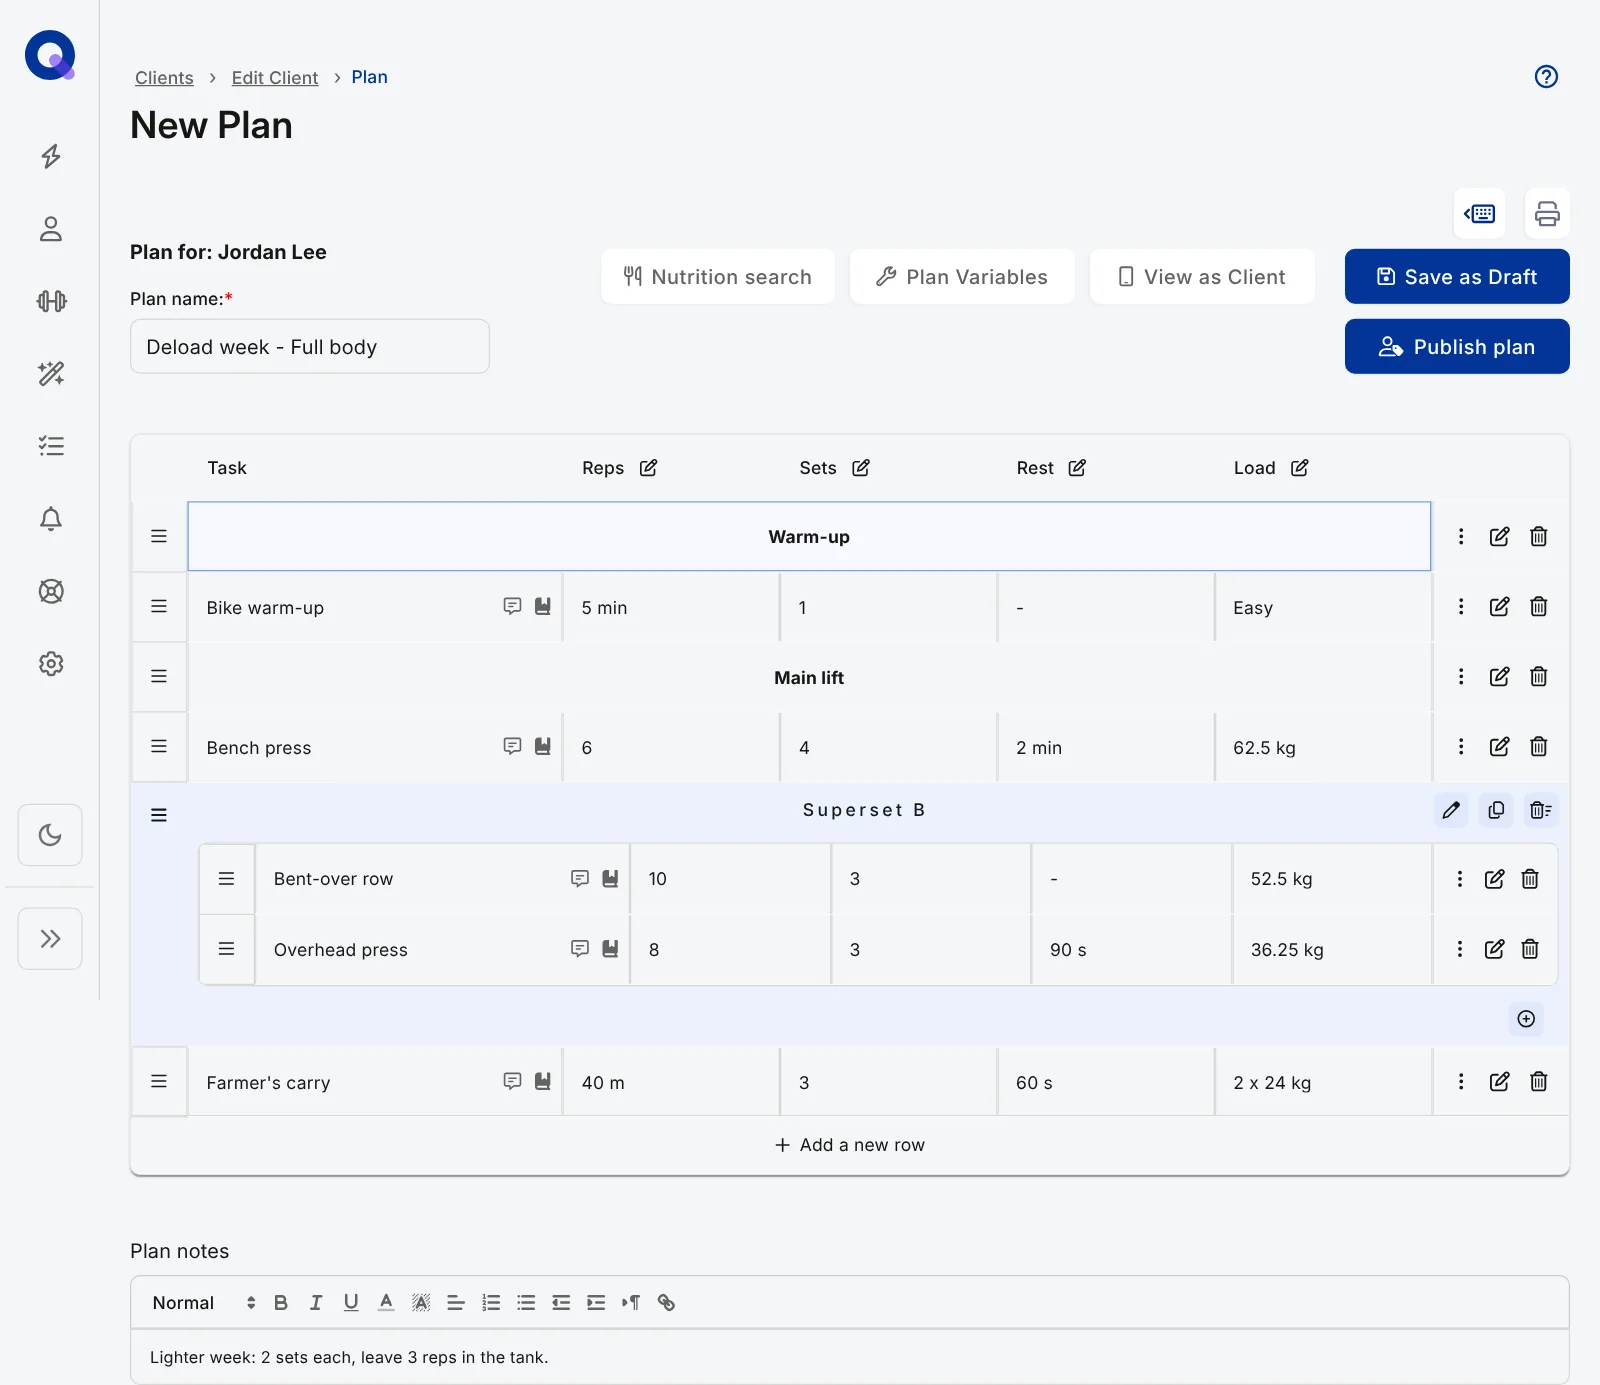
Two tools make a plan easier to follow. A heading splits it into sections such as Warm-up and Main workout, and a superset groups exercises done back to back. Both live in each row's options menu, and headings and supersets shows them in detail. Add any instructions for the whole session to the plan notes, which your client sees at the top.
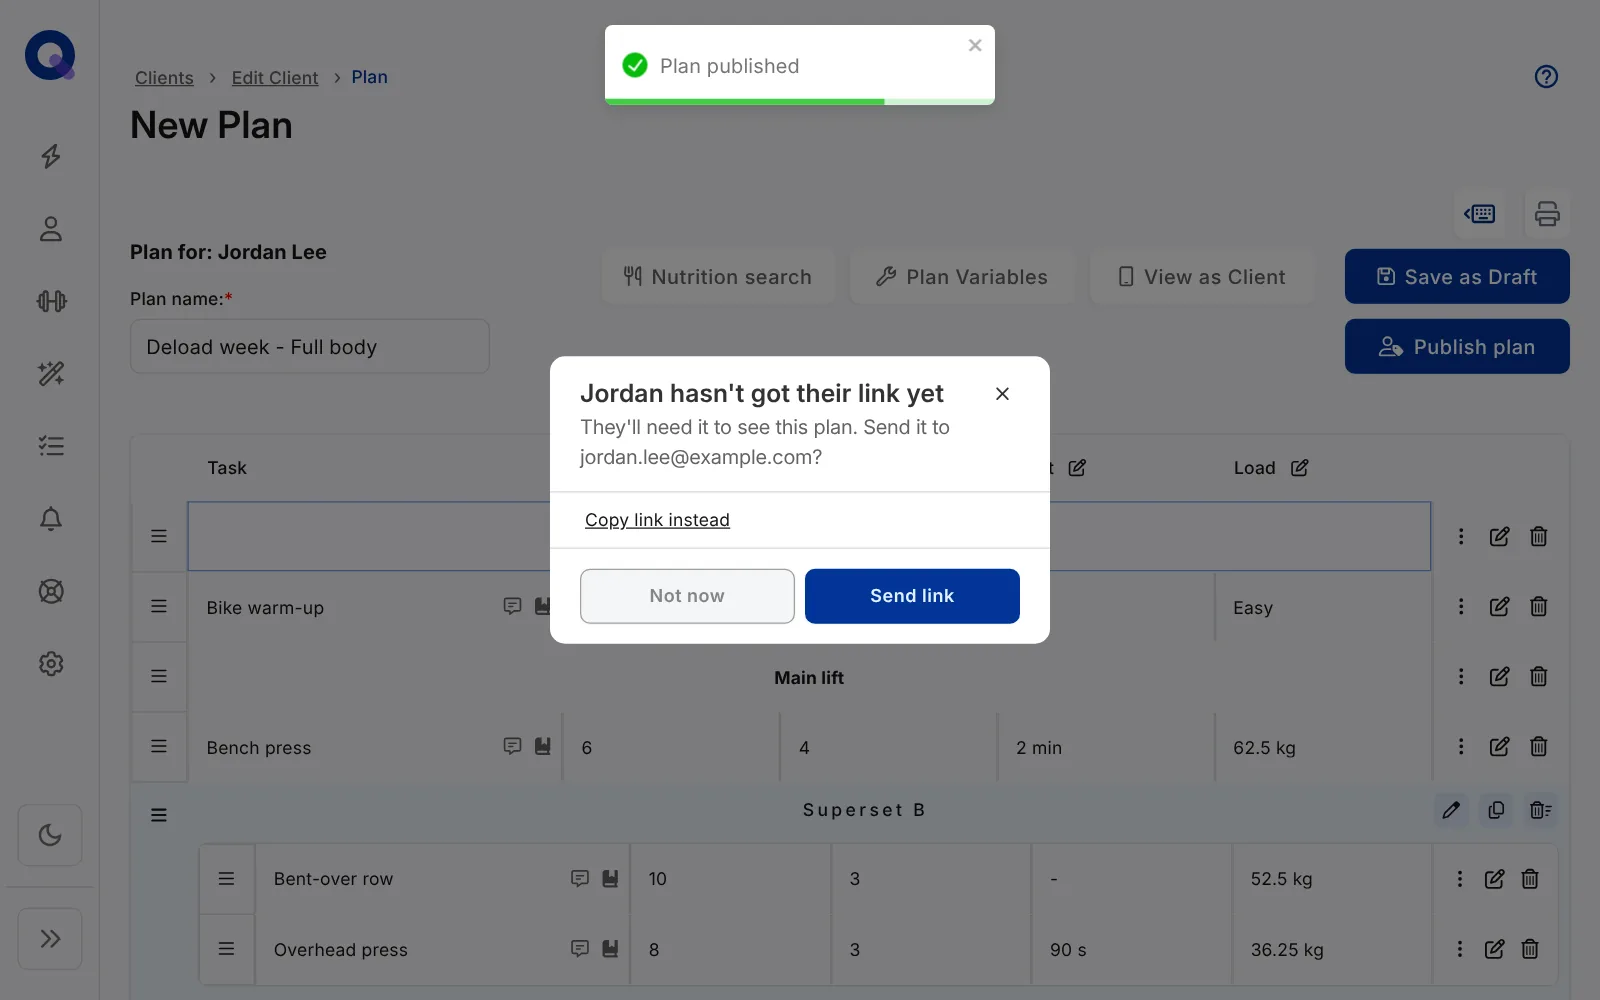
When you're happy, click Publish plan. Publishing delivers it to your client's account, and a draft stays private to you until you do. If your client hasn't had their link yet, QuickCoach asks straight away: Send link emails it to them, Copy link instead lets you send it yourself, and Not now leaves it for later.
6. Send your client their URL
Your client doesn't need to sign up or download anything from an app store. Their account is a private link. If you chose Not now, click Send client their URL on their page. They get an email from you via QuickCoach saying you've sent their plans, with a Get Started button that opens them. If you didn't add an email address, QuickCoach asks for one first.
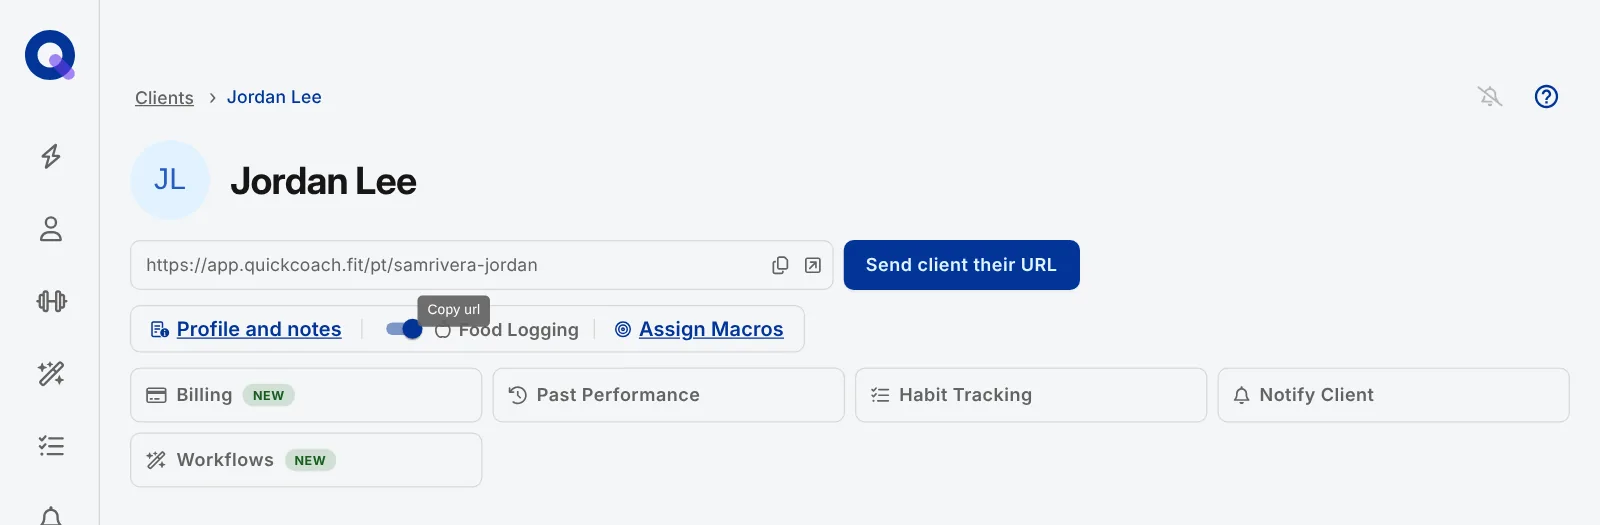
Prefer to send it yourself? Copy url and paste it into a text or WhatsApp message. Either way, point them at installing the client app so it sits on their home screen like any other app.
7. See it through your client's eyes
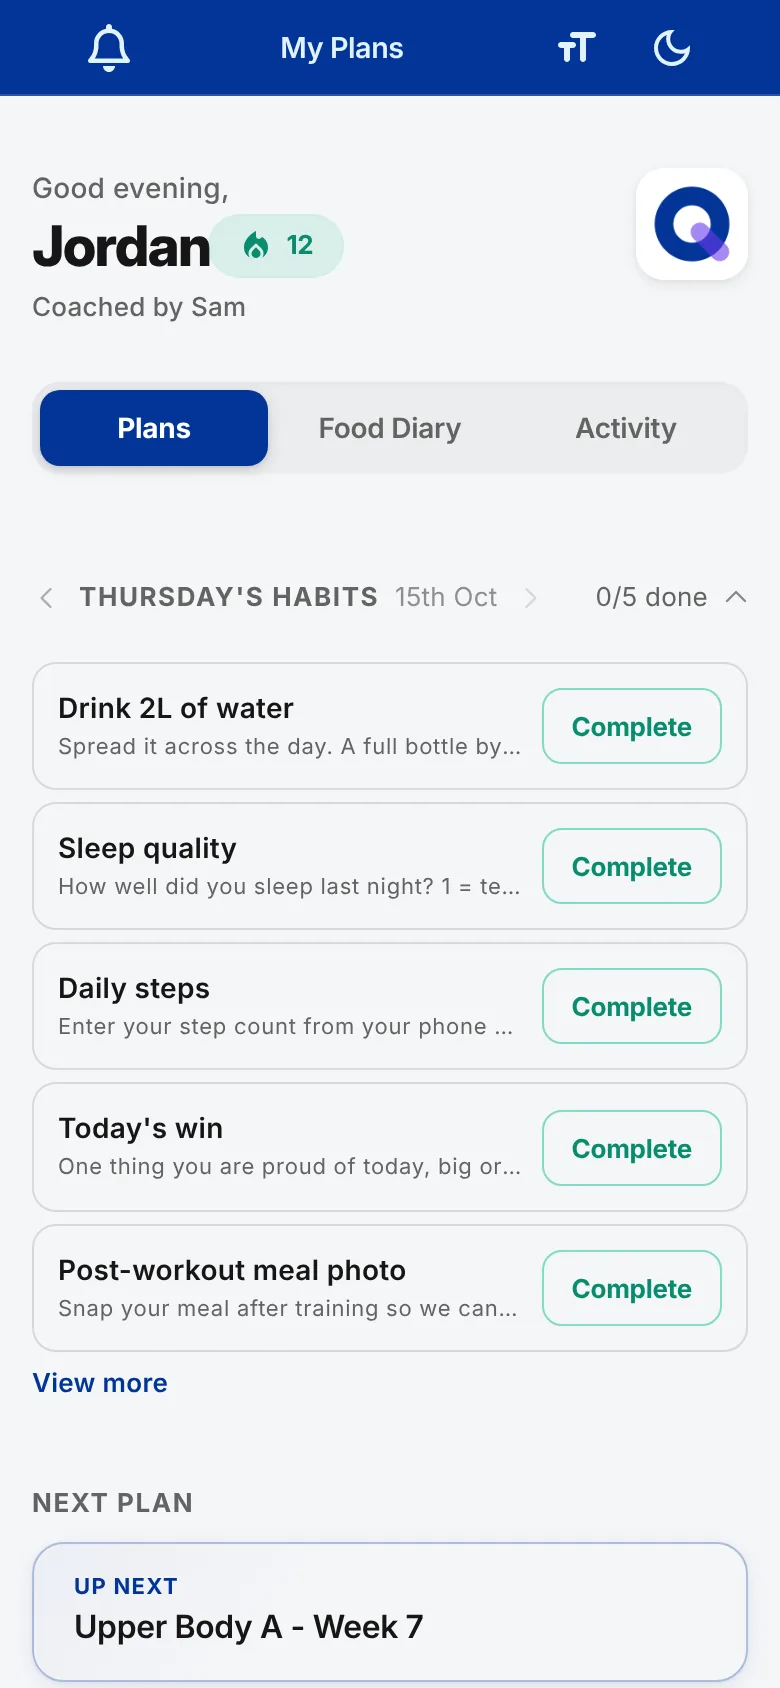
Click the Open Client App icon next to their link to see exactly what they'll see. Their home screen shows the plan you just published as their next plan.
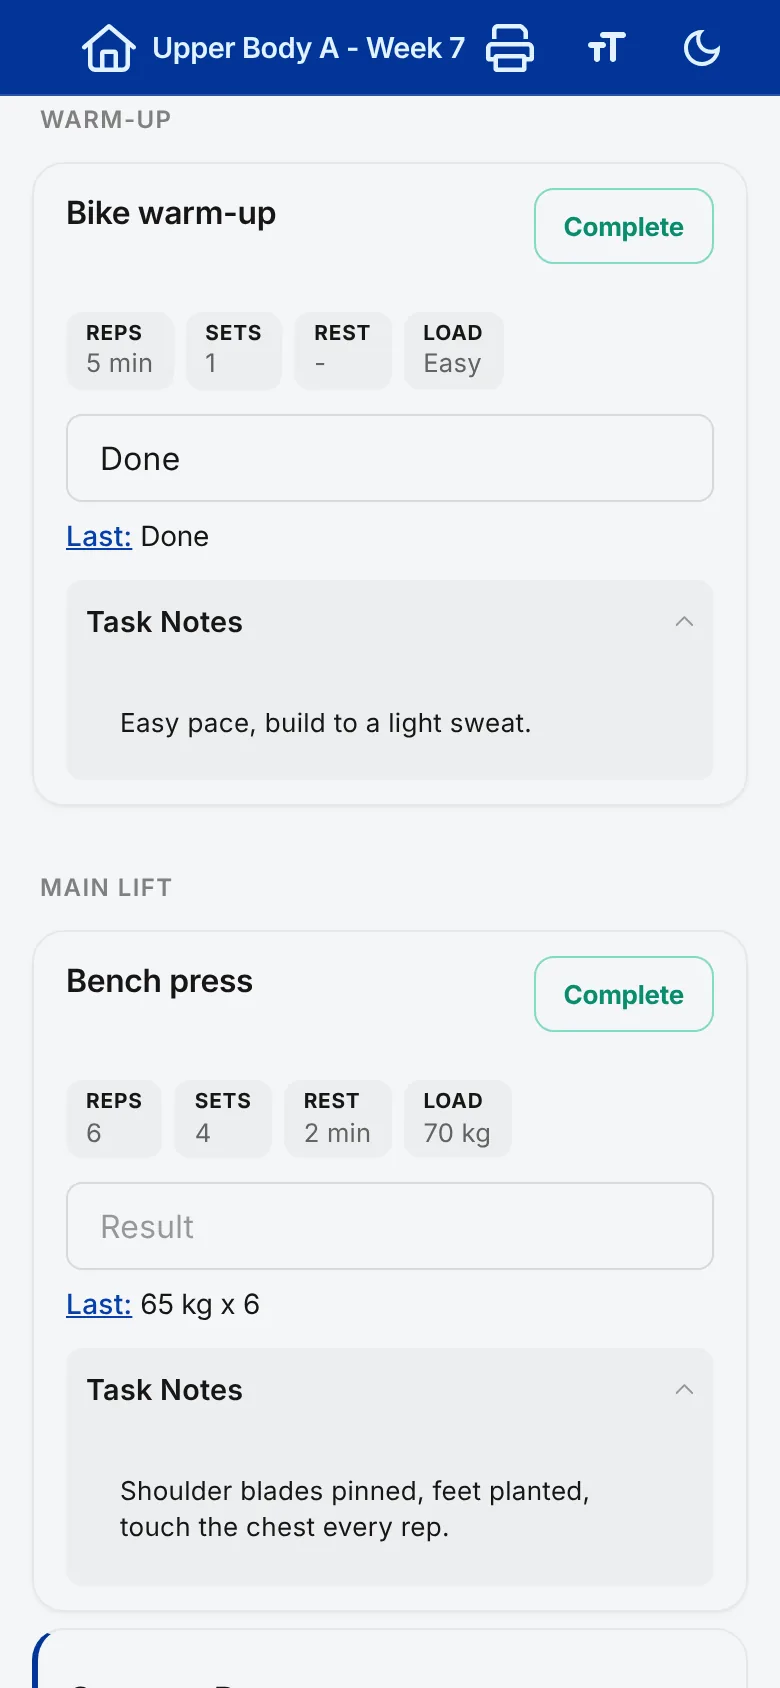
Inside the plan, each task has its sets and reps, any video or notes you added, and a Result box where your client logs what they did. When they finish, they tap Submit plan and can leave you feedback. The plan moves to their Completed tab on your side straight away, and on Pro or the free trial you also get a "Plan completed" notification under the bell in your navigation.
Six things QuickCoach does differently
If you're coming from heavier software, a few things here work differently on purpose:
- No calendar. Clients do the plan at the top of their list next, so nobody has to reschedule a missed day.
- No client usernames or passwords. The private link is the login, which means far less tech support for you.
- Your task library starts empty. Your cues, names and demos are yours. If you'd rather not start from scratch, import exercises from the QuickCoach Library and edit them.
- Apps install from the browser. No app store, which is also what lets Pro give clients a custom-branded app without store fees or delays.
- Progress is a list, not a graph. You can track almost anything, and not all of it is numerical, so results show as a list with the first and latest highlighted.
- No chat. You share information inside plans, and clients share back when they submit. General chat stays in email or text, which keeps the programming focused.
New words, such as tasks, plans, Program Templates and plan statuses, are all in the QuickCoach glossary. On the free plan you can have up to 20 active clients, and deactivating a client frees a slot; active and inactive clients explains the rules.
What to do next
With one client training, the next step is making the work reusable so client number two takes minutes. Build a full program once with the build along tutorial, then learn the quickest ways of assigning plans to clients. When you're ready to put your own brand on your client's app, QuickCoach Free and Pro, explained sets out exactly what Pro adds.