
A guide to your account settings
Every section of your QuickCoach account settings explained, from personal details and billing to notifications, plan builder defaults and your survey.

Your account settings page covers a lot of ground. It's where you update your personal information, manage your subscription, brand your client app, choose your notifications, set your plan builder defaults, and shape your post-plan questionnaire.
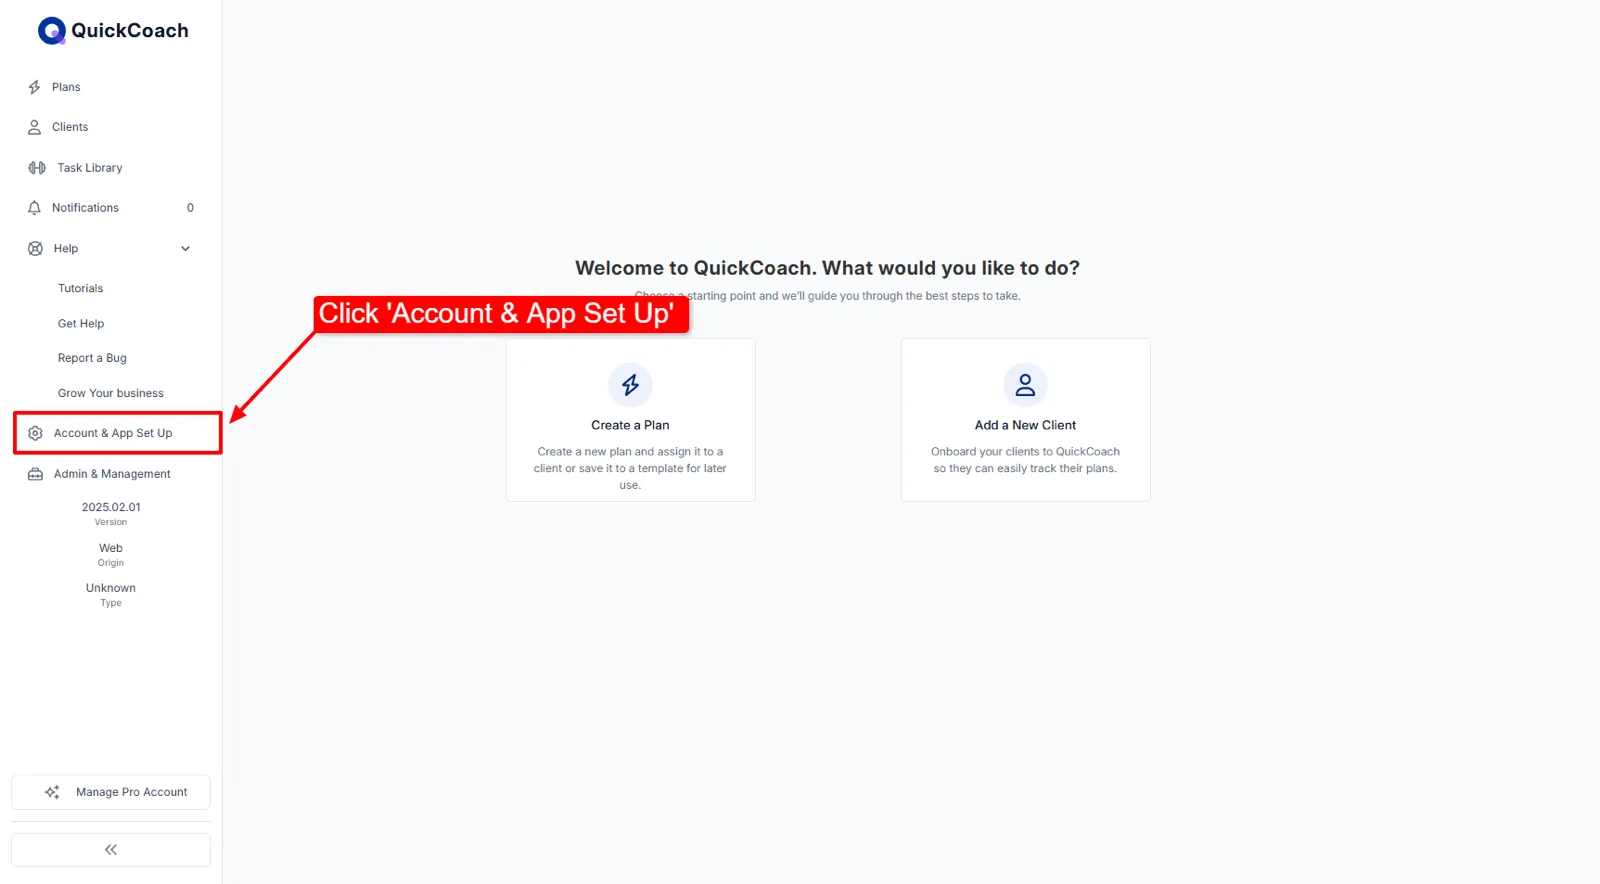
To get there, click 'Account & App Set Up' in the left navigation. The settings menu lists these sections, in this order: 'Personal Details', 'Client Billing', 'My Subscription', 'Customize Client App', 'Push Notifications', 'Plan Builder', 'Post-plan Questionnaire', 'Free with Friends' and 'Log Out'. Below is what each section does, with links to the deeper guides where a section has one.
Personal details
Account settings opens on the 'Personal Details' tab. If you're in another tab, tap 'Personal Details' to get back to it. Here you can add a profile picture, update your first and last name, add a phone number, and change your email address.
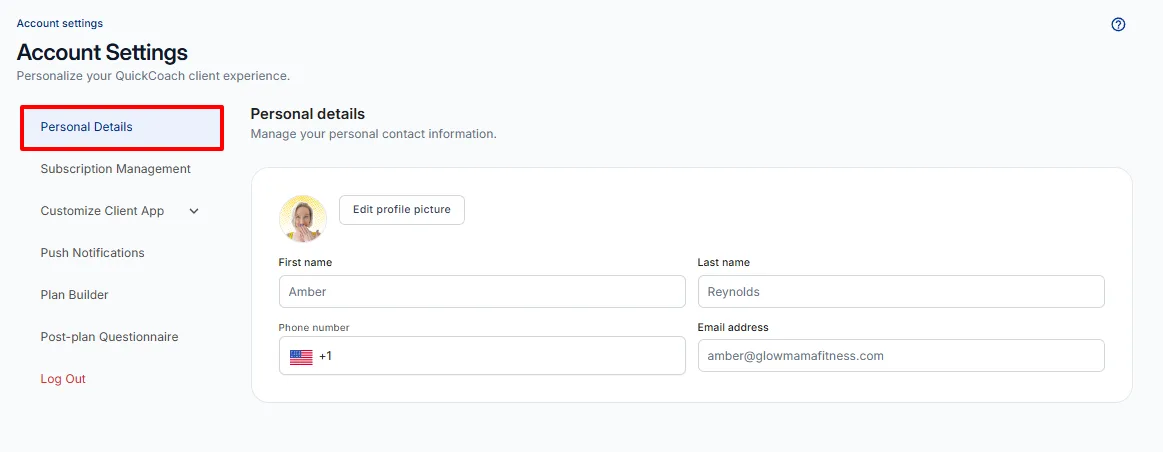
Click 'Upload profile picture' to add a photo (the button reads 'Edit profile picture' once you have one). Click in any of the name or phone boxes to update them; your answers save automatically.
Note: Your photo and phone number aren't used anywhere in the client-facing app. Both are optional.
Change your email address
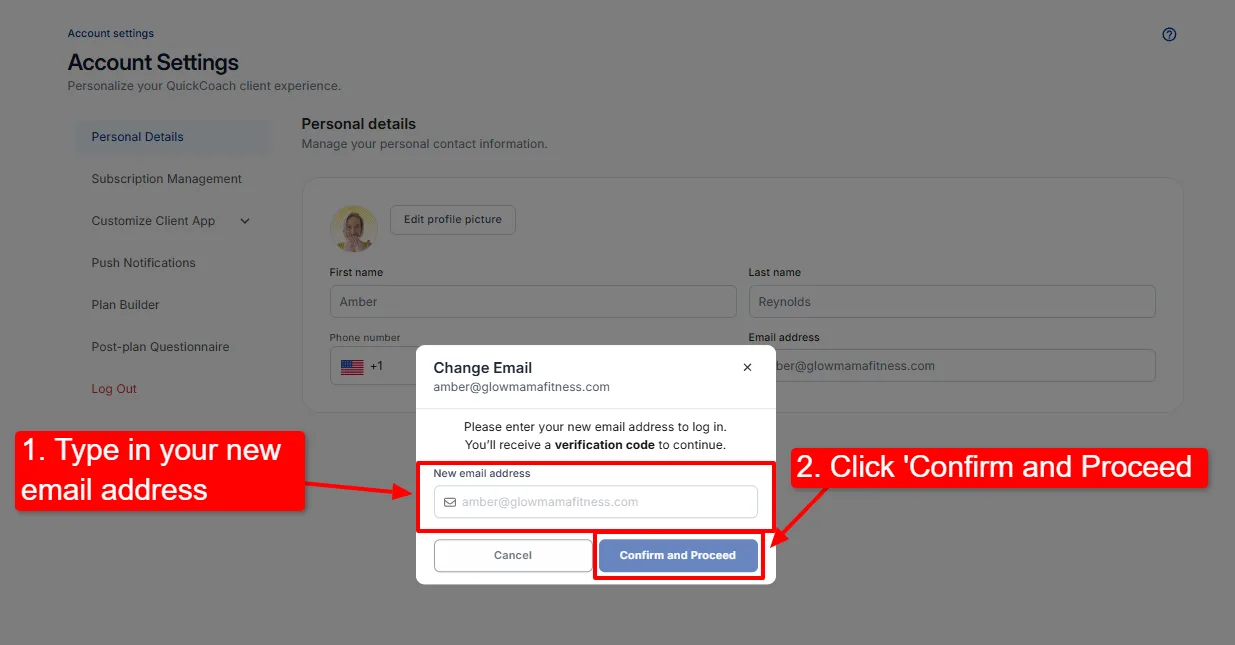
Your email address is the one worth keeping current, since that's where your verification emails go. Click inside the email address box, add your new address, then click 'Confirm and Proceed'. A verification code arrives at the new address; enter it and you're done.
Delete your account
At the bottom of 'Personal Details' there's a 'Delete Account' panel. Deleting is permanent and closes your account straight away, and your clients lose access too. It doesn't cancel an active subscription for you, so cancel that first. How do I delete my account? walks through it.
My Subscription
Click 'My Subscription' to see which plan you're on, compare Free and Pro, and look back through your invoices under 'Billing history'. On Pro, the 'Manage subscription' button opens Stripe's secure portal, where you check your renewal date, cancel, update your payment details and download receipts for accounting and tax purposes. The 'Add-ons' button at the bottom of your plan card opens the page where you add or remove add-ons. QuickCoach does not store any credit card information; card details stay with Stripe.
Charges on your card statement appear under FitFocus IO PTY LTD, the legal entity that has owned QuickCoach since December 2025, so a statement line with that name is your QuickCoach subscription. The full walkthrough is in managing your subscription, and plans and pricing covers what everything costs.
Important: Keep your payment details current, because a failed payment can deactivate your clients' apps.
Client Billing
The 'Client Billing' section is where you connect your own Stripe account to charge clients by card, create the packages you charge for, and see who has paid. It's optional and works on Free and Pro, with a platform fee of 10% of each payment on Free or 3.5% on Pro. Start with what Client Billing is and what it costs, then connect Stripe.
Customise your client app
The 'Customize Client App' section controls what your clients see. Upload your logo, choose your app name, and pick your background and theme colours; the same section also sets the colours for the optional client welcome email and for printed plans. Client app branding is part of Pro, so start with the Pro guide if you're on the Free plan.
Each branding surface has its own step-by-step article:
- Set up your custom-branded client app (name, logo, theme and background colours)
- Customise the client welcome email (header, title and button colours)
- Customise plan printouts (the colour around supersets on printed plans)
Note: After you change your app settings, clients should uninstall and reinstall the app so all of the changes come through.
Client activity notifications
Click 'Push Notifications' to decide which client activity you hear about and where. This section is a Pro feature: on the Free plan, clicking it shows an upgrade prompt instead. There are five types of activity you can be notified about: a client completes a plan, skips a plan, completes a survey, sends feedback (text or audio notes), or has fewer than a set number of plans left.
Each activity has two toggles. The 'In-App' toggle governs whether the event lands in your Notification Center; the 'Push' toggle affects only the banner-style push alerts on your device. Your selections save automatically. For the panel itself, the plans-left threshold and day-to-day use, see your Notification Center guide.
Plan builder defaults
Click 'Plan Builder' to choose what happens by default when you create a new plan: the names of your variables (reps, sets, rest and so on) and the number of rows. What you type in the boxes saves automatically.
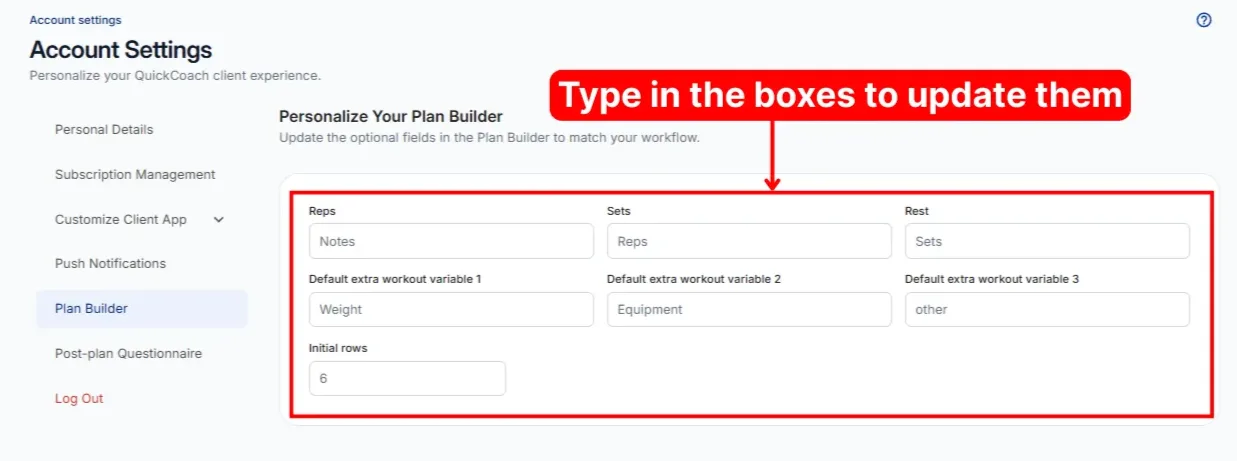
Here's what those settings affect in your plan builder:
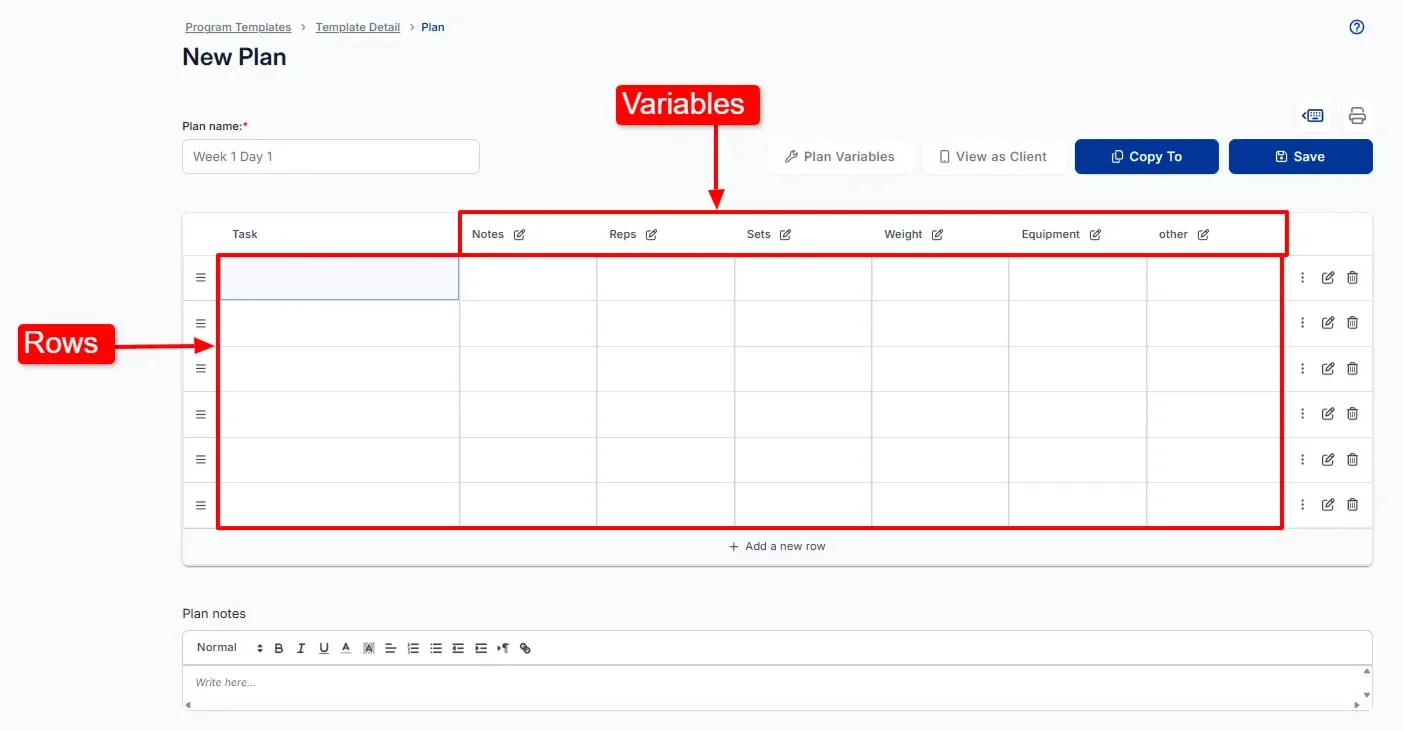
To make sure your variables show up in the order you want, enter them from left to right. For how variables behave once you're building, see the plan builder tour.
Post-plan questionnaire
At the end of every plan a client submits, they see your post-plan questionnaire. Click 'Post-plan Questionnaire' to choose how clients answer: emojis or a number scale. The specific emojis and numbers aren't changeable, but the choice between the two styles is yours.
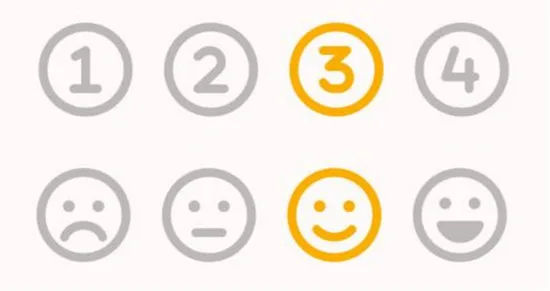
Workout Completion Text (Pro)
The same section has a 'Workout Completion Text' card. It sets the message every client sees on the confirmation screen right after they submit a workout. Type up to 60 characters; leave it empty to use the default, "Workout completed". On the Free plan the card is locked and clients see the default. See customising the workout completion message for more.
Writing your questions, choosing which ones show, saving your edits and turning the questionnaire off entirely are all covered in setting up your post-plan survey.
Your referral code lives under Free with Friends in the same menu. Free with Friends referrals explains how the credit works.