
Check-ins, forms and measurements
Run weekly client check-ins, track measurements in History, tune the post-plan survey and send one-click check-ins with Workflows. No form tool needed.

QuickCoach has no separate form builder, and it doesn't need one. A check-in is a plan whose tasks are questions, so you build it, send it and read the answers with tools you already use for workouts. This guide covers the four ways to hear back from clients, from a quick weekly check-in to measurements you can track over months.
Which kind of check-in do you need?
| You want to know | Use | Plan |
|---|---|---|
| How each session went | The post-plan survey, which runs after every plan | Free and Pro |
| How the week went, plus weight, sleep or energy | A check-in plan you build once and reuse | Free and Pro |
| A quick check-in, sent and announced in one click | The Client Check-in workflow | Coach Workflows add-on |
| A daily behaviour, such as steps or a meal photo | Habit tracking | Pro for anything beyond a tick |
Build a weekly check-in plan
Each question is a task, written exactly like an exercise. Build it once in your Plan Drafts or a Program Template and you can send it to any client, any week.
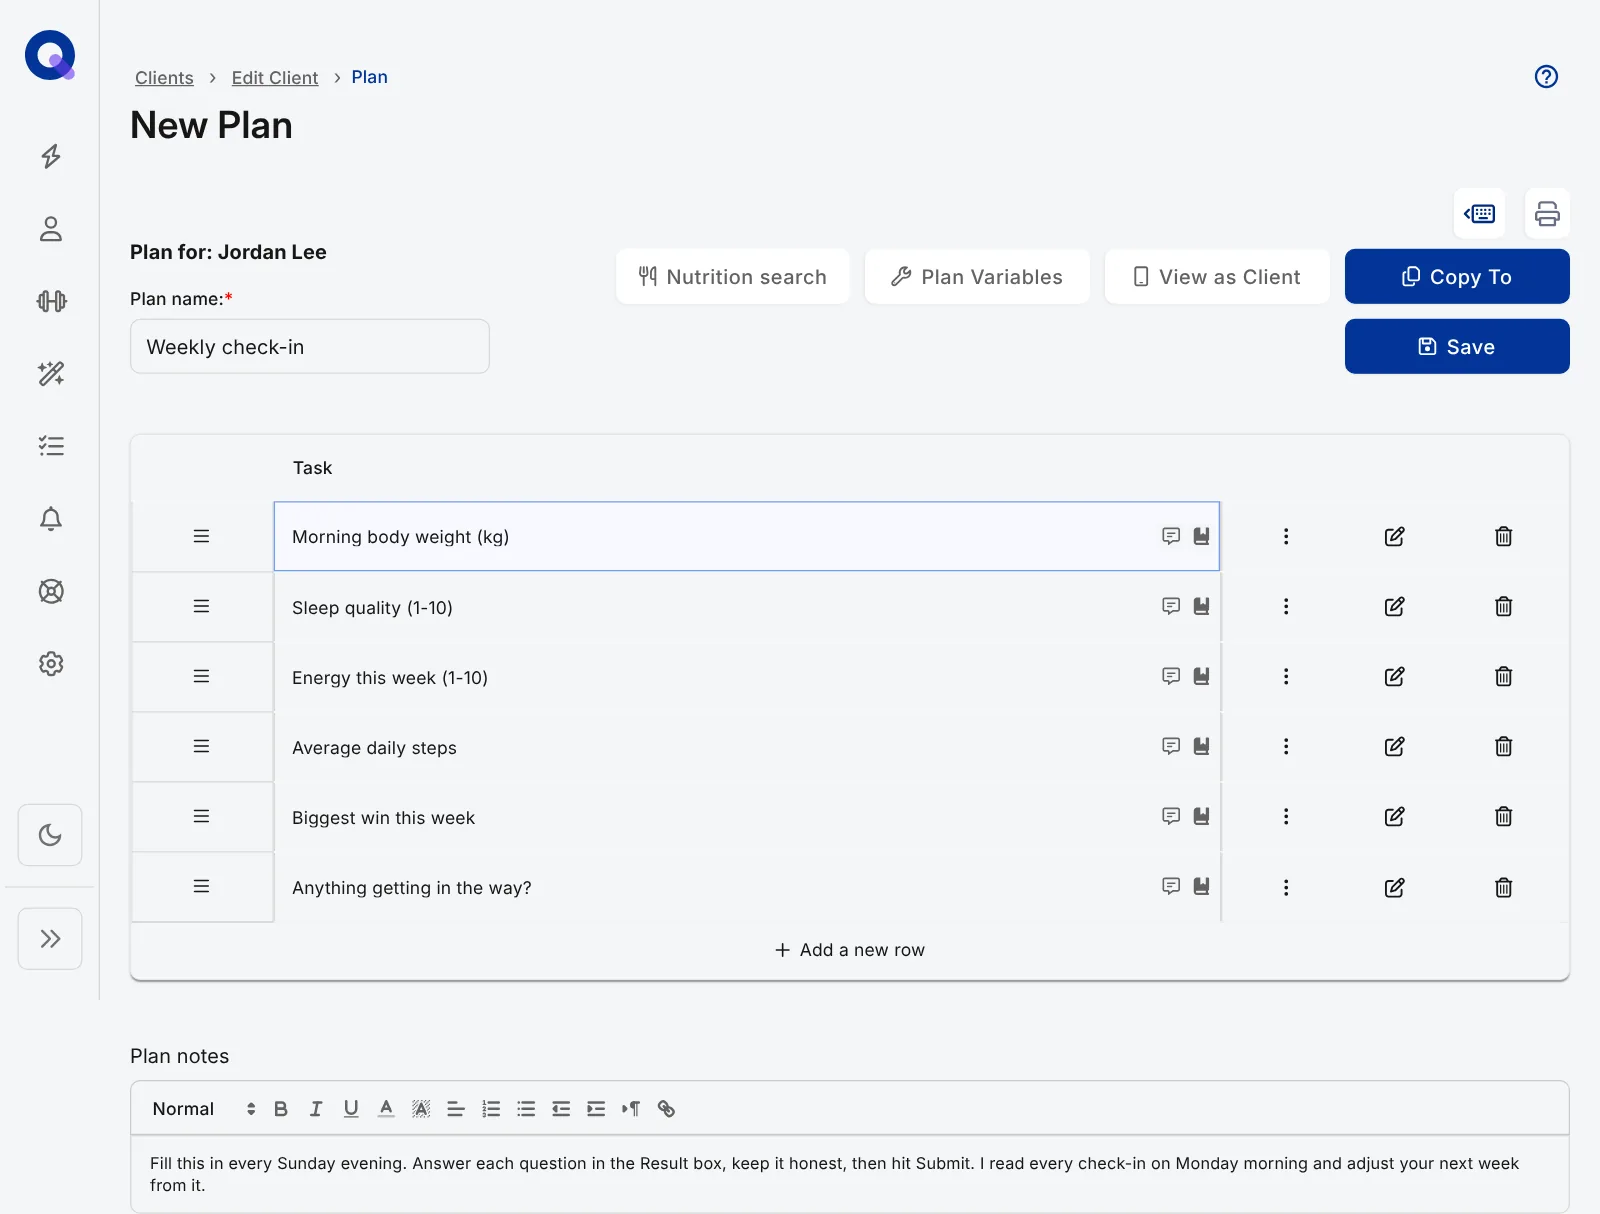
- Create a new plan called something like "Weekly check-in".
- Add each question as a task: "Morning body weight (kg)", "Sleep quality (1-10)", "Biggest win this week".
- Add questions you want to track over time, like body weight, to your task library. That's what puts their answers in the client's History.
- Click Plan Variables and switch off the columns you don't need. If you want instructions next to each question, rename a spare column to something like "How to answer" and fill it in per question, for example "a number, no units".
- Put the why in the plan notes: what you'll do with the answers and when you'll reply.
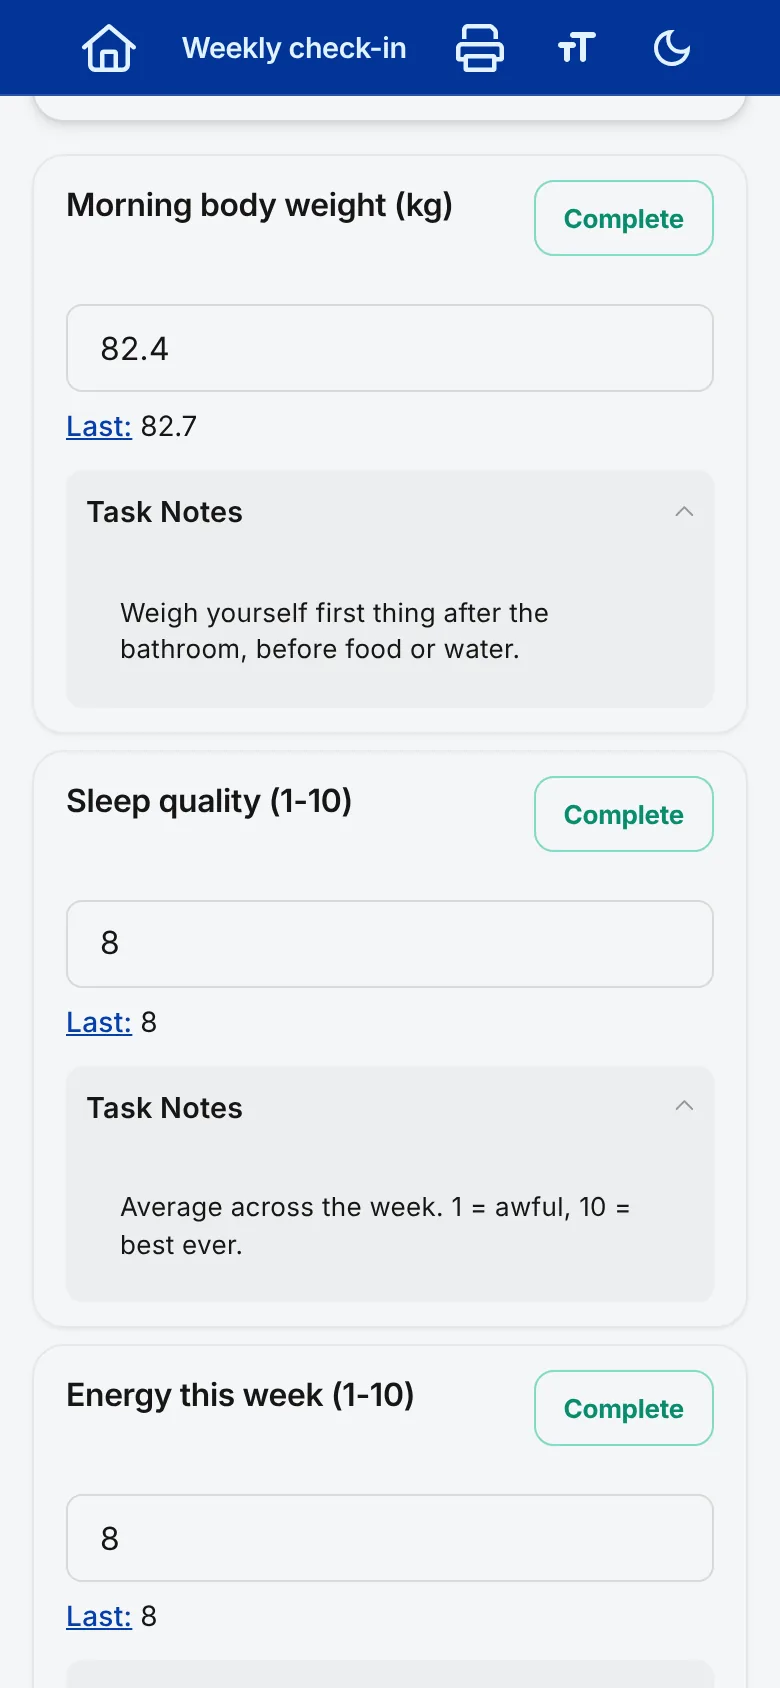
Clients answer in the Result box under each question. Each box takes up to 50 characters, so the best questions have short answers: a number, a score out of 10, yes or no, or a few words. If you need a long written answer, link to a separate form in the plan notes instead.
Tip: Not sure what to ask? The free check-in question template has five weekly questions and a monthly deep dive, with a note on why each one earns its place.
To send it, assign the plan like any other. Assigning plans to clients covers sending one plan to several clients or a whole group, and copying plans covers reusing next week's.
Track measurements over time
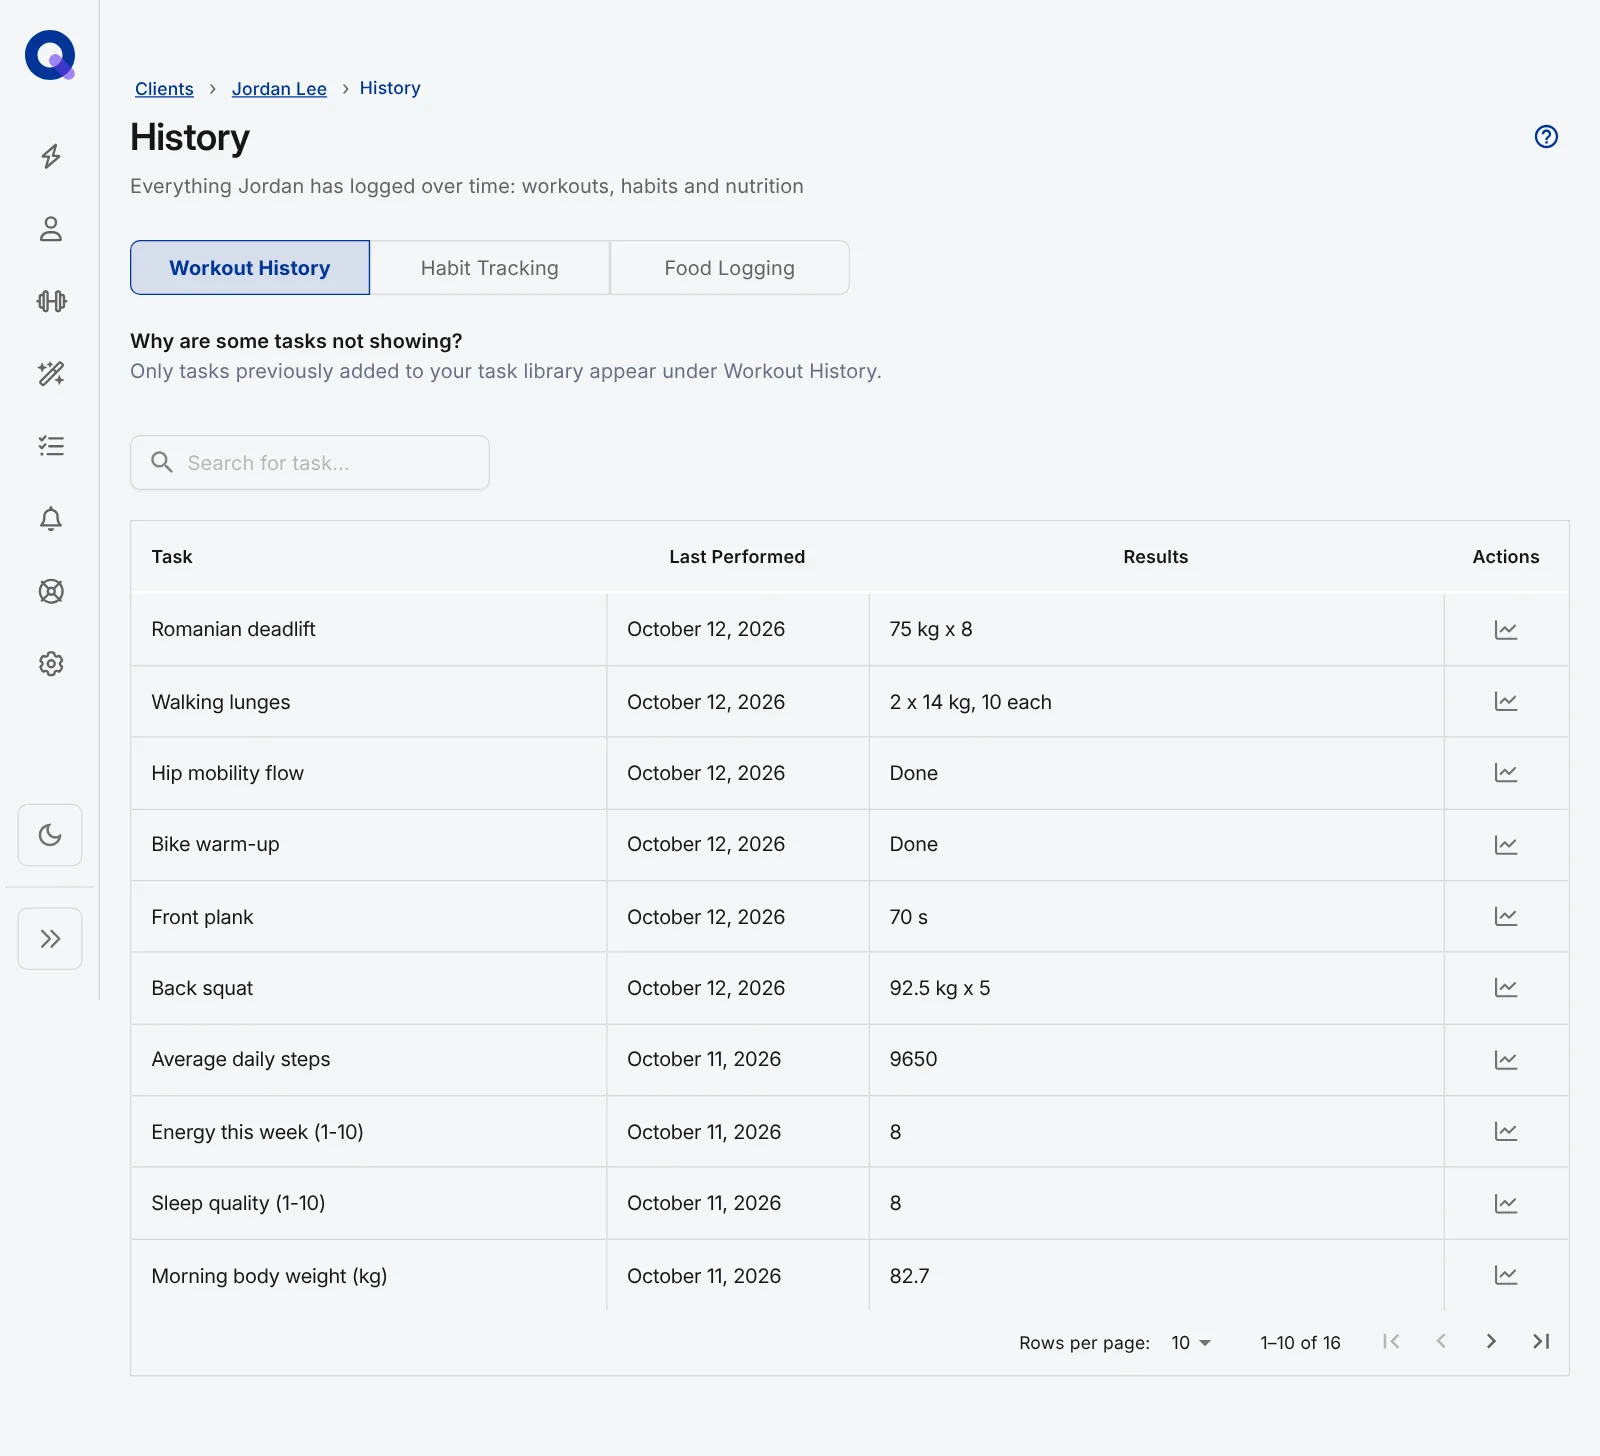
Because library tasks keep their history, a measurement asked every week turns into a running record. On the client's page, click the Past Performance tile. It opens their History page on the Workout History tab, where every library task they've answered is listed with when they last did it and their latest result.
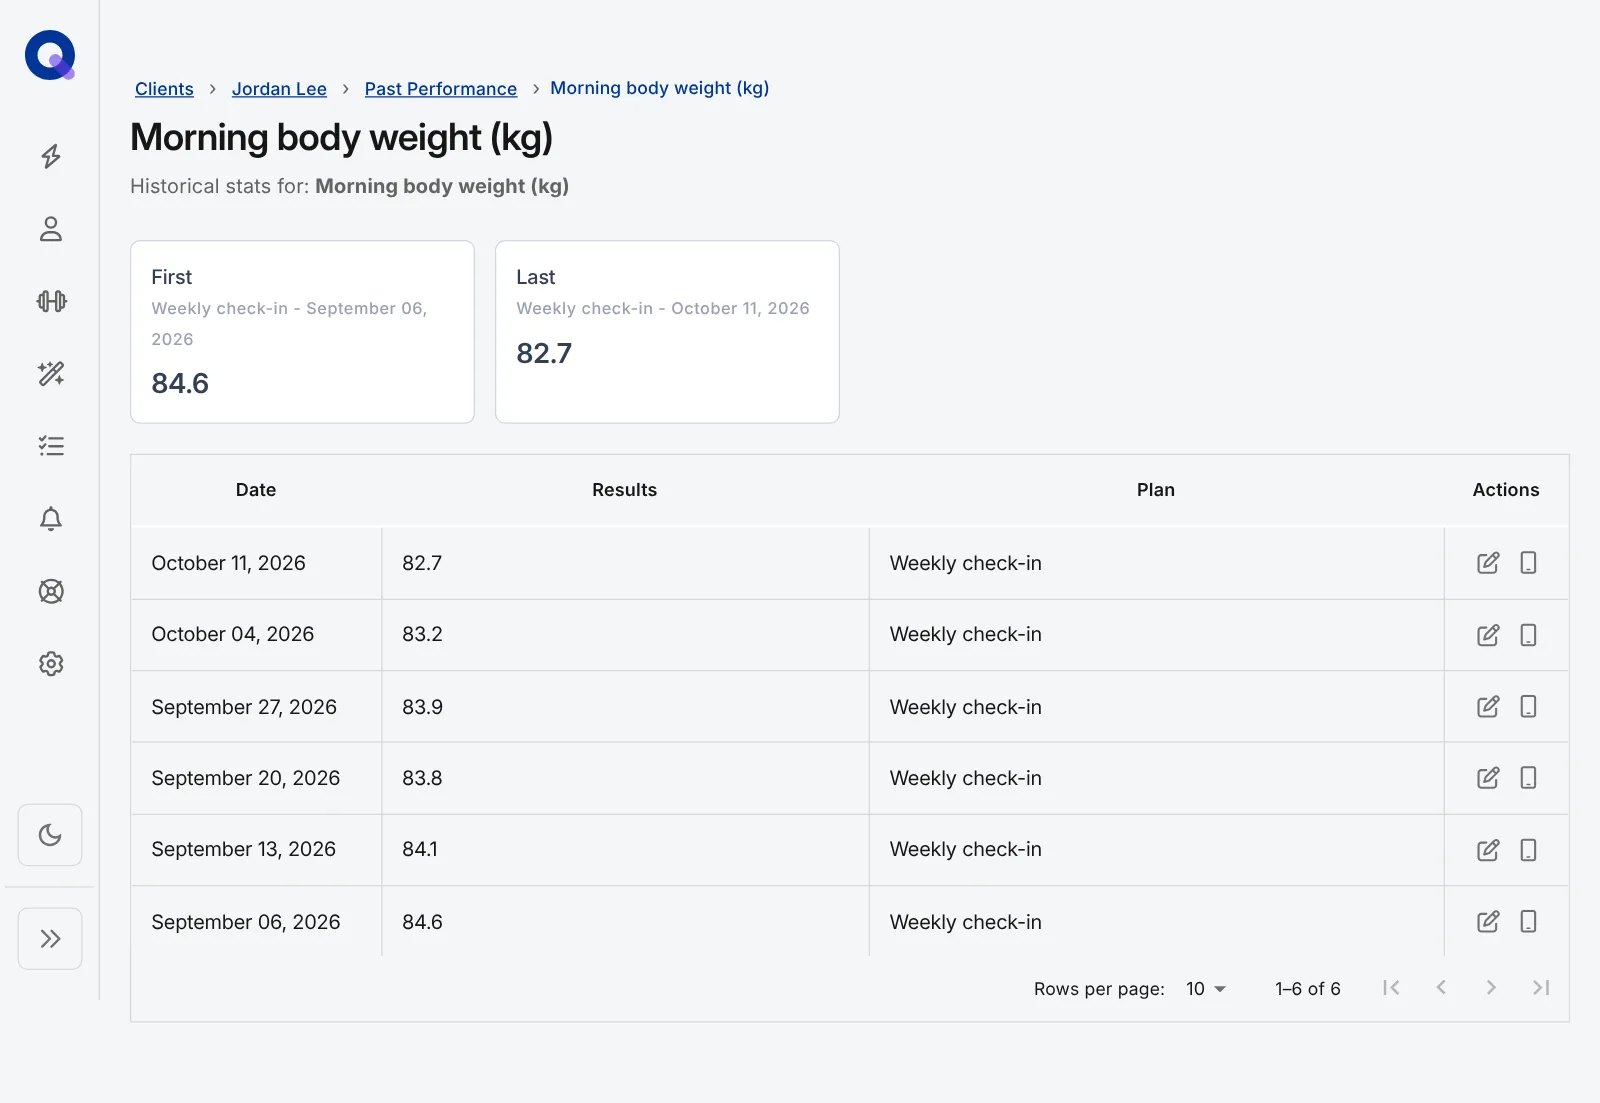
Click the chart icon in a task's Actions column to see every answer by date, with the first and last readings side by side. This is where "I don't think I'm making progress" meets six weeks of body weight readings.
Give each measurement its own task (waist, hips, body weight) so each history stays clean. Seeing a client's History and results covers the rest of that screen.
The post-plan survey
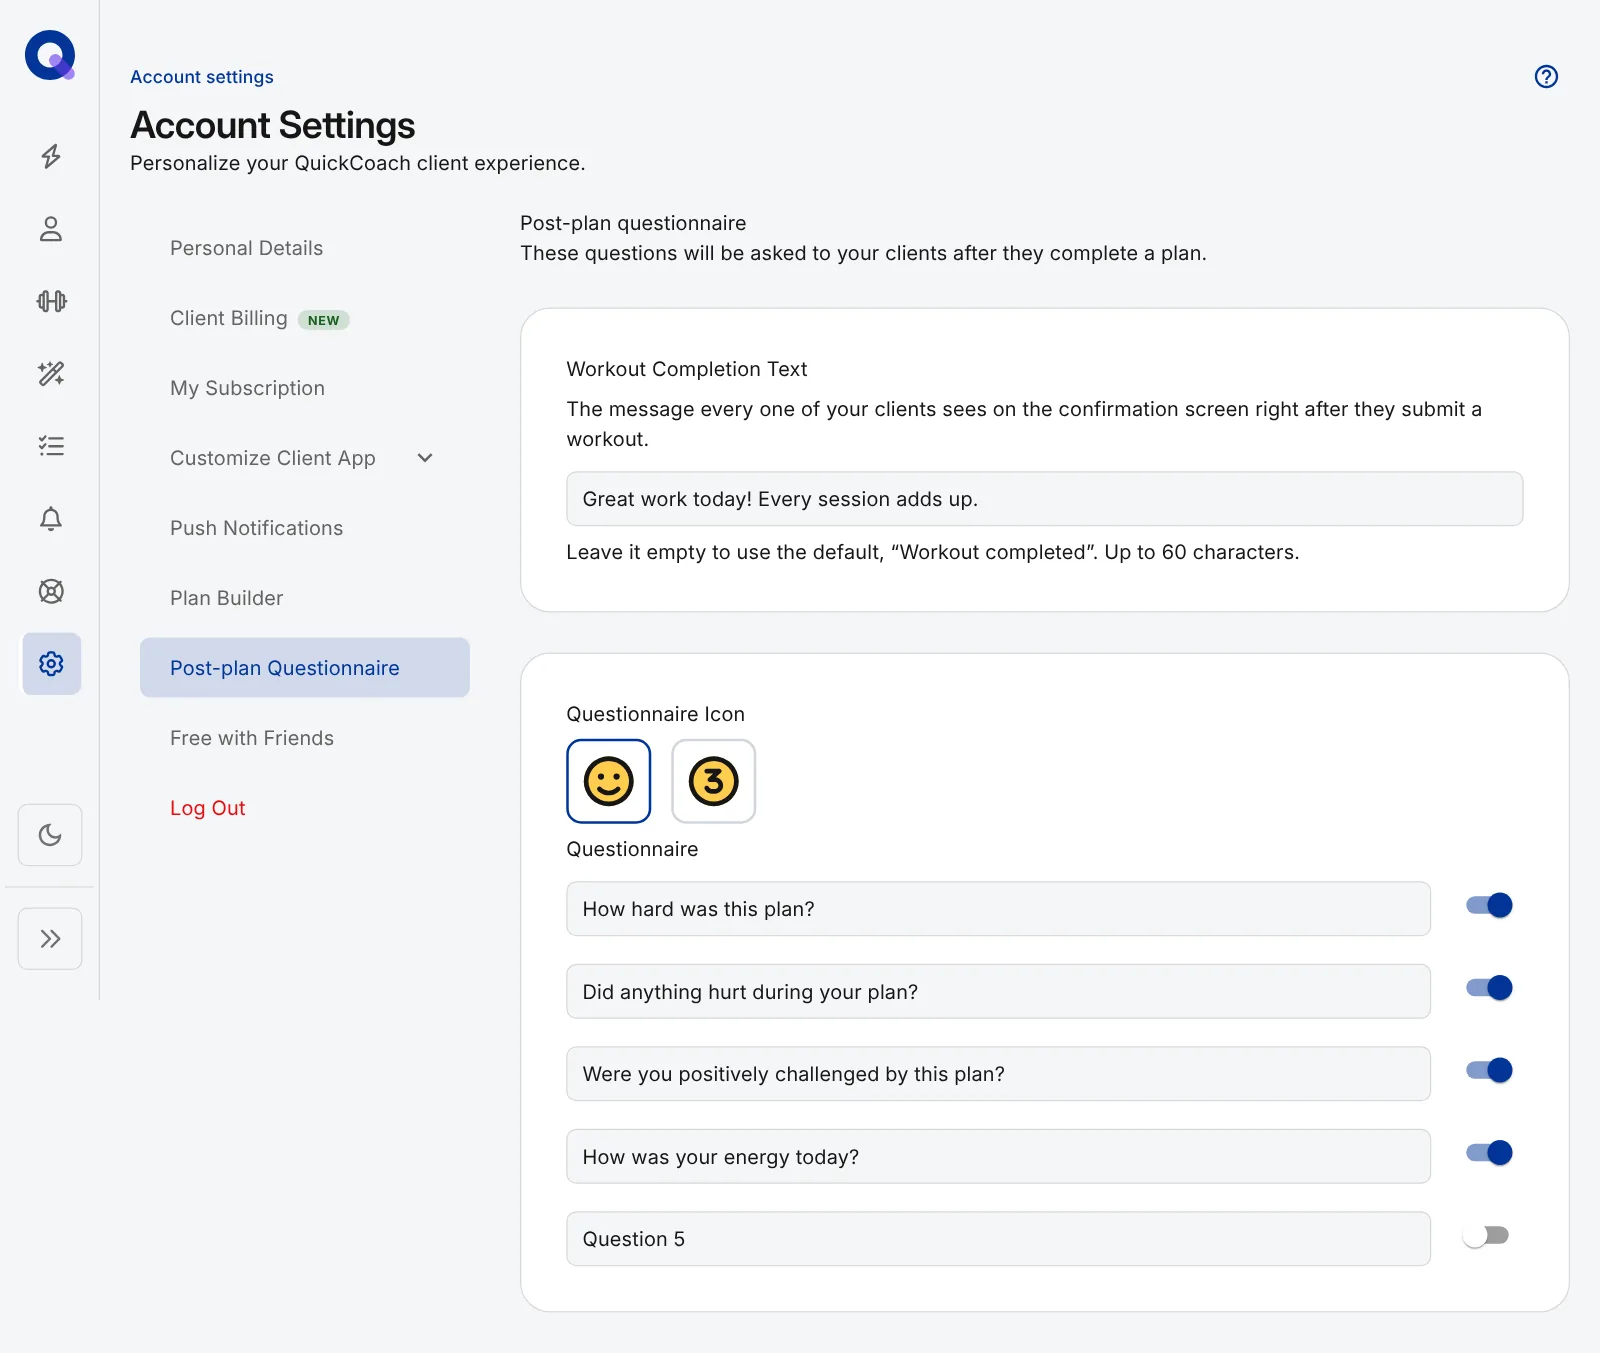
Every time a client finishes a plan, they can rate it and leave you a comment. The survey comes with three questions ready to go: "How hard was this plan?", "Were you positively challenged by this plan?" and "Did anything hurt during your plan?". You can reword those and add up to two of your own.
Change them under Account & App Set Up, in Post-plan Questionnaire. The same screen sets whether clients rate with smiley faces or numbers and, on Pro, the message they see when they finish a workout.
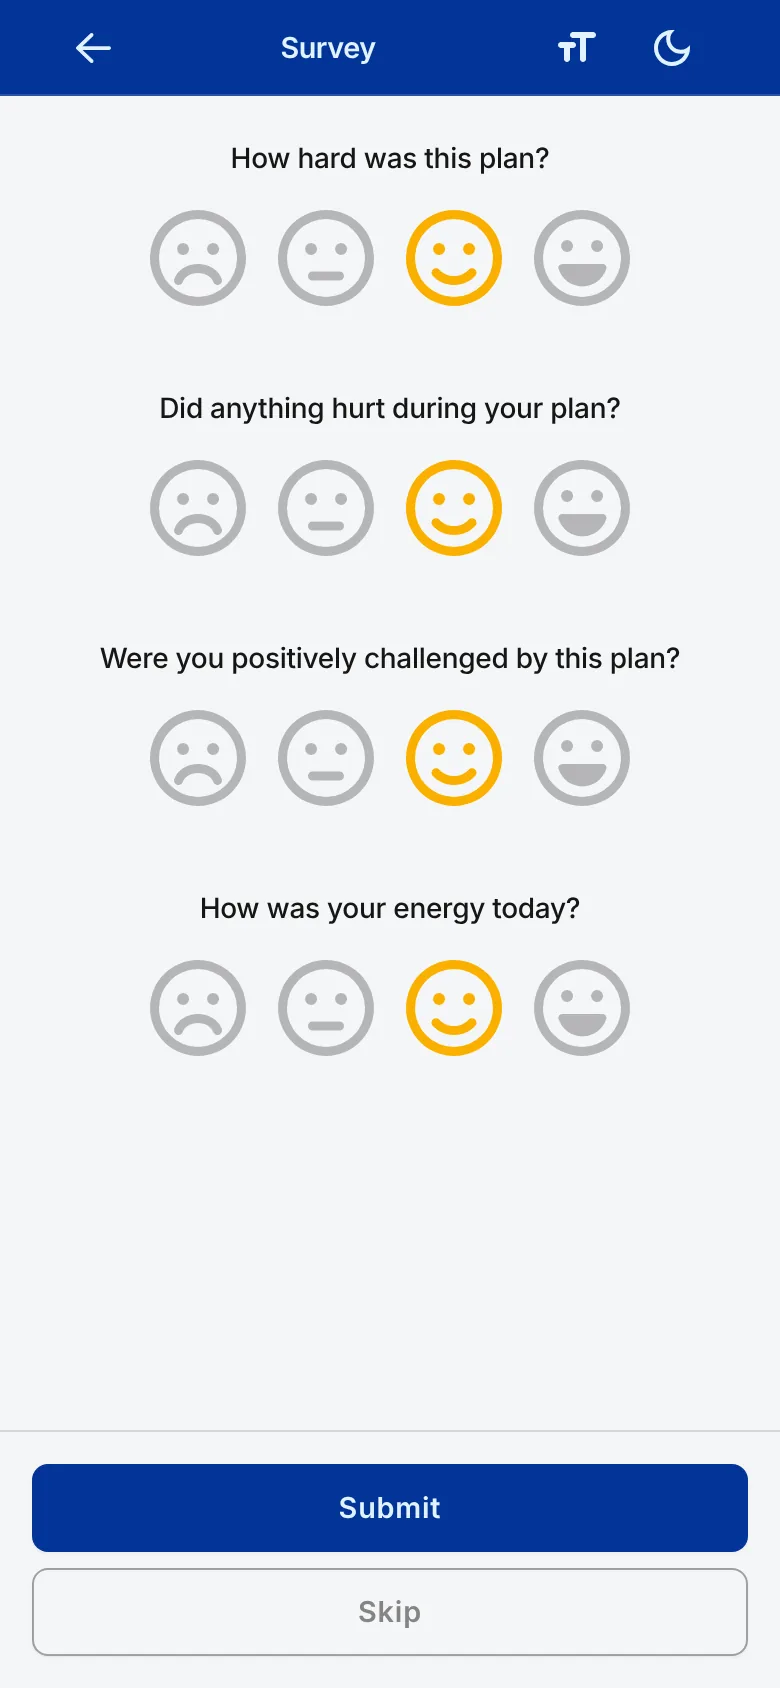
Answers appear on the client's page under Survey Feedback, next to the written comments under Client Comments. Each entry has a View Plan link back to the plan it came from.
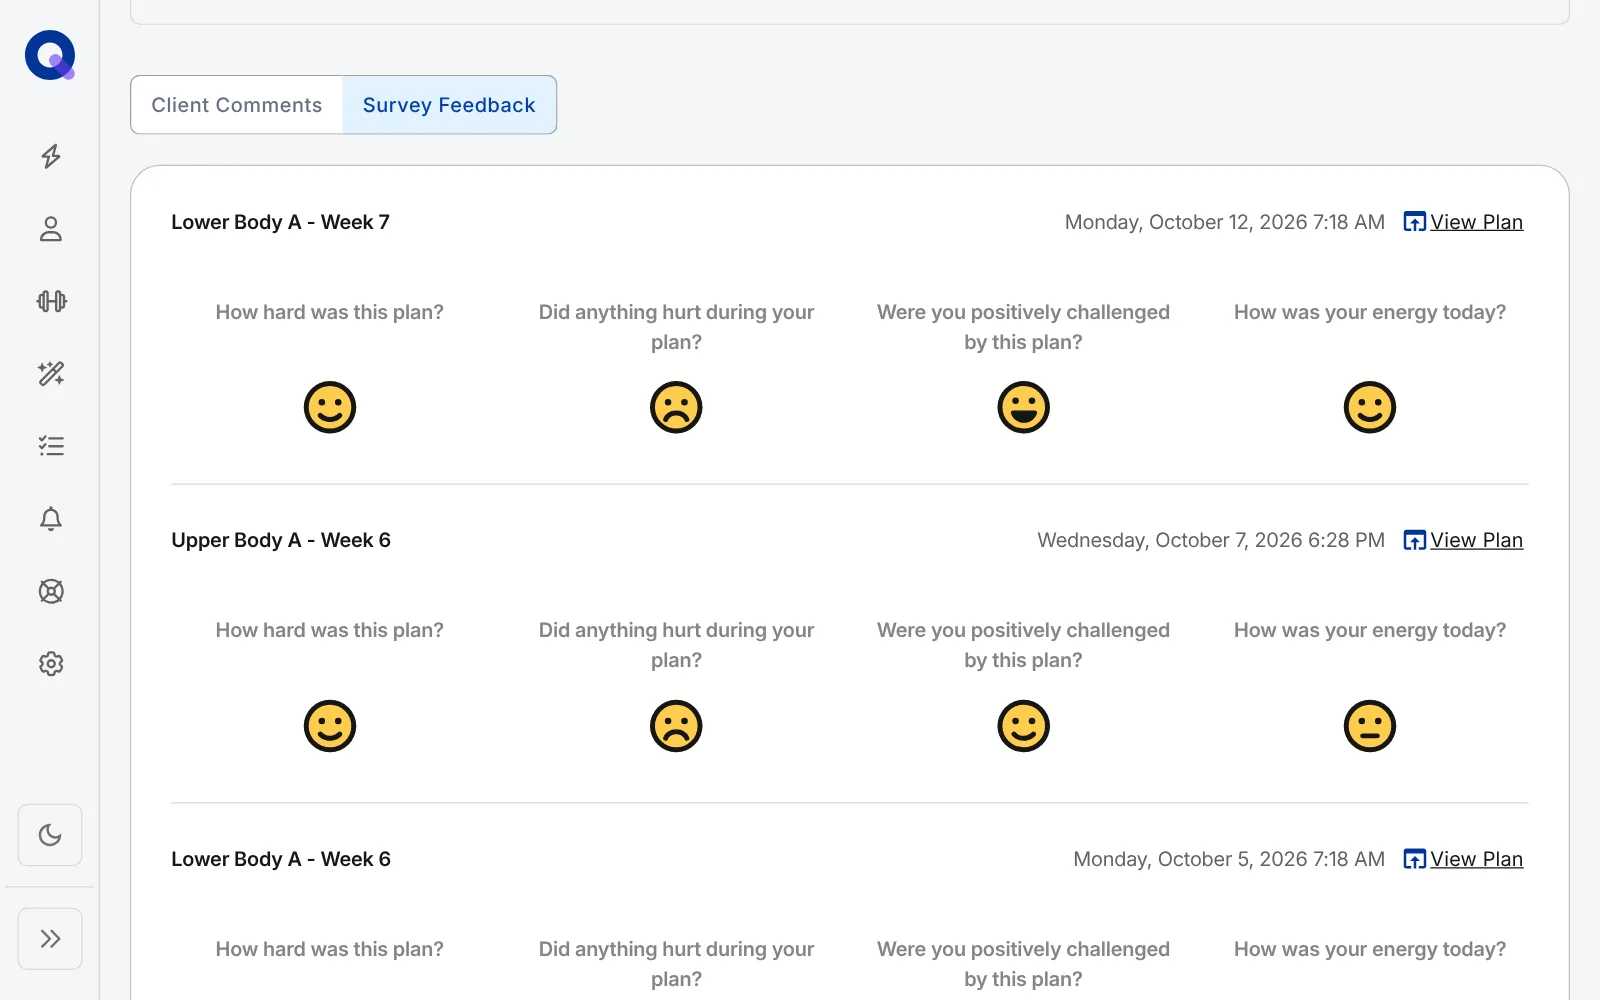
There's no inbox to reply from. Where to see your client's feedback, and how to reply covers the ways coaches answer, usually inside the next plan.
Send a check-in in one click with Workflows
With the Coach Workflows add-on, Client Check-in does the whole job in one go. Open Workflows from the side menu and click Run for a client on the Client Check-in card, or use the Workflows tile on a client's page. Pick the client if needed, type your questions under Your check-in questions, one per line, and click Send check-in. QuickCoach then creates a dated check-in plan at the top of their plan list, emails them with their link, and sends a push notification. They answer right on the plan.
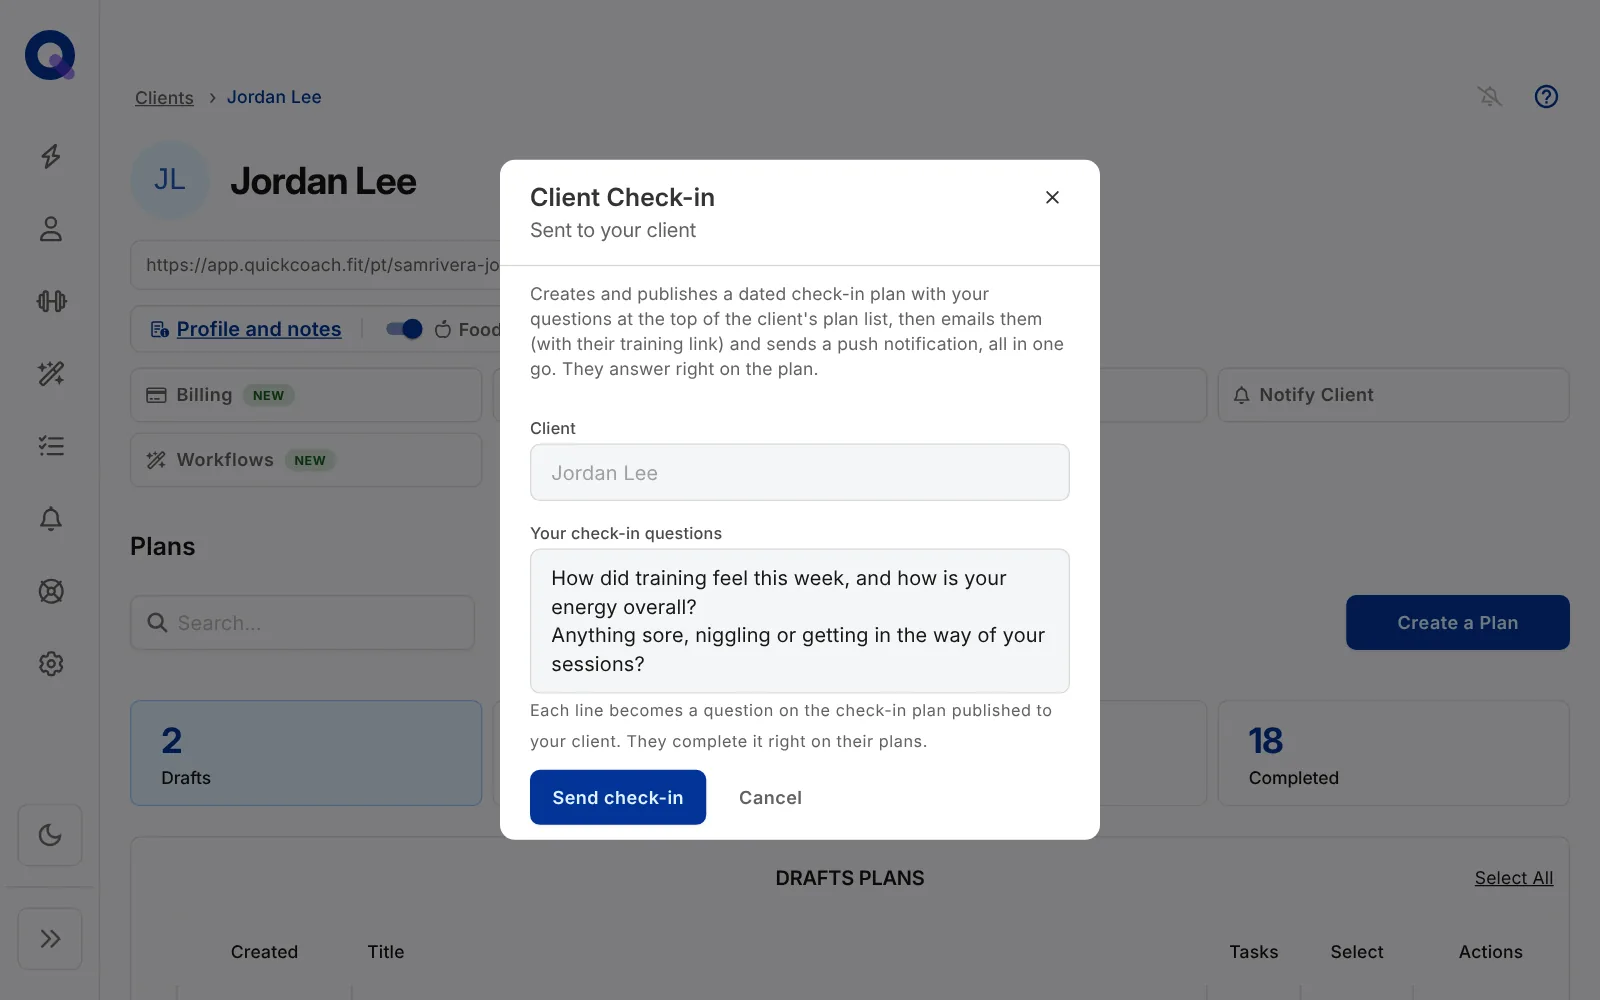
Use it for quick, one-off questions. For anything you'll track over time, a reusable check-in plan with library tasks is still the better tool.
Intake forms and assessments
An intake form or movement screen is built exactly like a check-in plan: one task per question or test, with clear instructions on how to answer. Keep it in a Program Template and send it to every new client in their first week. Long forms are easier to fill in when headings split them into sections, and clients can collapse each section once it's done.
Prefer video? There are walkthroughs for building check-ins (3:36), assessments (3:34) and tracking measurements (5:00).