
Inviting your first client
Add a client, send the invite and see what the experience looks like from their side.

Clients join QuickCoach by invitation from you. There's no public sign-up for clients, so your roster stays yours. Clients don't get a username or password either. Each client has a unique account link, and sharing that link is how you let them in.
Adding a client, step by step
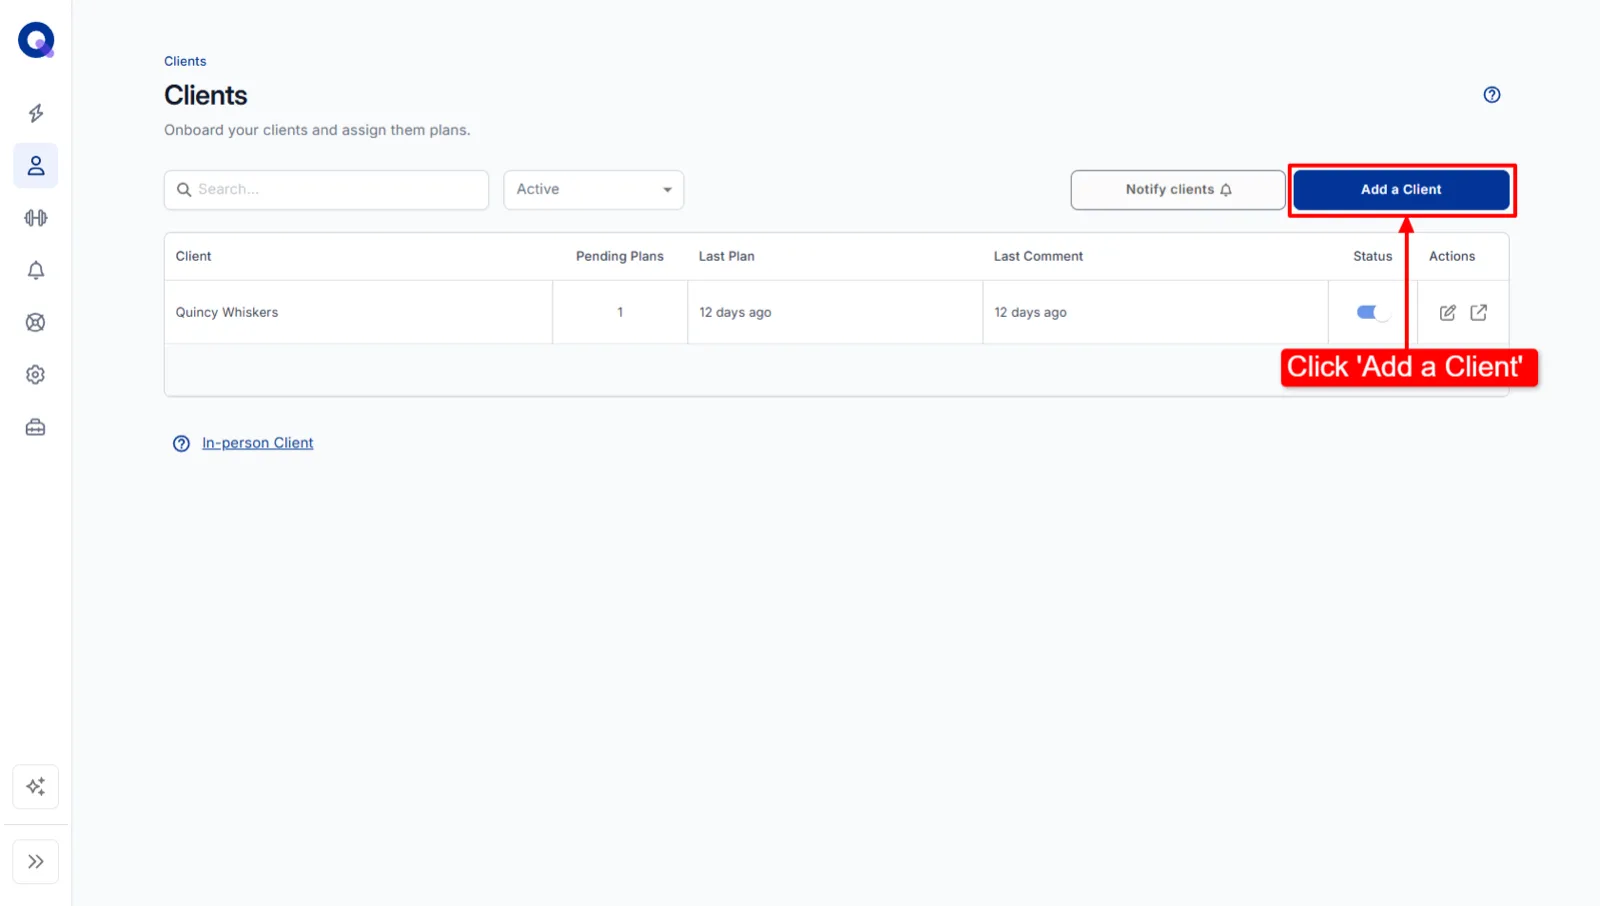
You can start from two places, and both land on the same form: the "Add a new client" card on your home screen, or the Clients area in the left navigation. From the Clients list, click 'Add a Client'.
Fill in the client's personal details. First name is the only required field. Last name, phone number and email address are all optional, though you'll need the email address to send the welcome email, and you can add that later.
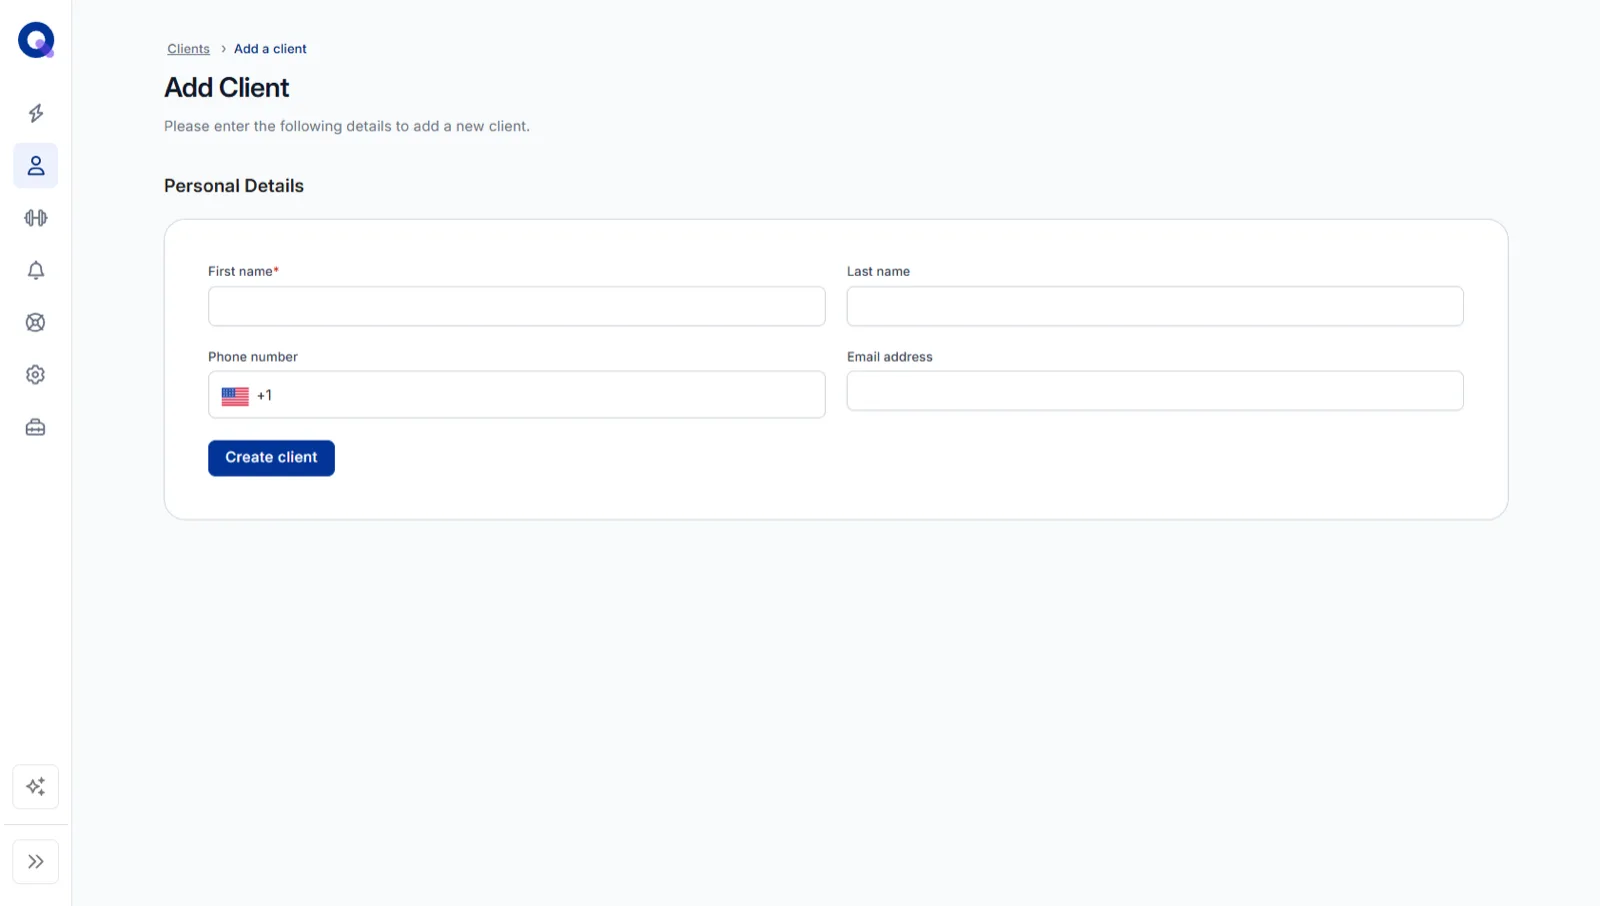
Click 'Create client' and you'll be taken straight to their account, ready for you to build and assign their first plan.
Giving your client access
When you're ready, send the client their unique account link. You can have QuickCoach email it as a welcome email, or copy the link and send it yourself in a text or message. The full walkthrough is in sending clients their account.
Once they open the link, they can train from the QuickCoach client app on their phone or in a browser. They see the plans you've delivered, tick off workouts and tasks, log results and send feedback after sessions. Point them at installing the client app so it sits on their home screen like any other app.
On the Free plan you can have up to 20 active clients. Inactive clients don't count toward the limit, so deactivating a client opens a slot while you're under the cap; reach 20 active and QuickCoach locks the workspace until you upgrade. Pro removes the cap entirely, and on Pro the app your clients open carries your logo and colours instead of ours. Read more in all you need to know about QuickCoach Pro.